Thursday, November 29, 2007

Esbit Stove

I worked at home today due to having a cold (I figured I'd keep my germs to myself). On my lunch break I went out back with my Esbit stove and made some beef broth in my Olicamp cup.


(Photo from Esbit's website.)

Esbit stoves have been made in Germany since 1936. I bought mine sometime ago from REI. They are simple little units made from stamped steel. Esbit fuel is tablets made from hexamine but you can also burn USGI trioxane bars. When folded, the stove folds up to about 4" x 3" x 1", and weighs a few ounces. The folded stove also acts as a container for carrying fuel tabs.

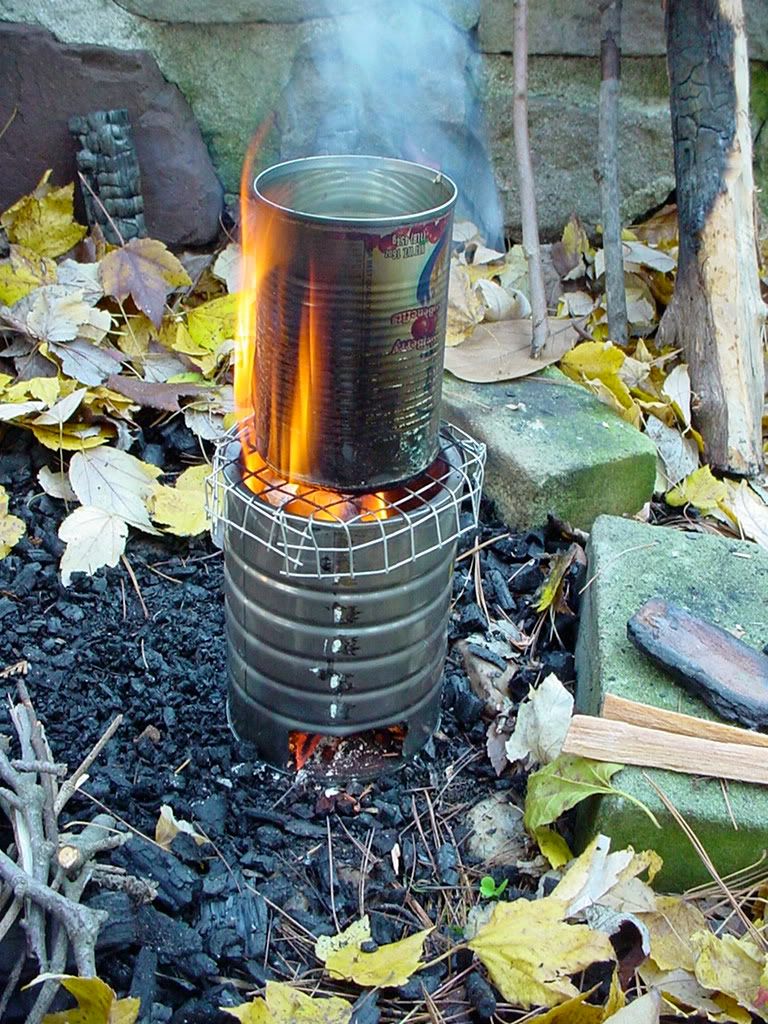
To use the stove, unfold it, place a fuel tablet in the center, and light. You can open the stove partway to accomodate a smaller cup, or all the way to hold a pot.

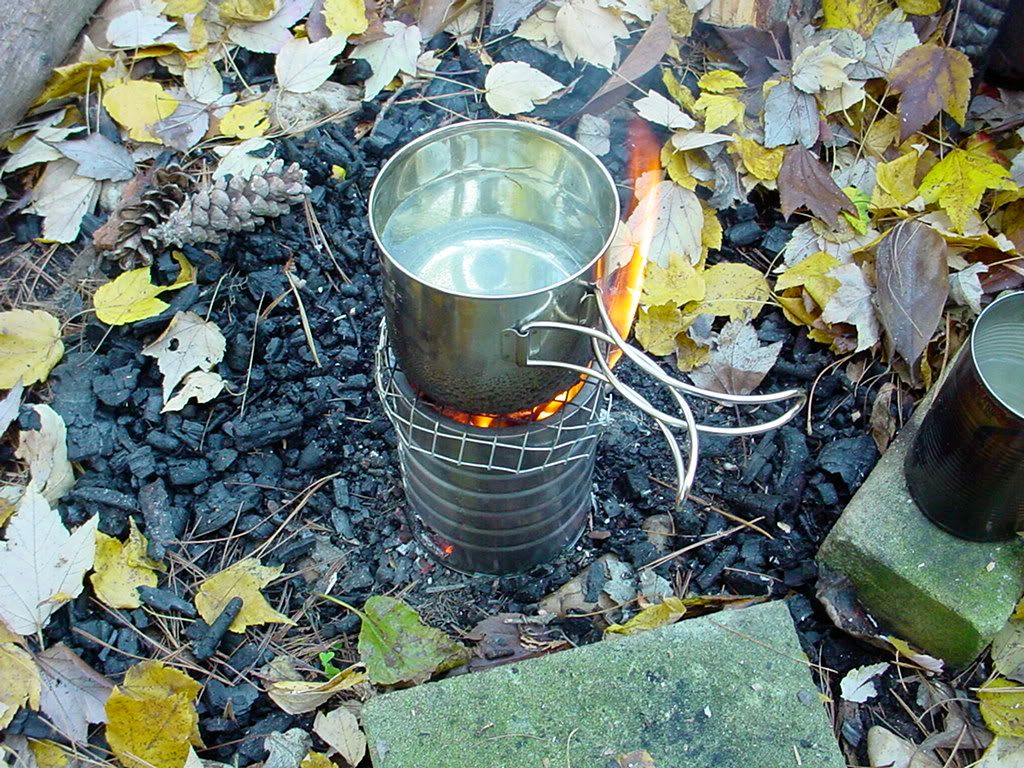
Performance of the stove is OK, but not great. It's mainly useful for warming field rations or water for tea or soup. You're not going to get a rolling boil on just one hexamine tab.

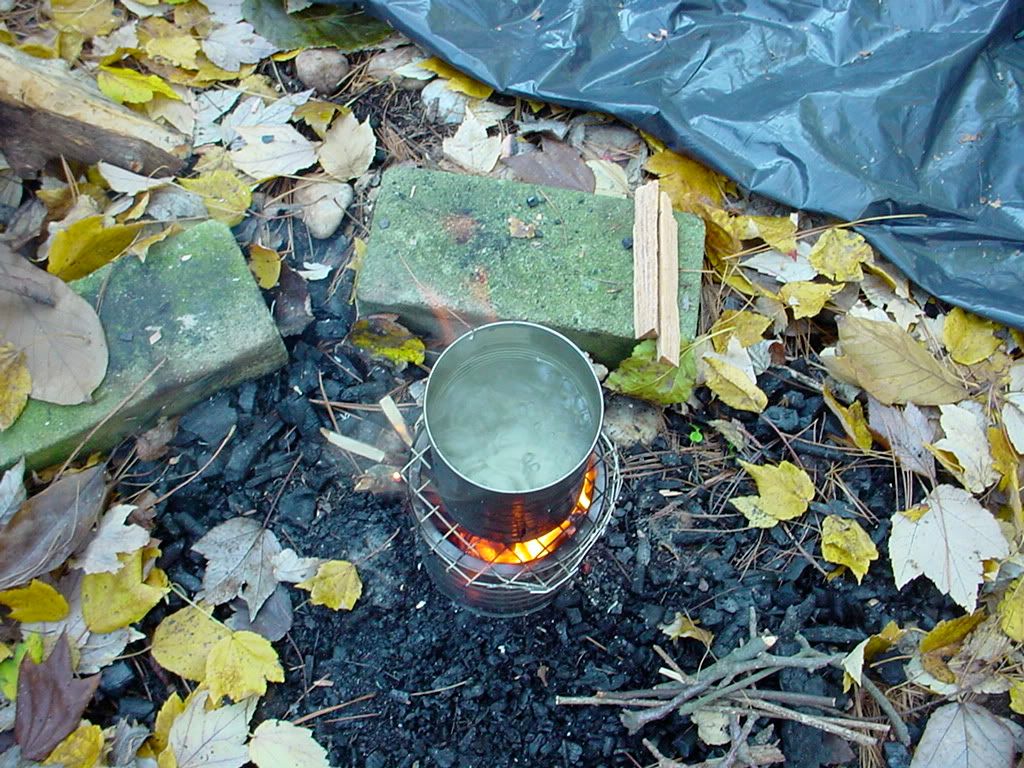
However, you can increase the heat output by adding other solid fuel along with the hexamine. E.g., today I was able to get my broth boiling by adding just a few dry twigs about as big around as my middle finger. Of course, using a cover on your cup or pot will help as well.

I've read that one can light the hexamine tabs with sparks from a ferrocerium rod, especially if you scrape some off and make a pile of powder on the tab. I tried this today with a Swedish Fire Steel but couldn't get it to work. Not wanting to resort to a match or lighter, I dug into my possibles bag and got out some dryer lint. A small wad of this on top of the hexamine tab was easy to light with a couple strikes, and this in turn ignited the hexamine.

Another use for the Esbit fuel tabs is as fire starter. The hexamine burns at about 1400 degrees F. and since it does so for over ten minutes it'll get even wet wood burning.

I keep an Esbit stove and fuel in my possibles bag, and another in the get home bag in my truck. They are small, light, easy to use, pretty much foolproof, and cheap. For a quick warm meal on the trail they work well. They get two thumbs up from me.

Sunday, November 25, 2007

Hobo Stove, Part 2

Today I revised the design of the hobo stove that I made yesterday from a coffee can. I flipped the can back over and made a top for it from some 1/2" mesh hardware cloth I picked up today at Lowe's. ("Cloth" is a bit of a misnomer. It's made from galvanized steel mesh.)

Before lighting, I loaded the stove with some crumpled paper, a couple pieces of fatwood, some twigs, and a wad of dryer lint. The dryer lint ignited with one strike from my fire steel. I quickly added more twigs and a pine cone, and placed the hardware cloth top on the stove.

The first shot here shows the front of the stove with the new top, after lighting.


Next, we can see that today, I was actually able to get water to boil.


Finally, I decided that since it was a little chilly and I had my possibles bag outside with me, I'd make up a cup of chicken boullion. The cup is an Olicamp Space Saver, which fits over the bottom of a 32 oz. Nalgene bottle.


So, this is definitely an improvement over yesterday's attempt. It'll burn pretty much anything you can fit inside. Due to the size, you have to feed fuel in frequently, but it seems to burn fuel pretty completely and not leave much ash behind. I'm very interested to see how it performs with charcoal briquets. Assuming it works well with them it would make a good little emergency stove for home owners or apartment dwellers with patios, since it should be more efficient than a charcoal grill for boiling water.

The stove's exhaust vent is large enough to feed fuel into, but I think I'll enlarge the bottom front vent, to let in more air, and to allow me to shove sticks into the bottom of the fire. (This time I'll use snips or my Dremel, to save the edge on my knife.)

Saturday, November 24, 2007

Hobo Stove, Part I

Today's post may be more properly titled, "How Not to Make a Hobo Stove."

If enter the term "hobo stove" into Google, you get about 257,000 hits. Even leaving out the irrelevant results, that leaves a lot of pertinent info available online about them. Before making the stove below, I did look at some of these pages.

Anyway, my goal for this was to see, using nothing more than an empty coffee can and a Swiss Army Knife, if I could make a functional hobo stove for cooking either while camping or in an emergency. An important feature is the ability to use any flammable solid that you can put into the stove as fuel. E.g., twigs, bark, pine cones, cardboard, etc.

First, here are pictures of the front of the stove, with an air intake and fuel feeding window at the bottom (what was the top of the can), and then an exhaust vent/fuel feeding window at the top (formerly the bottom of the can).


As you can see above, I did not cut through the rim of the can. I left the rim on so the stove would be more rigid.


To cut out the windows, I punched out the corners of each window with the reamer on my Victorinox Farmer Swiss Army Knife. Then, I cut between the holes using the knife blade. The knife cut the can OK but was dulled quite a bit by doing so. If you're going to try this, you'll be better off using tin snips or a cutoff wheel in a Dremel. Watch out for sharp edges on the can.

Our next picture is of the tinder pile I made to get it started. I used my Victorinox Pioneer to make a pile of fatwood scrapings and some splinters onto a piece of cardboard, then used the reamer as a striker on the ferrocerium rod.


Once the tinder was going -- which took only a few strikes on the ferro rod -- I added a few twigs, then placed the stove over the burning pile and starting feeding more twigs in through the exhaust vent. The lower vent was facing the prevailing wind, so each time a breeze picked up it fanned the flames.

Note my high-tech pot, a cranberry sauce can left over from Thanksgiving. ;)


Finally, here's a shot of some flames coming out the back exhaust vent.


OK, so why is this, "How Not to Make a Hobo Stove?" Simply put, this layout doesn't allow you to build and keep going a hot enough fire, at least with scrounged fuel. It works only with rather small pieces of wood or pinecones. Despite my best efforts, the water in the cranberry sauce can never boiled. It did warm up and start giving off water vapor but never came to a good boil. A bit of water spilled on the top of the stove did sizzle off, but the two layers of metal between the fire and water kept it from getting hot enough to boil in the can. It might work better with charcoal briquets.

Having tried this setup, I'm going to play with it a bit more. I'll probably try charcoal briquets. Also, I'll flip the coffee can back over and make a pot support for the top using either wire hangers or some hard cloth/chicken wire. I may also make what was the exhaust hole a bit larger so I can feed larger pieces of fuel into it.

Stay tuned for part two.

Friday, November 09, 2007

A Modern Possibles Bag

I recently picked up an EOD Utility Bag from Countycomm, which I used as the basis for a basic survival kit AKA "possibles bag" for use while day hiking, or if I need to grab a bag that's light and compact. I put a post up over on TRP with full details and pictures. Check it out.

Sunday, November 04, 2007

Case Moose Follow Up

I got the chance to go out back this afternoon and play with the Case Moose I got Friday. Here it is next to my Remington Woodsman:


The next picture shows it next to a fire lay and my Cold Steel Trail Hawk:


You can't see it in the pic, but there is a wad of unraveled jute twine in the middle of the fire lay. Between the jute, the fuzz sticks, and one match, I had a good fire going in about 20 seconds.

As an aside, I am reevaluating my opinion of the CS Trail Hawk. I wasn't too impressed with it when I first got it. For chopping branches and stuff it's a bit small. However, it worked very well for splitting up some small logs and chopping splinters off the sides for use in making up the fire lay shown.

Friday, November 02, 2007

Case Moose Pocketknife

As I alluded to in my post last week about my Remington Woodsman Bullet Knife, I picked up a Case Moose with chrome vanadium blades and red jigged bone handle scales (#6979). I ordered it Monday morning from Sawyer's Cutler on eBay and it arrived in the mail today.

Although the same general pattern as the Remington, the Case is slimmer overall and a bit lighter. My first impression is that the quality is much better, and it came with both blades razor sharp. (The Remington's spey blade was especially bad out of the box.) They may be the sharpest blades I've ever seen on a factory knife, as a matter of fact. I am going to use the knife without touching up the blades first, to see how long the edges last.

The reason I got chrome vanadium steel blades rather than stainless is that with the exception of my Victorinox knives, every knife I've had with a stainless blade has been a real bitch and a half to sharpen. Knife makers tend to make stainless blades very hard. This means that they retain an edge well but when it comes time to sharpen them doing so takes a lot of work. I'd rather have to sharpen a knife a bit more often if doing so is relatively easy. I can put a razor edge on a thin carbon steel blade like on my Opinel Number 8 in only a few minutes. A stainless blade of similar thickness but much harder will take about two or three times as long, using a bench stone. I'd rather not think about having to resharpen such a blade in the field using a short pocket hone.

The Case feels nice in the hand and sits well in my front pocket. It's longer but slimmer than the Victorinox Farmer I've been carrying everyday for the past month or so.

I plan to employ the Case's clip blade for general use, keeping the spey in reserve as an always handy razor sharp edge. The spey would also be good for skinning game without poking through the hide in unwanted places, or opening packages with a reduced risk of damaging the contents.

In his seminal book, Woodcraft, George Washington Sears, AKA "Nessmuk" carried a trio of cutting implements:

  1. A large folding knife quite similar to a Case Moose,
  2. A fixed knife with about a 4" blade which was thin so it was good for slicing, and
  3. A pocket axe with two edges, one fine and the other a bit coarser.

One could make a modern day Nessmuk trio for a modest sum with a Case Moose, a Swedish Mora fixed blade, and a small hatchet or even a folding saw. It would handle pretty much any cutting need one would encounter in a North American forest.

A Moose or another similar high quality traditional pocketknife would also serve well in an urban or suburban emergency kit. However, it does fall behind Swiss Army Knives and multitools in overall usefulness, since it lacks impelements like screwdrivers and can openers. A traditional slipjoint knife would make a fine complement for a multitool, though, since the knife blades on most such tools aren't as convenient as those on a dedicated knife.