- Large blade
- Small blade
- Bottle opener with large screwdriver tip
- Can opener with small screwdriver tip
- Phillips head screwdriver
- Magnifier
- Scissors
- Corkscrew
- Awl with hole for sewing
- Multi-purpose hook
- Tweezers
- Toothpick
- Keyring
Thursday, March 27, 2008
Victorinox Explorer
Yesterday I received in the mail from Amazon a Victorinox Explorer Swiss Army Knife. It's a four-layer SAK with the following tools:


Sunday, March 23, 2008
Ontario RAT-3 Knife
Last week I picked up an Ontario RAT-3 knife from Knifecenter.com. I've posted a brief review with a couple of pictures over on The Rally Point.
Sunday, March 16, 2008
Marlin 336 Spare Parts Kit
In the past I've posted about the Marlin 336 as a good addition to your toolkit. It's rugged, reliable, and is chambered for rounds suitable for self protection or hunting medium-sized game.
One of the reasons that I prefer the Marlin over the Winchester 94, its main competitor, is that the Marlin is much easier to perform maintenance upon. For example, to field strip the Marlin all you need to do is remove the finger lever screw, remove the lever, then pull the bolt out the back of the receiver (watch for the ejector falling out when you do this). In contrast, the Winchester is not easily field stripped.
A possible downside to this ease of disassembly is that because you're more likely to have the gun apart, the likelihood that you'll lose a small part is increased. And even if you never lose any small pieces, it's possible for them to wear out or break. So, keeping some spares on hand is a very good idea if a Marlin 336 is part of your serious toolkit.
Last night I ordered from Brownells several parts to put up in an ammo can with spares for other guns in my collection. I ordered items 1 through 7, below.
I've listed the spare magazine spring and tube because it is possible to wear out the spring or dent the tube. Doing the latter might damage the spring as well. I regard this as less likely than losing other parts so I held off on these for now.
It is my opinion that you should have a spare parts kit for any firearm which you include as a "survival gun." Even if you're not expecting TEOTWAWKI, parts breakage may occur at the most inopportune time, rendering your gun inoperative.
Along with the spare parts, you need the proper tools to work on your guns. You don't need a complete gunsmith's toolkit, but the following items are a good start:
Marlin 336 Spare Parts List with Brownells Stock Numbers and Prices as of 3/15/08
1. Finger lever screw. #550-301-192 $2.73
2. Ejector w/spring #50-501-168 $10.18
3. Extractor. #550-301-169 $6.01
4. Firing pin, rear. #550-401-199 $6.64
5. Firing pin, front. #550-000-588. $11.33
6. Firing pin spring. #550-401-295 $2.73
7. Firing pin retaining pin. #550-420-299. $2.73.
Optional:
8. Spare mag spring. #550-401-395. $6.30
9. Spare mag tube. #550-000-042. $16.53
I've listed the spare magazine spring and tube because it is possible to wear out the spring or dent the tube. Doing the latter might damage the spring as well. I regard this as less likely than losing other parts so I held off on these for now.
It is my opinion that you should have a spare parts kit for any firearm which you include as a "survival gun." Even if you're not expecting TEOTWAWKI, parts breakage may occur at the most inopportune time, rendering your gun inoperative.
Along with the spare parts, you need the proper tools to work on your guns. You don't need a complete gunsmith's toolkit, but the following items are a good start:
- Screwdriver with interchangeable, replaceable bits which properly fit gun screws. Use hollow ground bits for flat screws. Don't forget hex and Torx bits, if you need them. I like the Lyman Mag Driver.
- A set of gunsmith's punches and a mallet with a brass head and a non-marking nylon head. Again, Lyman makes a good set.
- Non-making inserts for a vice, or some kind of a clamp to hold guns while you're working on them.
Wednesday, March 12, 2008
Mountain House Chicken & Rice
Tonight I tried out one of the freeze dried meals I bought last weekend at REI. I picked the Mountain House Chicken and Rice. This comes in a ziploc pouch. To prepare, you pour in 12 oz. of boiling water, seal the bag, and wait about 8 or 9 minutes.
To make the trial a bit more interesting, I boiled the water in an Olicamp Space Saver cup on an Esbit stove (both from my possibles bag). Based on past experience with the Esbit, I used two fuel tablets and also covered the cup with a piece of aluminum foil.
It took about 6 minutes for the water to boil. The Esbit tabs were still burning, lasting for about 10 minutes total.
I followed the directions by pouring in the boiling water, sealing the pouch, and waiting about 8 or 9 minutes. Then open, stir, and eat.
It was quite tasty. There wasn't a lot of chicken, rather, it was mostly rice. However, I found it to be pretty filling (the Newcastle I drank with it helped, I'm sure).
Freeze dried meals like this one have a few advantages: they are light, can be prepared in their containers by adding boiling water, and they have a long shelf life (at least 7 years).
On the downside, you need to be able to provide boiling water, which of course requires not only the water but a way to boil it. They are also high in sodium, which can be bad for those on restricted diets.
For me the good points outweigh the bad, so I'll probably pick up some more.
Sunday, March 09, 2008
New Toys With My REI Dividend
REI dividends are out and this year I managed to rack up $47 worth. I also had a 20% off one item coupon. Today I went over to the local store and spent it (and then some). Anyway, I bought:
I haven't tried the Mountain House meals yet, and I got the Space Pen just because I thought it was neat.
- A Gerber Gator folding saw
- An Open Country Explorer Grid 12" x 6" folding grill
- A box of Lightning Nugget fire starters
- A pack of REI Storm Proof matches
- A Fisher Space Pen (telescoping model)
- A couple Mountain House freezed dried meals
I've used the Storm Proof matches for awhile. They burn like mini-flares and will not go out even if you drop them into snow. I once tested this by dropping a lit one into about a foot of snow. It melted its way down to the ground without going out.
The Lightning Nugget fire starters appear to be pine chips that are soaked in paraffin, then formed into hemispheres. The manufacturer claims they'll burn for up to 15 minutes. To use, the instructions on the box tell you to place one on the ground, round side down. Then light it with a match and wait until its going well before placing your kindling on it. I used a bit of Coughlin's tinder (wax-impregnated cotton) ignited with a fire steel to light it. It worked well, and I plan to add two or three Nuggets to my kit, each one wrapped in some aluminum foil to protect them in storage and shield them from damp ground in use.
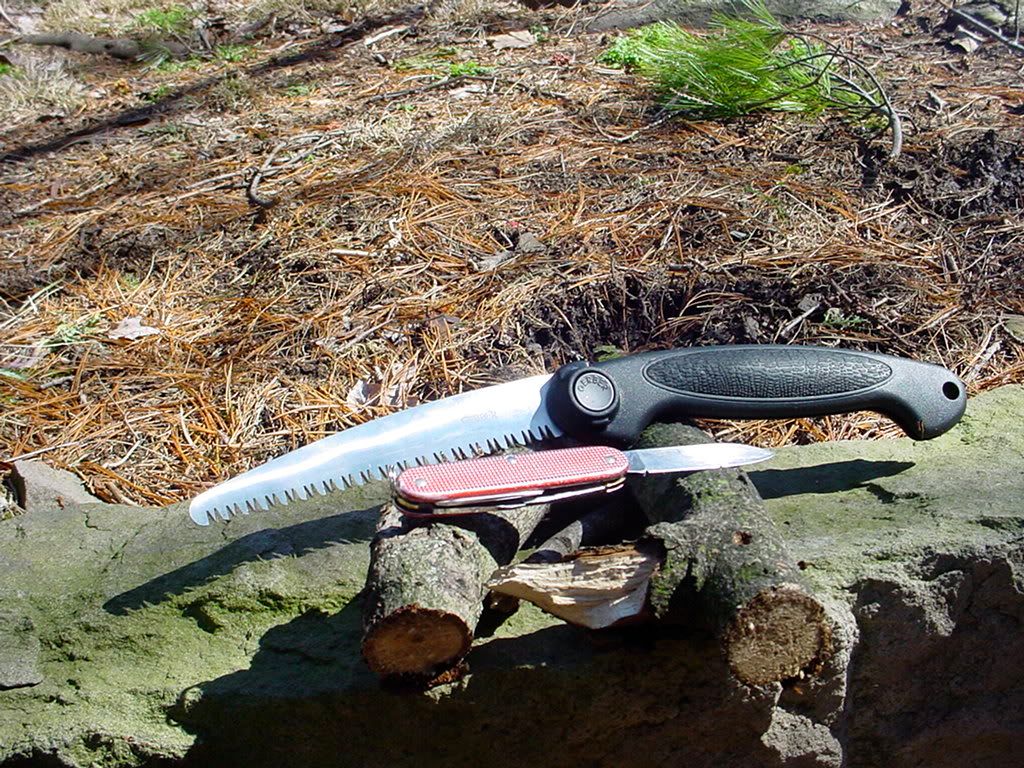
I've wanted to try one of the Gerber Gator folding saws for awhile now, having read many favorable reviews. (HERE is a pic I took, along with my Victorinox Pioneer for scale.) The blade is fairly thin, which when combined with the plastic handle, makes it very light weight. The teeth are pretty aggressive and designed to cut on the pull stroke. Some reviews I saw on REI's web page reported people breaking the saw. I think what may have happened was that those users tried to cut on the push stroke, bending the blade and wrecking the hinge. However, if used as designed, it looks like it should be fine.
In my brief testing, the Gator cut both hard and soft wood well, requiring less effort to do so than using a large knife would. Using a saw is also a bit safer than hacking away with a big knife. As one part of a modern "Nessmuk trio," one of these makes a lot of sense, in my opinion. Finally, at $15.95, the Gerber is cheaper than most large knives.
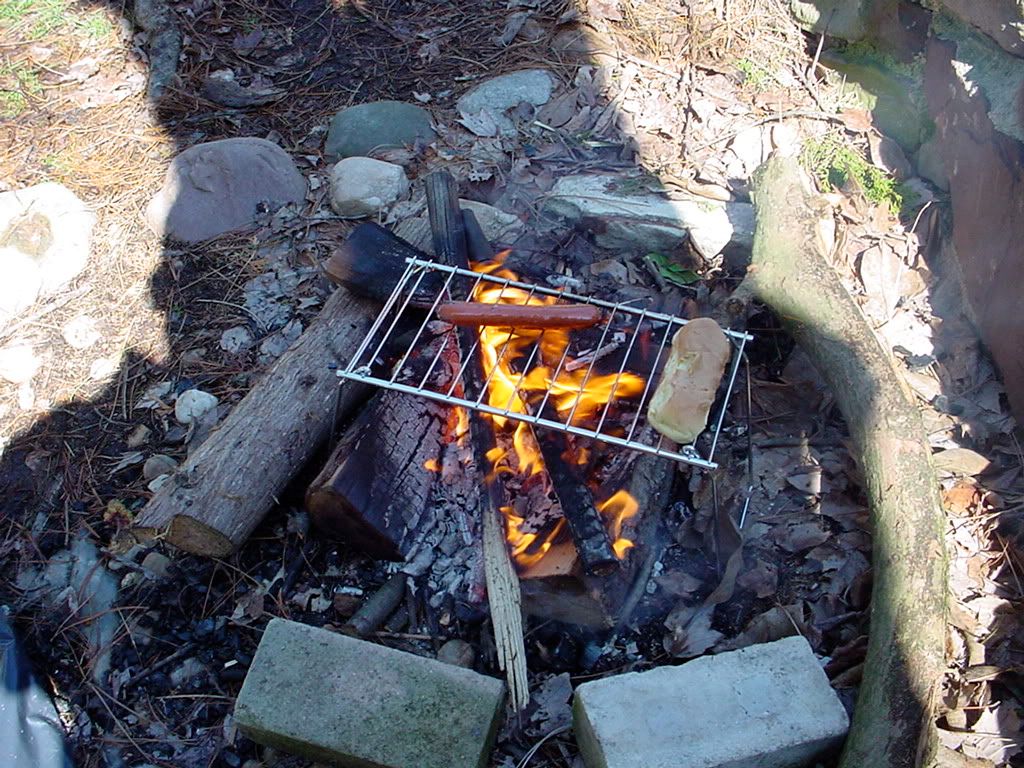
Another item which I've had my eye on for a little while is the Open Country folding grill (PIC). Even though it's small, it's easier to cook over an open fire by using a grill than by impaling the food on sticks or putting a vessel right in the fire. The OC Explorer Grid seems well made for the price (about $11) and strong enough to hold a kettle or small pan. It didn't come with any kind of a case, so I'm going to make something up with some scrap denim or muslin. A leg from an old pair of jeans might be big enough. That way, anything it gets packed with after being used will stay clean.
I haven't tried the Mountain House meals yet, and I got the Space Pen just because I thought it was neat.
Monday, February 04, 2008
A USB Thumb Drive for Emergencies
Like many people nowadays, my life involves dealing with a lot of data. Especially important items include the many usernames, logins, and account numbers for loans, credit cards, and various websites which I use. I keep a spreadsheet in an encrypted file on my laptop to keep track of them. But what happens if my laptop is stolen, lost, or destroyed?
For awhile I've carried a copy of the spreadsheet along with other important info in encrypted form on a USB flash drive on my keyring. This way, it's always with me even if the SHTF. The drive I've been using has been a Microcenter bulk 1 GB stick, and it's worked just fine.
The prices on USB thumb drives have plummeted over the past year. So, over the weekend I bought an 8 GB USB flash drive at Microcenter. Like my old stick, it's one of their bulk, house-brand units and the cost was only $29.99 + tax.
I keep only the most essential data on the USB stick, and I formatted the stick as FAT32 so that it can be read in any PC or Mac I may need to use. It's organized like so:
Root directory
-A plain text file with contact info, including next of kin and the number for my childrens' daycare.
Documents folder
-Backup of my Safari browser bookmarks
-Backup of my OS X Addressbook
-Backup of my iCal database
-Separate encrypted images for financial data, logins, client data
Installer files folder
-Contains installation files for several Windows programs (AVG Antivirus, Firefox, Foxit PDF reader, Spybot, and the anti-spyware hosts file from MVPS.org)
Mac Portable Apps folder (apps that can run directly from the USB stick when connected to a Mac running OS X)
-Portable Firefox
-Portable AdiumX instant messenger client
Windows Portable Apps folder (apps that can run directly from the USB stick when connected to a Windows PC)
-PuTTy (a telnet and SSH client)
-Portable Firefox
-Pidgin Portable instant messenger client
Over 6 GB are still free.
Running applications from the USB drive is quite a bit slower than from a hard disk, but this isn't for regular use. Since flash memory has a limited number of read/write cycles, and because I don't want potentially sensitive information saved in an unencrypted folder on the thumb drive, I configured both Firefox installations to not cache files locally.
The new thumb drive has replaced my old one in my pocket. It rides on a keyring along with a Victorinox Rambler SAK, a Countycomm.com Peanut Lighter, and a Countycomm.com SO-ARES LED light.
For awhile I've carried a copy of the spreadsheet along with other important info in encrypted form on a USB flash drive on my keyring. This way, it's always with me even if the SHTF. The drive I've been using has been a Microcenter bulk 1 GB stick, and it's worked just fine.
The prices on USB thumb drives have plummeted over the past year. So, over the weekend I bought an 8 GB USB flash drive at Microcenter. Like my old stick, it's one of their bulk, house-brand units and the cost was only $29.99 + tax.
I keep only the most essential data on the USB stick, and I formatted the stick as FAT32 so that it can be read in any PC or Mac I may need to use. It's organized like so:
Root directory
-A plain text file with contact info, including next of kin and the number for my childrens' daycare.
Documents folder
-Backup of my Safari browser bookmarks
-Backup of my OS X Addressbook
-Backup of my iCal database
-Separate encrypted images for financial data, logins, client data
Installer files folder
-Contains installation files for several Windows programs (AVG Antivirus, Firefox, Foxit PDF reader, Spybot, and the anti-spyware hosts file from MVPS.org)
Mac Portable Apps folder (apps that can run directly from the USB stick when connected to a Mac running OS X)
-Portable Firefox
-Portable AdiumX instant messenger client
Windows Portable Apps folder (apps that can run directly from the USB stick when connected to a Windows PC)
-PuTTy (a telnet and SSH client)
-Portable Firefox
-Pidgin Portable instant messenger client
Over 6 GB are still free.
Running applications from the USB drive is quite a bit slower than from a hard disk, but this isn't for regular use. Since flash memory has a limited number of read/write cycles, and because I don't want potentially sensitive information saved in an unencrypted folder on the thumb drive, I configured both Firefox installations to not cache files locally.
The new thumb drive has replaced my old one in my pocket. It rides on a keyring along with a Victorinox Rambler SAK, a Countycomm.com Peanut Lighter, and a Countycomm.com SO-ARES LED light.
Monday, January 14, 2008
Sunday, January 06, 2008
Follow up on Debris Shelter
We got a light rain last night which allowed me to see how good of a shelter I made yesterday. Pretty good as it turns out. I went out back this morning and checked the ground underneath the shelter to see how damp it was.
Near the entrance it was damper than it was yesterday, but back underneath it was about the same as yesterday afternoon. An "eve" extending over the entrance would've helped.
Another way to improve this kind of shelter is to use heavy duty contractor garbage bags or drum liners. Two or three of these weigh hardly anything and take up little room in your woods kit. You can use one as a tarp over the shelter frame for additional waterproofing and wind blocking, with another as a ground sheet. Arranged right, you could even use one as a door to keep rain and wind out of the entrance. I have one such bag tied to the outside of my possibles bag. I'll be adding a couple more.
Saturday, January 05, 2008
Backyard Bushcraft: Shelter Making
Last month, one of the arborviate trees in my yard blew down during a wind storm. Today I went out back to cut it up for disposal, when it occurred to me that I had the perfect opportunity to practice making a debris shelter. So, with golok and bow saw in hand, I made a debris shelter.
First, here's a picture of the tree after some cleanup, before I started making it into a shelter.

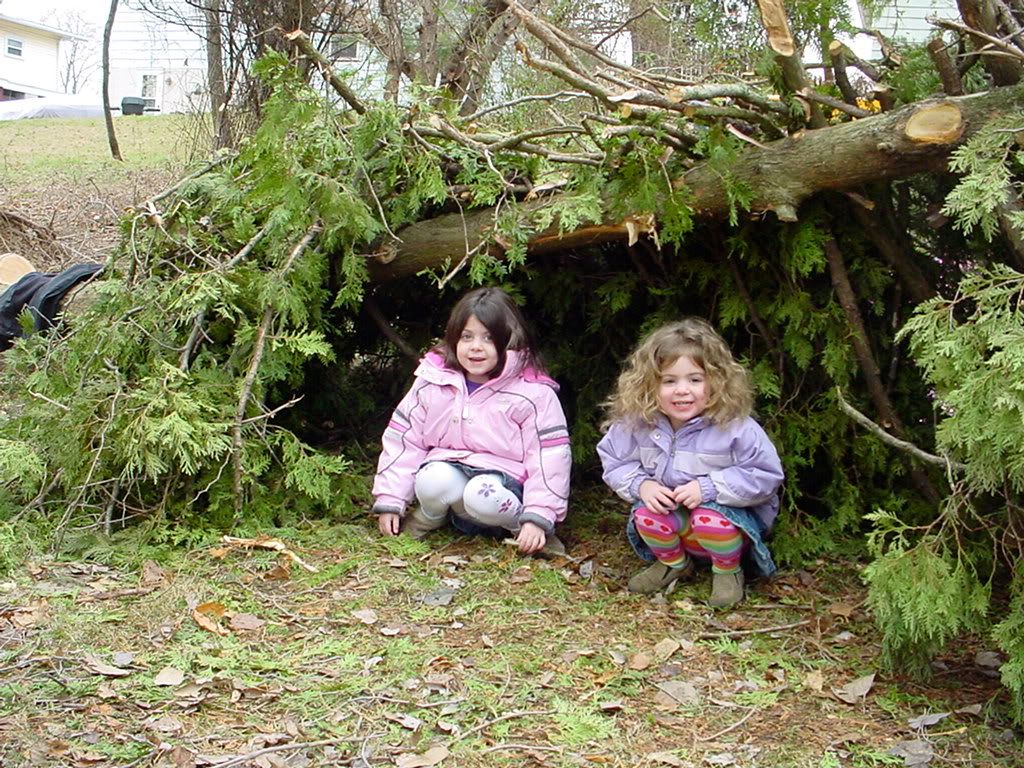
My daughters spent the morning out with their grandmother. When they got home they wanted to see what Daddy was doing in the backyard. They helped out a little before going inside for their nap. Here's a pic of them in the unfinished shelter.
Finally, a few shots of the shelter from different angles.
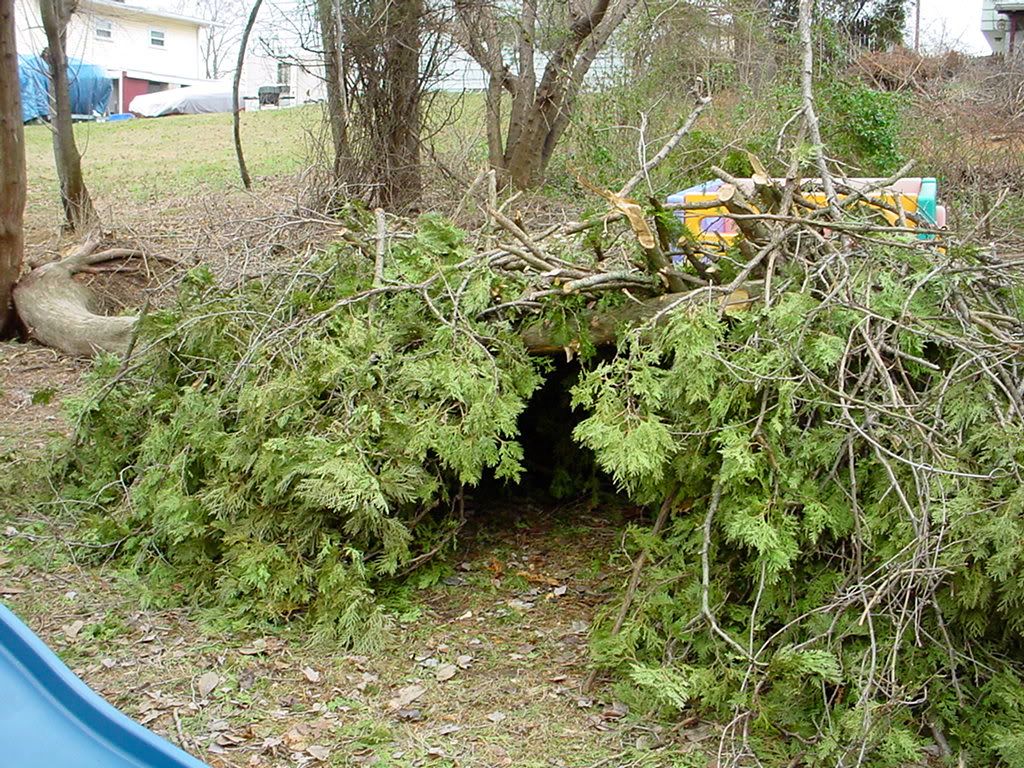
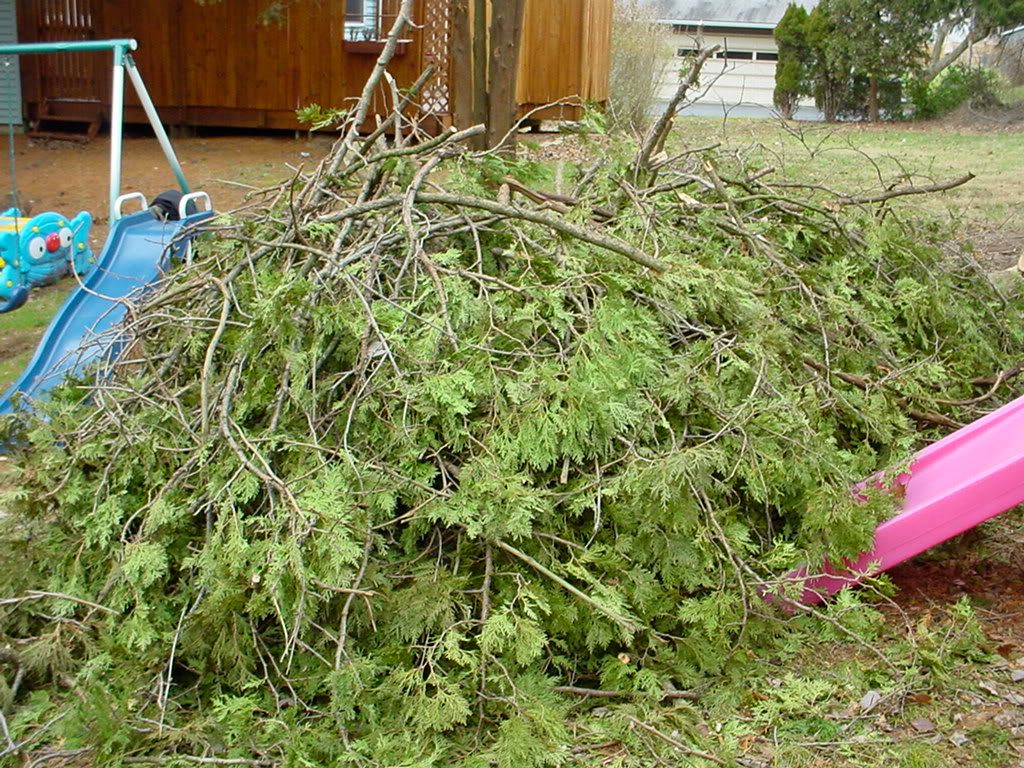
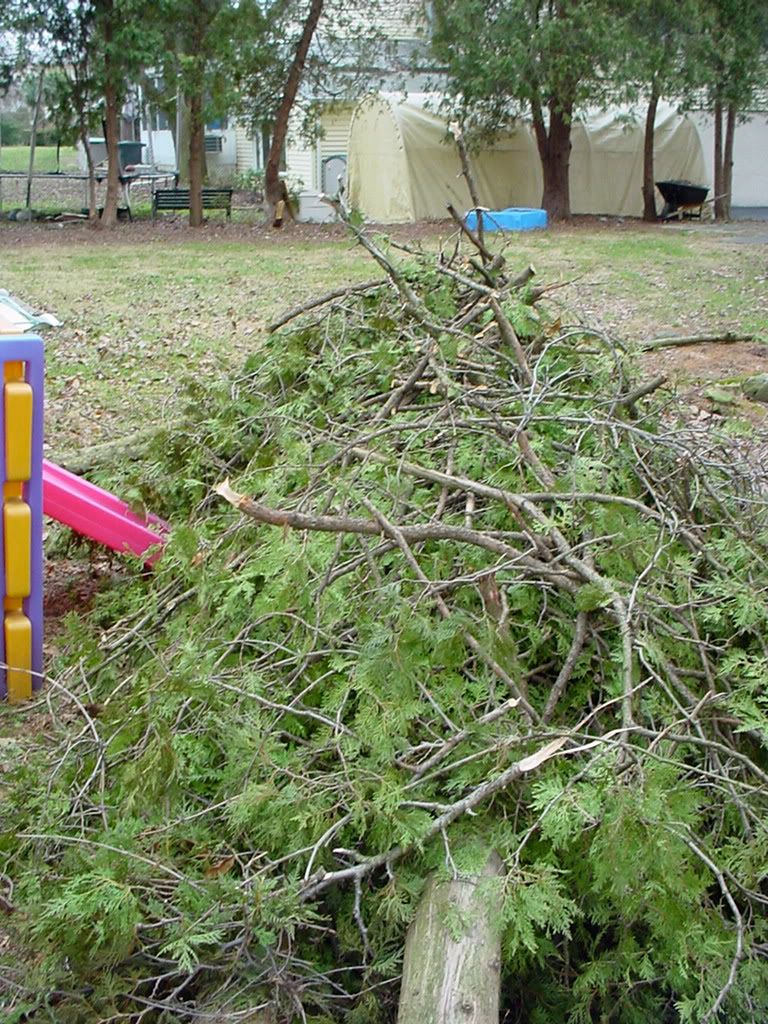
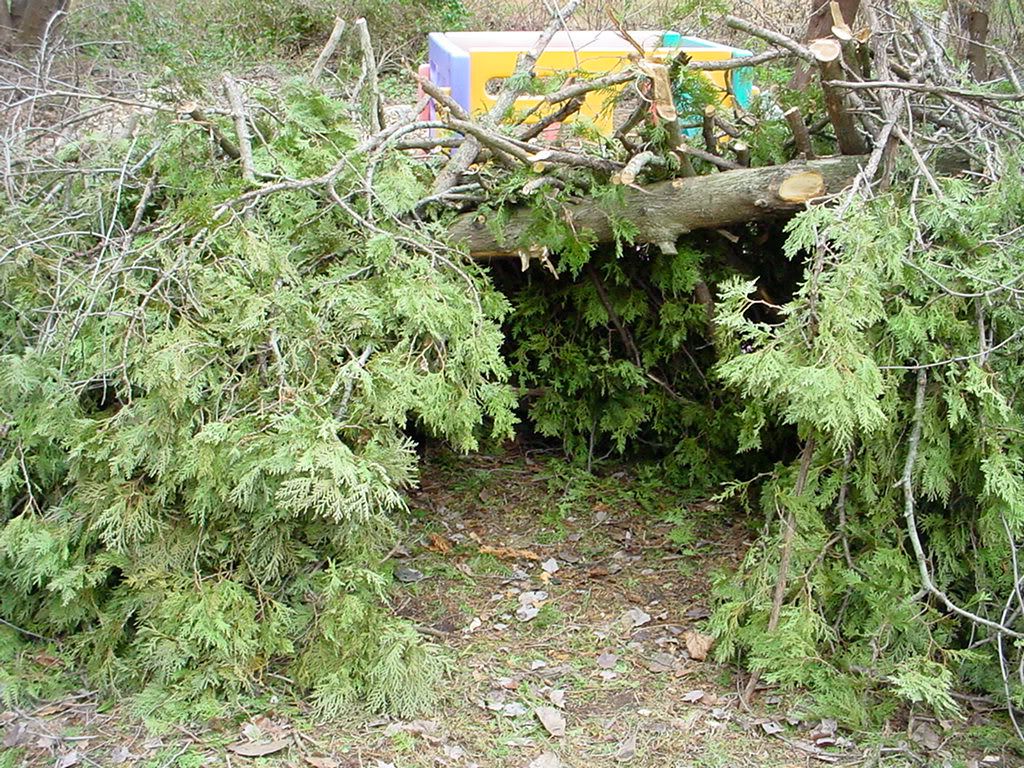
Finally, a few shots of the shelter from different angles.
If one got stuck out in the woods without a tent, e.g., due to a plane crash, car running off the road, loss of gear, etc., this kind of shelter can make the difference between making it and dying. It can provide insulation from the cold, if made thick enough can block rain and snow, and will help to block the wind. Just like I used a tree blown down in my backyard, you can often find trees in the woods that have blown down and which can be used as the basis of your shelter. For example, note how I used the tree as a ridge pole and leaned other branches against it.
Make sure that when covering the structure, you orient your thatch so that the twigs, leaves, or pine needles are pointed downwards. Also, start at the bottom then work your way up, overlapping the upper branches over the lower. Doing so encourages rain and meltwater to drain outside the shelter.
Don't make the shelter too large. Doing so will require more effort and will be harder to keep warm. On the other hand, as long as it's structurally sound it's probably impossible to put too much thatch on it. The more you use the more weather resistant it should be.
Make sure that when covering the structure, you orient your thatch so that the twigs, leaves, or pine needles are pointed downwards. Also, start at the bottom then work your way up, overlapping the upper branches over the lower. Doing so encourages rain and meltwater to drain outside the shelter.
Don't make the shelter too large. Doing so will require more effort and will be harder to keep warm. On the other hand, as long as it's structurally sound it's probably impossible to put too much thatch on it. The more you use the more weather resistant it should be.
Be careful about is locating the shelter where it'll have good drainage and where it's unlikely to have anything else fall on top of it.
Finally, this kind of shelter can be hard to see from afar. If you're trying to be found keep this in mind. If you're trying not to be found, so much the better.
Monday, December 24, 2007
Hexayurt Emergency Shelter
Now this is what I call innovative thinking. A hexayurt is a shelter that you can build out of 4'x8' insulation boards and some heavy duty tape. In the Arfcom thread linked below, another member posted a pic of a small hexayurt made from political campaign signs.
{H/T to EXPY37 at Arfcom for the heads up.}
Wednesday, December 05, 2007
Maxpedition Baby Condor Pack
Last week on Arfcom someone posted a link to a closeout on Maxpedition Baby Condor packs at LA Police Gear. The price was $49.99 plus shipping. This is a discontinued model but normally went for about twice as much. Since I've been casually looking for a replacement for my Outdoor Products Power Pack for everyday carry, I decided to order one in brown. I figured that if it didn't work for EDC, it would certainly work as a replacement for the old book bag I keep in my truck as a get home bag.
The Power Pack is well made and holds all my stuff, but it's a little too big for everyday carry. Capacity is about 3000 cubic inches. It has straps on the sides to snug down the main compartment when it isn't full, but the buckles would be better placed if they were out one layer, to snug down all three main pockets. As a result, it tends to be floppy when it isn't full.
Per LA Police Gear's site, the official description of the Baby Condor is:
The Baby Condor has three compartments: a large main compartment, which includes a mesh pocket near the top and a water bladder holder. The bladder holder is just large enough to hold my 15.4" Apple MacBook Pro laptop.
Next is a smaller compartment with pockets for pens and a PDA or an MP3 player. The third pocket is a zippered slash compartment. All compartments are closed with heavy duty YKK zippers. On the top is Maxpedition's signature Y-strap, which fastens over all three compartments with a Fastex buckle. The zipper pulls each are fitted with a paracord loop (except on one side pocket).
The bottom of the pack is rubberized. On the right side is a mesh pocket with a drawstring, sized to hold a 32 oz. (1L) Nalgene bottle. One the left is another mesh pocket, this one with a zipper (sans paracord).
There is one row of PALS webbing on the front for adding other pouches. I may do this to gain a bit more organized space. The straps are padded but not what I'd call "cushy." Each strap has a D-ring to guide the tube from a hydration bladder, and they can be connected with a sternum strap. The back is padded. There is no waist belt, which is fine on a pack this size.
The new pack arrived today. This is the second piece of Maxpedition gear I've bought (the first being a Mini Roly-Poly pouch), and this is as well made as the first. The overall construction including the nylon material and stitching are of high quality. The nylon is quite stiff but I expect it to break in.
After I transferred my laptop and assorted stuph into the new pack I tried it on. It seemed to carry well but of course I won't be able to tell for sure in my living room. I'll get a better idea when I go to work tomorrow. But this is definitely a very good pack and at $50, a very good deal. Assuming it works out, I'll retask the Power Pack as the get home bag in my truck.
The Power Pack is well made and holds all my stuff, but it's a little too big for everyday carry. Capacity is about 3000 cubic inches. It has straps on the sides to snug down the main compartment when it isn't full, but the buckles would be better placed if they were out one layer, to snug down all three main pockets. As a result, it tends to be floppy when it isn't full.
Per LA Police Gear's site, the official description of the Baby Condor is:
- Capacity: 2010 cu. in. / 33 liters
- Hydration: Side pouches for 1L Nalgene
- Support: 1in Adjustable Sternum Strap
- Dimensions : 17.5"(H) x 14"(W) x 7"(D) Main Compartment
- 13"(H) x 10.5"(W) x 2.5"(D) Front Pouch
- 13"(H) x 10.5"(W) Slip Pocket
The Baby Condor has three compartments: a large main compartment, which includes a mesh pocket near the top and a water bladder holder. The bladder holder is just large enough to hold my 15.4" Apple MacBook Pro laptop.
Next is a smaller compartment with pockets for pens and a PDA or an MP3 player. The third pocket is a zippered slash compartment. All compartments are closed with heavy duty YKK zippers. On the top is Maxpedition's signature Y-strap, which fastens over all three compartments with a Fastex buckle. The zipper pulls each are fitted with a paracord loop (except on one side pocket).
The bottom of the pack is rubberized. On the right side is a mesh pocket with a drawstring, sized to hold a 32 oz. (1L) Nalgene bottle. One the left is another mesh pocket, this one with a zipper (sans paracord).
There is one row of PALS webbing on the front for adding other pouches. I may do this to gain a bit more organized space. The straps are padded but not what I'd call "cushy." Each strap has a D-ring to guide the tube from a hydration bladder, and they can be connected with a sternum strap. The back is padded. There is no waist belt, which is fine on a pack this size.
The new pack arrived today. This is the second piece of Maxpedition gear I've bought (the first being a Mini Roly-Poly pouch), and this is as well made as the first. The overall construction including the nylon material and stitching are of high quality. The nylon is quite stiff but I expect it to break in.
After I transferred my laptop and assorted stuph into the new pack I tried it on. It seemed to carry well but of course I won't be able to tell for sure in my living room. I'll get a better idea when I go to work tomorrow. But this is definitely a very good pack and at $50, a very good deal. Assuming it works out, I'll retask the Power Pack as the get home bag in my truck.
Tuesday, December 04, 2007
Honey as a Cough Medicine for Children
I ran across this story today, discussing the results of a study performed at Penn State.
I think we'll try this out, since my eldest has a cough, and it can't hurt.
Natural honey is a more effective remedy for children’s coughs than over-the-counter medicines, researchers say. A dose of buckwheat honey before bedtime easily outperformed a cough suppressant in a US study.
Honey did a better job of reducing the severity and frequency of night-time coughs. It also improved sleep quality for children and their parents.
I think we'll try this out, since my eldest has a cough, and it can't hurt.
Sunday, December 02, 2007
Maglite LED Replacement Bulb
I had to make a trip to Lowe's today for some lightbulbs and a new step ladder, and saw that they had the LED upgrade for 3-cell Maglites. This is been something I've been looking for, as we have a 3-D cell Maglite at the house, so I added it to my cart.
The upgrade from the old krypton bulb to the new LED was easy. Just unscrew the head, unscrew the bulb retainer, remove the bulb, and reassemble with the LED. It took just a couple minutes.
Maglite doesn't make specific claims on their website or the packaging about how much longer the light should run with the LED, nor any specific claims about improved brightness. However, it should increase battery life, and it is quite a bit brighter (I checked brightness with the room lights off before swapping out the old bulb).
Like the krypton bulb, the illumination pattern with the LED can be changed by focusing the flashlight. The light color is different. While the krypton bulb provides a yellowish light, the LED emits a very white light.
Lowe's has the old fashioned 3 D-cell Maglites for about $18 - $20. The same light with an LED goes for about $39. The LED conversion bulb sells for about $19. I think it's a worthwhile upgrade for non-LED Maglites.
The upgrade from the old krypton bulb to the new LED was easy. Just unscrew the head, unscrew the bulb retainer, remove the bulb, and reassemble with the LED. It took just a couple minutes.
Maglite doesn't make specific claims on their website or the packaging about how much longer the light should run with the LED, nor any specific claims about improved brightness. However, it should increase battery life, and it is quite a bit brighter (I checked brightness with the room lights off before swapping out the old bulb).
Like the krypton bulb, the illumination pattern with the LED can be changed by focusing the flashlight. The light color is different. While the krypton bulb provides a yellowish light, the LED emits a very white light.
Lowe's has the old fashioned 3 D-cell Maglites for about $18 - $20. The same light with an LED goes for about $39. The LED conversion bulb sells for about $19. I think it's a worthwhile upgrade for non-LED Maglites.
Thursday, November 29, 2007
Esbit Stove
I worked at home today due to having a cold (I figured I'd keep my germs to myself). On my lunch break I went out back with my Esbit stove and made some beef broth in my Olicamp cup.

(Photo from Esbit's website.)
Esbit stoves have been made in Germany since 1936. I bought mine sometime ago from REI. They are simple little units made from stamped steel. Esbit fuel is tablets made from hexamine but you can also burn USGI trioxane bars. When folded, the stove folds up to about 4" x 3" x 1", and weighs a few ounces. The folded stove also acts as a container for carrying fuel tabs.
To use the stove, unfold it, place a fuel tablet in the center, and light. You can open the stove partway to accomodate a smaller cup, or all the way to hold a pot.
Performance of the stove is OK, but not great. It's mainly useful for warming field rations or water for tea or soup. You're not going to get a rolling boil on just one hexamine tab.
However, you can increase the heat output by adding other solid fuel along with the hexamine. E.g., today I was able to get my broth boiling by adding just a few dry twigs about as big around as my middle finger. Of course, using a cover on your cup or pot will help as well.
I've read that one can light the hexamine tabs with sparks from a ferrocerium rod, especially if you scrape some off and make a pile of powder on the tab. I tried this today with a Swedish Fire Steel but couldn't get it to work. Not wanting to resort to a match or lighter, I dug into my possibles bag and got out some dryer lint. A small wad of this on top of the hexamine tab was easy to light with a couple strikes, and this in turn ignited the hexamine.
Another use for the Esbit fuel tabs is as fire starter. The hexamine burns at about 1400 degrees F. and since it does so for over ten minutes it'll get even wet wood burning.
I keep an Esbit stove and fuel in my possibles bag, and another in the get home bag in my truck. They are small, light, easy to use, pretty much foolproof, and cheap. For a quick warm meal on the trail they work well. They get two thumbs up from me.
(Photo from Esbit's website.)
Esbit stoves have been made in Germany since 1936. I bought mine sometime ago from REI. They are simple little units made from stamped steel. Esbit fuel is tablets made from hexamine but you can also burn USGI trioxane bars. When folded, the stove folds up to about 4" x 3" x 1", and weighs a few ounces. The folded stove also acts as a container for carrying fuel tabs.
To use the stove, unfold it, place a fuel tablet in the center, and light. You can open the stove partway to accomodate a smaller cup, or all the way to hold a pot.
Performance of the stove is OK, but not great. It's mainly useful for warming field rations or water for tea or soup. You're not going to get a rolling boil on just one hexamine tab.
However, you can increase the heat output by adding other solid fuel along with the hexamine. E.g., today I was able to get my broth boiling by adding just a few dry twigs about as big around as my middle finger. Of course, using a cover on your cup or pot will help as well.
I've read that one can light the hexamine tabs with sparks from a ferrocerium rod, especially if you scrape some off and make a pile of powder on the tab. I tried this today with a Swedish Fire Steel but couldn't get it to work. Not wanting to resort to a match or lighter, I dug into my possibles bag and got out some dryer lint. A small wad of this on top of the hexamine tab was easy to light with a couple strikes, and this in turn ignited the hexamine.
Another use for the Esbit fuel tabs is as fire starter. The hexamine burns at about 1400 degrees F. and since it does so for over ten minutes it'll get even wet wood burning.
I keep an Esbit stove and fuel in my possibles bag, and another in the get home bag in my truck. They are small, light, easy to use, pretty much foolproof, and cheap. For a quick warm meal on the trail they work well. They get two thumbs up from me.
Sunday, November 25, 2007
Hobo Stove, Part 2
Today I revised the design of the hobo stove that I made yesterday from a coffee can. I flipped the can back over and made a top for it from some 1/2" mesh hardware cloth I picked up today at Lowe's. ("Cloth" is a bit of a misnomer. It's made from galvanized steel mesh.)
Before lighting, I loaded the stove with some crumpled paper, a couple pieces of fatwood, some twigs, and a wad of dryer lint. The dryer lint ignited with one strike from my fire steel. I quickly added more twigs and a pine cone, and placed the hardware cloth top on the stove.
The first shot here shows the front of the stove with the new top, after lighting.
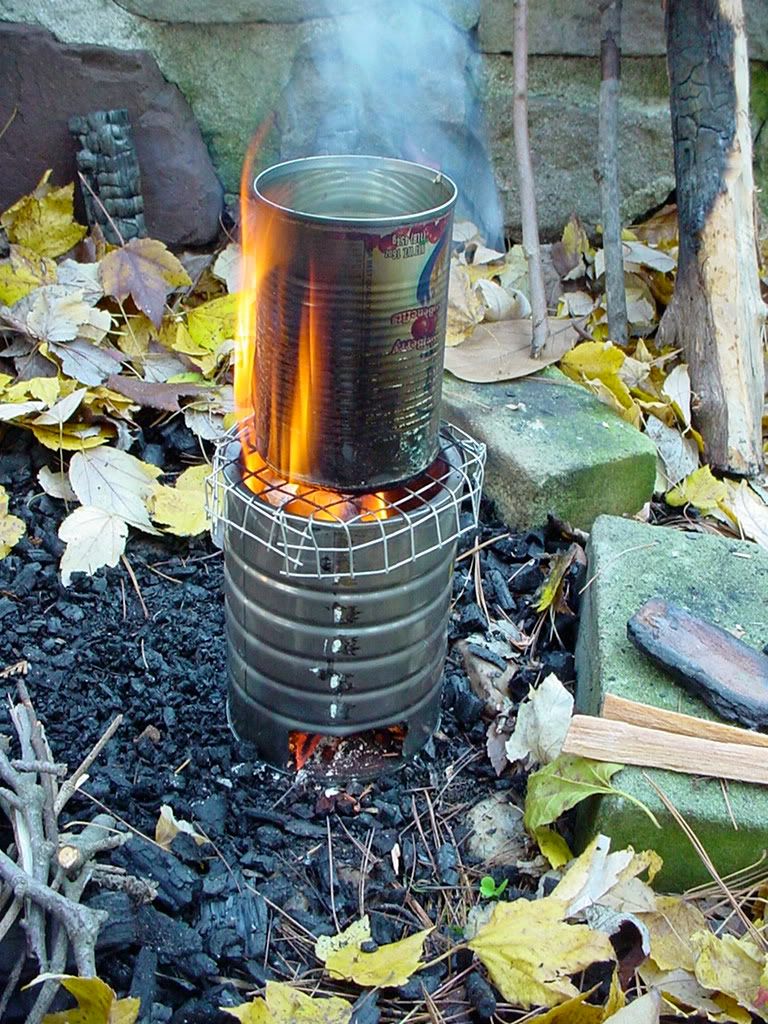
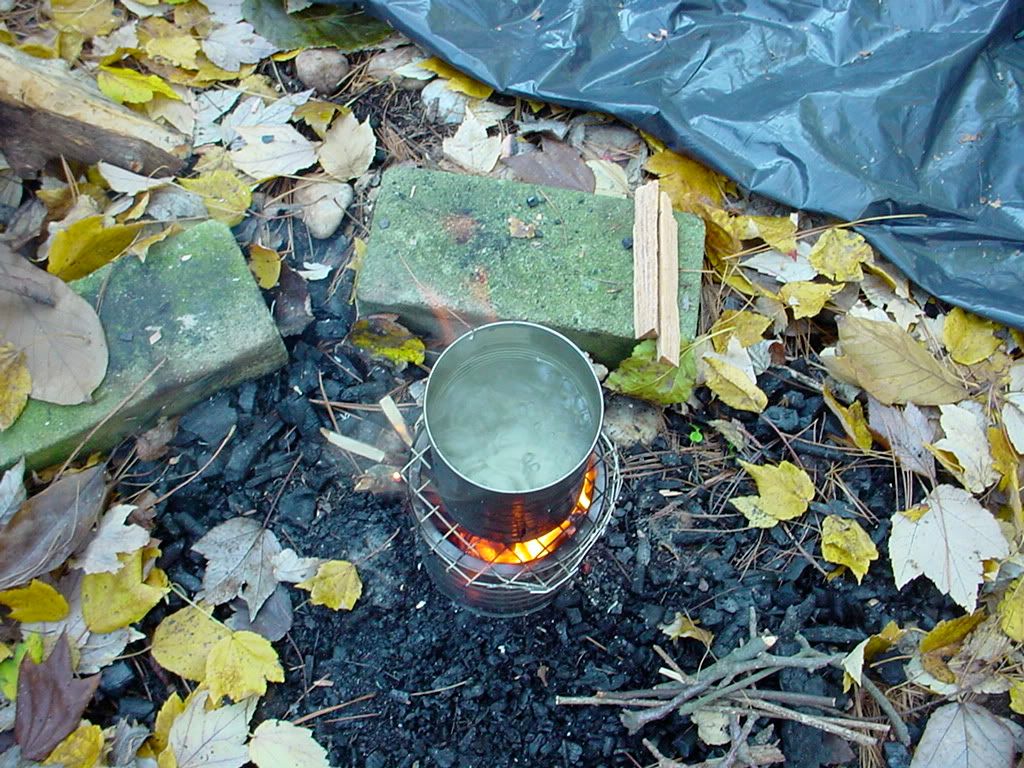
Next, we can see that today, I was actually able to get water to boil.
Finally, I decided that since it was a little chilly and I had my possibles bag outside with me, I'd make up a cup of chicken boullion. The cup is an Olicamp Space Saver, which fits over the bottom of a 32 oz. Nalgene bottle.
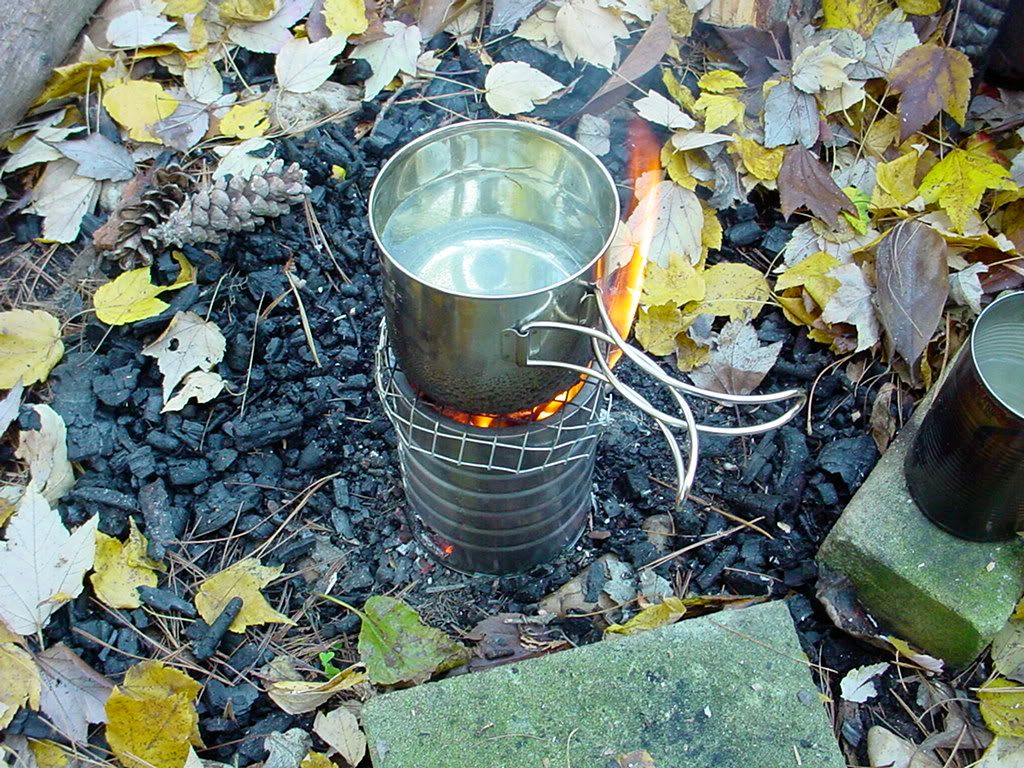
So, this is definitely an improvement over yesterday's attempt. It'll burn pretty much anything you can fit inside. Due to the size, you have to feed fuel in frequently, but it seems to burn fuel pretty completely and not leave much ash behind. I'm very interested to see how it performs with charcoal briquets. Assuming it works well with them it would make a good little emergency stove for home owners or apartment dwellers with patios, since it should be more efficient than a charcoal grill for boiling water.
The stove's exhaust vent is large enough to feed fuel into, but I think I'll enlarge the bottom front vent, to let in more air, and to allow me to shove sticks into the bottom of the fire. (This time I'll use snips or my Dremel, to save the edge on my knife.)
Before lighting, I loaded the stove with some crumpled paper, a couple pieces of fatwood, some twigs, and a wad of dryer lint. The dryer lint ignited with one strike from my fire steel. I quickly added more twigs and a pine cone, and placed the hardware cloth top on the stove.
The first shot here shows the front of the stove with the new top, after lighting.
Next, we can see that today, I was actually able to get water to boil.
Finally, I decided that since it was a little chilly and I had my possibles bag outside with me, I'd make up a cup of chicken boullion. The cup is an Olicamp Space Saver, which fits over the bottom of a 32 oz. Nalgene bottle.
So, this is definitely an improvement over yesterday's attempt. It'll burn pretty much anything you can fit inside. Due to the size, you have to feed fuel in frequently, but it seems to burn fuel pretty completely and not leave much ash behind. I'm very interested to see how it performs with charcoal briquets. Assuming it works well with them it would make a good little emergency stove for home owners or apartment dwellers with patios, since it should be more efficient than a charcoal grill for boiling water.
The stove's exhaust vent is large enough to feed fuel into, but I think I'll enlarge the bottom front vent, to let in more air, and to allow me to shove sticks into the bottom of the fire. (This time I'll use snips or my Dremel, to save the edge on my knife.)
Saturday, November 24, 2007
Hobo Stove, Part I
Today's post may be more properly titled, "How Not to Make a Hobo Stove."
If enter the term "hobo stove" into Google, you get about 257,000 hits. Even leaving out the irrelevant results, that leaves a lot of pertinent info available online about them. Before making the stove below, I did look at some of these pages.
Anyway, my goal for this was to see, using nothing more than an empty coffee can and a Swiss Army Knife, if I could make a functional hobo stove for cooking either while camping or in an emergency. An important feature is the ability to use any flammable solid that you can put into the stove as fuel. E.g., twigs, bark, pine cones, cardboard, etc.
First, here are pictures of the front of the stove, with an air intake and fuel feeding window at the bottom (what was the top of the can), and then an exhaust vent/fuel feeding window at the top (formerly the bottom of the can).

As you can see above, I did not cut through the rim of the can. I left the rim on so the stove would be more rigid.

To cut out the windows, I punched out the corners of each window with the reamer on my Victorinox Farmer Swiss Army Knife. Then, I cut between the holes using the knife blade. The knife cut the can OK but was dulled quite a bit by doing so. If you're going to try this, you'll be better off using tin snips or a cutoff wheel in a Dremel. Watch out for sharp edges on the can.
Our next picture is of the tinder pile I made to get it started. I used my Victorinox Pioneer to make a pile of fatwood scrapings and some splinters onto a piece of cardboard, then used the reamer as a striker on the ferrocerium rod.

Once the tinder was going -- which took only a few strikes on the ferro rod -- I added a few twigs, then placed the stove over the burning pile and starting feeding more twigs in through the exhaust vent. The lower vent was facing the prevailing wind, so each time a breeze picked up it fanned the flames.
Note my high-tech pot, a cranberry sauce can left over from Thanksgiving. ;)

Finally, here's a shot of some flames coming out the back exhaust vent.

OK, so why is this, "How Not to Make a Hobo Stove?" Simply put, this layout doesn't allow you to build and keep going a hot enough fire, at least with scrounged fuel. It works only with rather small pieces of wood or pinecones. Despite my best efforts, the water in the cranberry sauce can never boiled. It did warm up and start giving off water vapor but never came to a good boil. A bit of water spilled on the top of the stove did sizzle off, but the two layers of metal between the fire and water kept it from getting hot enough to boil in the can. It might work better with charcoal briquets.
Having tried this setup, I'm going to play with it a bit more. I'll probably try charcoal briquets. Also, I'll flip the coffee can back over and make a pot support for the top using either wire hangers or some hard cloth/chicken wire. I may also make what was the exhaust hole a bit larger so I can feed larger pieces of fuel into it.
Stay tuned for part two.
If enter the term "hobo stove" into Google, you get about 257,000 hits. Even leaving out the irrelevant results, that leaves a lot of pertinent info available online about them. Before making the stove below, I did look at some of these pages.
Anyway, my goal for this was to see, using nothing more than an empty coffee can and a Swiss Army Knife, if I could make a functional hobo stove for cooking either while camping or in an emergency. An important feature is the ability to use any flammable solid that you can put into the stove as fuel. E.g., twigs, bark, pine cones, cardboard, etc.
First, here are pictures of the front of the stove, with an air intake and fuel feeding window at the bottom (what was the top of the can), and then an exhaust vent/fuel feeding window at the top (formerly the bottom of the can).
As you can see above, I did not cut through the rim of the can. I left the rim on so the stove would be more rigid.
To cut out the windows, I punched out the corners of each window with the reamer on my Victorinox Farmer Swiss Army Knife. Then, I cut between the holes using the knife blade. The knife cut the can OK but was dulled quite a bit by doing so. If you're going to try this, you'll be better off using tin snips or a cutoff wheel in a Dremel. Watch out for sharp edges on the can.
Our next picture is of the tinder pile I made to get it started. I used my Victorinox Pioneer to make a pile of fatwood scrapings and some splinters onto a piece of cardboard, then used the reamer as a striker on the ferrocerium rod.
Once the tinder was going -- which took only a few strikes on the ferro rod -- I added a few twigs, then placed the stove over the burning pile and starting feeding more twigs in through the exhaust vent. The lower vent was facing the prevailing wind, so each time a breeze picked up it fanned the flames.
Note my high-tech pot, a cranberry sauce can left over from Thanksgiving. ;)
Finally, here's a shot of some flames coming out the back exhaust vent.
OK, so why is this, "How Not to Make a Hobo Stove?" Simply put, this layout doesn't allow you to build and keep going a hot enough fire, at least with scrounged fuel. It works only with rather small pieces of wood or pinecones. Despite my best efforts, the water in the cranberry sauce can never boiled. It did warm up and start giving off water vapor but never came to a good boil. A bit of water spilled on the top of the stove did sizzle off, but the two layers of metal between the fire and water kept it from getting hot enough to boil in the can. It might work better with charcoal briquets.
Having tried this setup, I'm going to play with it a bit more. I'll probably try charcoal briquets. Also, I'll flip the coffee can back over and make a pot support for the top using either wire hangers or some hard cloth/chicken wire. I may also make what was the exhaust hole a bit larger so I can feed larger pieces of fuel into it.
Stay tuned for part two.
Friday, November 09, 2007
A Modern Possibles Bag
I recently picked up an EOD Utility Bag from Countycomm, which I used as the basis for a basic survival kit AKA "possibles bag" for use while day hiking, or if I need to grab a bag that's light and compact. I put a post up over on TRP with full details and pictures. Check it out.
Sunday, November 04, 2007
Case Moose Follow Up
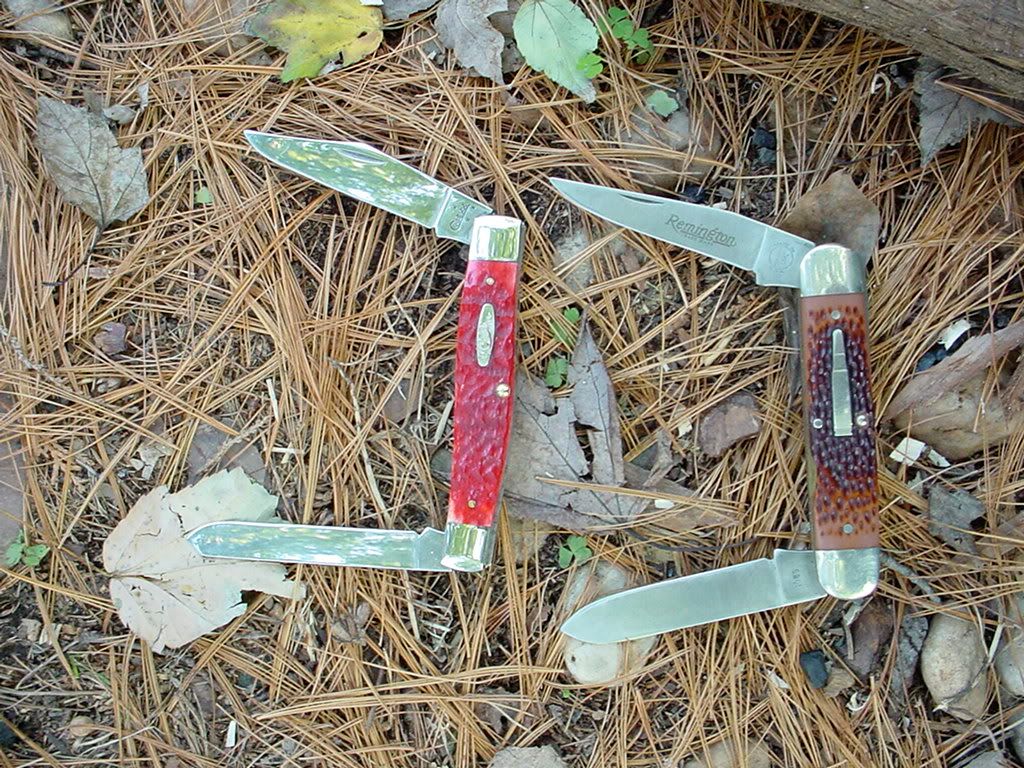
I got the chance to go out back this afternoon and play with the Case Moose I got Friday. Here it is next to my Remington Woodsman:
The next picture shows it next to a fire lay and my Cold Steel Trail Hawk:
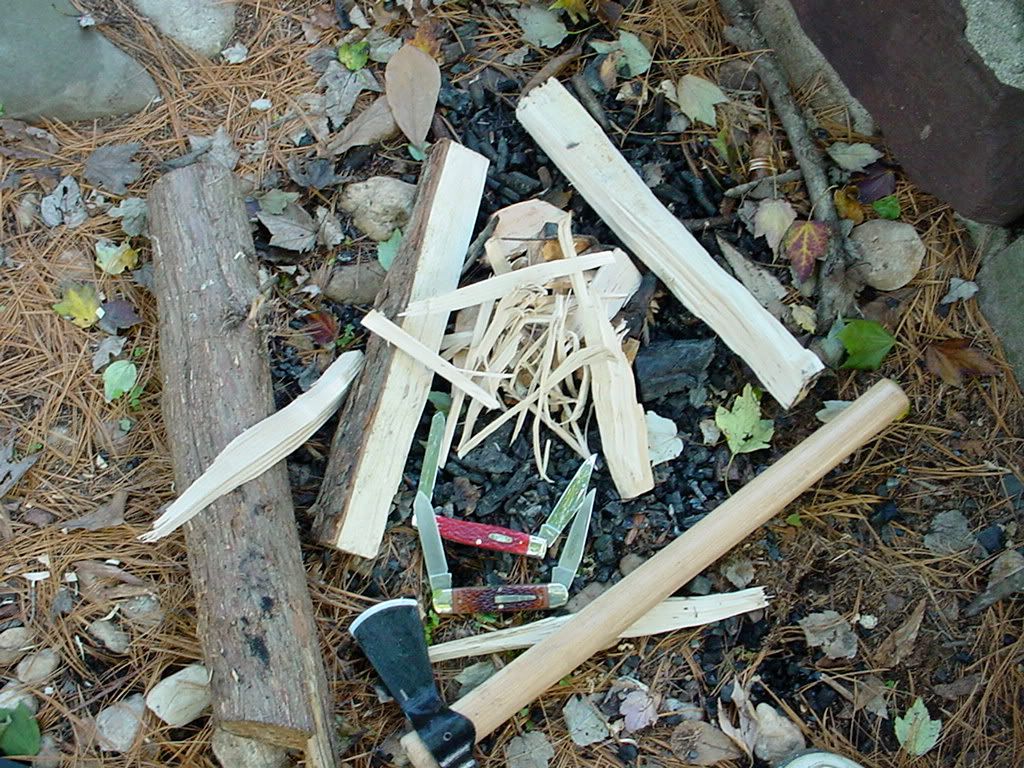
You can't see it in the pic, but there is a wad of unraveled jute twine in the middle of the fire lay. Between the jute, the fuzz sticks, and one match, I had a good fire going in about 20 seconds.
As an aside, I am reevaluating my opinion of the CS Trail Hawk. I wasn't too impressed with it when I first got it. For chopping branches and stuff it's a bit small. However, it worked very well for splitting up some small logs and chopping splinters off the sides for use in making up the fire lay shown.
The next picture shows it next to a fire lay and my Cold Steel Trail Hawk:
You can't see it in the pic, but there is a wad of unraveled jute twine in the middle of the fire lay. Between the jute, the fuzz sticks, and one match, I had a good fire going in about 20 seconds.
As an aside, I am reevaluating my opinion of the CS Trail Hawk. I wasn't too impressed with it when I first got it. For chopping branches and stuff it's a bit small. However, it worked very well for splitting up some small logs and chopping splinters off the sides for use in making up the fire lay shown.
Friday, November 02, 2007
Case Moose Pocketknife
As I alluded to in my post last week about my Remington Woodsman Bullet Knife, I picked up a Case Moose with chrome vanadium blades and red jigged bone handle scales (#6979). I ordered it Monday morning from Sawyer's Cutler on eBay and it arrived in the mail today.
Although the same general pattern as the Remington, the Case is slimmer overall and a bit lighter. My first impression is that the quality is much better, and it came with both blades razor sharp. (The Remington's spey blade was especially bad out of the box.) They may be the sharpest blades I've ever seen on a factory knife, as a matter of fact. I am going to use the knife without touching up the blades first, to see how long the edges last.
The reason I got chrome vanadium steel blades rather than stainless is that with the exception of my Victorinox knives, every knife I've had with a stainless blade has been a real bitch and a half to sharpen. Knife makers tend to make stainless blades very hard. This means that they retain an edge well but when it comes time to sharpen them doing so takes a lot of work. I'd rather have to sharpen a knife a bit more often if doing so is relatively easy. I can put a razor edge on a thin carbon steel blade like on my Opinel Number 8 in only a few minutes. A stainless blade of similar thickness but much harder will take about two or three times as long, using a bench stone. I'd rather not think about having to resharpen such a blade in the field using a short pocket hone.
The Case feels nice in the hand and sits well in my front pocket. It's longer but slimmer than the Victorinox Farmer I've been carrying everyday for the past month or so.
I plan to employ the Case's clip blade for general use, keeping the spey in reserve as an always handy razor sharp edge. The spey would also be good for skinning game without poking through the hide in unwanted places, or opening packages with a reduced risk of damaging the contents.
In his seminal book, Woodcraft, George Washington Sears, AKA "Nessmuk" carried a trio of cutting implements:
One could make a modern day Nessmuk trio for a modest sum with a Case Moose, a Swedish Mora fixed blade, and a small hatchet or even a folding saw. It would handle pretty much any cutting need one would encounter in a North American forest.
A Moose or another similar high quality traditional pocketknife would also serve well in an urban or suburban emergency kit. However, it does fall behind Swiss Army Knives and multitools in overall usefulness, since it lacks impelements like screwdrivers and can openers. A traditional slipjoint knife would make a fine complement for a multitool, though, since the knife blades on most such tools aren't as convenient as those on a dedicated knife.
Although the same general pattern as the Remington, the Case is slimmer overall and a bit lighter. My first impression is that the quality is much better, and it came with both blades razor sharp. (The Remington's spey blade was especially bad out of the box.) They may be the sharpest blades I've ever seen on a factory knife, as a matter of fact. I am going to use the knife without touching up the blades first, to see how long the edges last.
The reason I got chrome vanadium steel blades rather than stainless is that with the exception of my Victorinox knives, every knife I've had with a stainless blade has been a real bitch and a half to sharpen. Knife makers tend to make stainless blades very hard. This means that they retain an edge well but when it comes time to sharpen them doing so takes a lot of work. I'd rather have to sharpen a knife a bit more often if doing so is relatively easy. I can put a razor edge on a thin carbon steel blade like on my Opinel Number 8 in only a few minutes. A stainless blade of similar thickness but much harder will take about two or three times as long, using a bench stone. I'd rather not think about having to resharpen such a blade in the field using a short pocket hone.
The Case feels nice in the hand and sits well in my front pocket. It's longer but slimmer than the Victorinox Farmer I've been carrying everyday for the past month or so.
I plan to employ the Case's clip blade for general use, keeping the spey in reserve as an always handy razor sharp edge. The spey would also be good for skinning game without poking through the hide in unwanted places, or opening packages with a reduced risk of damaging the contents.
In his seminal book, Woodcraft, George Washington Sears, AKA "Nessmuk" carried a trio of cutting implements:
- A large folding knife quite similar to a Case Moose,
- A fixed knife with about a 4" blade which was thin so it was good for slicing, and
- A pocket axe with two edges, one fine and the other a bit coarser.
One could make a modern day Nessmuk trio for a modest sum with a Case Moose, a Swedish Mora fixed blade, and a small hatchet or even a folding saw. It would handle pretty much any cutting need one would encounter in a North American forest.
A Moose or another similar high quality traditional pocketknife would also serve well in an urban or suburban emergency kit. However, it does fall behind Swiss Army Knives and multitools in overall usefulness, since it lacks impelements like screwdrivers and can openers. A traditional slipjoint knife would make a fine complement for a multitool, though, since the knife blades on most such tools aren't as convenient as those on a dedicated knife.
Wednesday, October 31, 2007
Qualcomm Stadium Evacuation Center AAR
The following email is reposted with the author's permission. It was originally sent to the Yahoogroups misc_survivalism_moderated group by mjgarcia -at- yahoo.com. It is unedited with the exception of slight formatting revisions.
From: mjgarcia -at- yahoo.com
Subject: [MSM] Qualcomm Stadium Evacuation Center AAR
Date: October 30, 2007 5:04:06 AM EDT
I don't know how valuable this will be to those out there. I mostly lurk here, and occasionally chuckle at the endless debates over calibers and the ideal handgun (which to settle that dispute...the ideal handgun is whatever gun you have in your hand that you can use with proficiency).
I spent a couple of days working at the main material distribution center at Qualcomm Stadium during the recent fires there. I live in Phoenix, but lived in San Diego for close to a decade and have family there.
My primary bug out vehicle as well as my daily driver is a modified 1991 VW Vanagon with the full camper interior. I've rebuilt and improved just about everything on it and added a fair amount to increase its reliability. I also use it to do a lot of camping
which further allows me to refine my gear and tactics. I'm very capable of being self sustaining without primary infrastructure support for extended periods.
I usually keep a notepad and pen with me and take notes constantly. I did so during this crisis. I just finished an After Action Review of my experience. Please bear in mind that these are my own limited observations. I'm sure other's experiences could be vastly
different.
I recommend volunteering during a similar crisis, if you can, without becoming a burden. Beyond lending a helping hand, the lessons learned are considerable.
Qualcomm Stadium After Action Review
Purpose:
1. Help out the evacuation efforts in whatever capacity possible
2. Exercise my own bug out practices
3. Learn more about large scale disasters and evacuations
Goals:
1. Be self-sustaining for whatever period needed to help out disaster relief. Initial plan was for 2 weeks minimum, limited by water. Food supplies were 4 weeks. If I find I'm getting in the way more than I'm helping, I'm leaving.
2. Support evacuation center during disaster
3. Be able to bug out of my own home within 30 minutes
What Happened?
Tuesday, October 23:
Went on-line to identify location of evacuation shelters, and print out the most current map of fires in San Diego County. Decided easiest place to start would be Qualcomm stadium. Updated my list of scanner frequencies.
Packed up van in 20 minutes. Longest item was filling up water (2-7 gallon containers). Gear was pre-packed in 4 Rubbermaid ActionPacker Storage Boxes and 1 24 gallon ActionPacker Storage Box for the food. Included a bag of work clothes prepacked for bugout. Left behind firearms, mountain bike and important documents. Was on
the fence about taking a pistol for personal protection, but decided not to run afowl of the law in California. Left the mountain bike behind because I didn't think I would be using it. Left behind the important documents because it wasn't my bug out, and I didn't want to have to leave them unsecured in my van. Going forward, I'll add a strong box to the van to secure such documents.
Left Phoenix at 11:30 pm, after filling gas tank and checking oil. Drove through the night, heading to San Diego via I-8. Monitored XM radio, channel 247, which was rebroadcasting feed from KOGO in San Diego.
Saw first glow from the fires from just west of El Centro, approximately 100 miles away. Saw first fires around Alpine, CA, just before sunrise.
Wednesday, October 24:
Arrived in El Cajon around 0630. Refueled gas tank and filled spare tanks. Called brother who lives in El Cajon to let him know how close the fires were. He's packed and ready to leave. His plan was to head East, and go to Phoenix to stay with me. Arrived at Qualcomm Stadium around 0730. Parked the van near a fenced area at the far end of the parking lot. I walked into the fenced area, and spoke to a person who appeared in
charge (carrying a clip board). After about 5 minutes of instruction, I began helping.
This was the main distribution hub for donations. The volunteers were working in one of 3 separate groups. The first was unloading donations from cars that were queued in 2 lines. Another similar group was unloading large volume donations from churches, stores,and other organizations. The second group, where I started working was taking the unloaded donations and separating them into various categories: pet food, hygiene products, snacks, staples, etc. The third group was helping the various shelters that would arrive with a U-Haul or truck to fill their orders for supplies.
It was very well organized for something so hastily put together. The man in charge was responsible for San Diego's warehousing operations.
Around 3 pm, National Guard troops showed up to provide security around our perimeter. The night before someone had cut the fence and made off with an undetermined amount of supplies. I worked throughout Wednesday into Wednesday night. I spoke with several of my family members who live in the San Diego area via cell
phone to get updates on how everyone was doing. No one had heard from my uncle who lives up in Rancho Bernardo and had to leave in a hurry. My Aunt who had to leave her home in the Vista area was OK and safe. Cellular service was spotty during the day with calls dropped and generally poor reception.
Thursday, October 25
I went back to work for a while helping to finish up organizing material. They announced that they had started clearing the stadium from the top down and that evacuees were going to be relocated to the Del Mar Fairgrounds. I was released around noon, since there were more than enough volunteers to finish up. At the Stadium they
also didn't need any more volunteers, so I left. I went to my brothers and check on other evacuation centers to see in they needed volunteers. None that I contacted needed any more help.
What worked:
1. Packing gear went smooth and fast. New collapsible handcart speeded loading of van considerably. $49 at Cabela's. Having pre-staged gear was useful
2. Bug out list. The only change to the list would be to add an American flag
3. Van ran well. No issues. Refueling before entering the effected area was a good idea. I had a range of 500 miles fully loaded. The small fan inside the van made sleeping easier.
4. The organization and teamwork at the stadium. The city and state didn't wait for federal officials to come in to `rescue' them as appeared to be the case after Katrina. By the time a federal disaster declaration was announced Wednesday, the evacuation and
distribution centers had been up and functioning for almost 72 hours.
5. Didn't need to bring firearms. There was sufficient security this time.
6. Personal hygiene planning. I used baby wipes to substitute for showers for close to 3 days. Made sure I had foot powder as well. Sunscreen helped as well as sunglasses and a wide brimmed hat.
7. Good work gloves and good work boots.
8. XM radio. I was able to determine the situation by listening to satellite radio
9. SSB radio. I spoke to a couple of truckers coming from San Diego to get first hand situation reports.
10. Scanner. I was able to program in the frequencies I needed to keep a good idea of the changing situation once I arrived in San Diego.
11. Security. In general good, especially after the National Guard showed up. But there were individuals and groups who tried to steal supplies, and some succeeded. The lighting in the parking lot helped with the sense of security. Power in the area was threatened by the fires, and had that gone down, the situation could have turned less secure pretty quickly. The distribution center was running off a stand alone generator, so I would have been able to gauge the situation and decide what to do in a lit and somewhat secure environment.
12. The wind changed direction on Wednesday. If it hadn't, things would have gotten worse. Potentially much worse.
What didn't work:
1. Mattress. After working long and hard, sleeping was difficult. I added a 1.5" memory foam mattress cover after I left, and spent a blissful night sleeping on that. Great improvement.
2. Air quality. The small paper face masks provided may have helped a little, but not much, especially with physical activity. Better face mask to filter out junk would be a major improvement in this scenario.
3. Noise and light. Trying to sleep was difficult in a lit parking lot full of activity. Ear plugs and eye covers would have helped.
What to do differently next time:
1. Calling tree. Within my own family it was difficult ascertaining everyone's status.
2. Backup calling tree.
3. Add a lockbox to the van to store important documents
4. Consider a satellite phone. Cellular phones weren't doing so well and were overloaded. Expensive but adds a layer of communication.
5. Add more solar panels. If this had gone beyond 72 hours, I would have had to run the engine to recharge the batteries, wasting fuel. The single solar panel wouldn't be adequate to maintain the batteries, and doesn't provide redundancy.
Several other thoughts:
While I was able to get out of my apartment in around 20 minutes, my uncle had less than a minute to get out. He had already loaded his car, so was able to take the most important items with him. His house wasn't severely damaged, except for smoke damage and ash everywhere. My aunt who also evacuated was able to return to her home Thursday, which wasn't seriously threatened. My brother's house in El Cajon wasn't affected and he wasn't forced to evacuate. I returned to Phoenix on Saturday. The 92 year old grandmother of the wife of one of my technicians here was evacuated to Qualcomm Stadium. They weren't able to contact her for several days. Again, a good calling tree would have helped me find that information out. I could have found her and relayed information.
Sunday, October 28, 2007
Remington Woodsman 1985 Bullet Knife
This afternoon after getting errands done, I spent some time out back with my Remington Woodsman Bullet Knife. This is one of the limited edition Bullet Knives that Remington has been putting out since 1982. I bought it new in 1985 (the year of issue) and still have the original box and papers. I paid about $30 and after some googling, it looks like they're going for around $100 in 2007. The rest of my investments should do so well (not that I plan on ever selling it.)
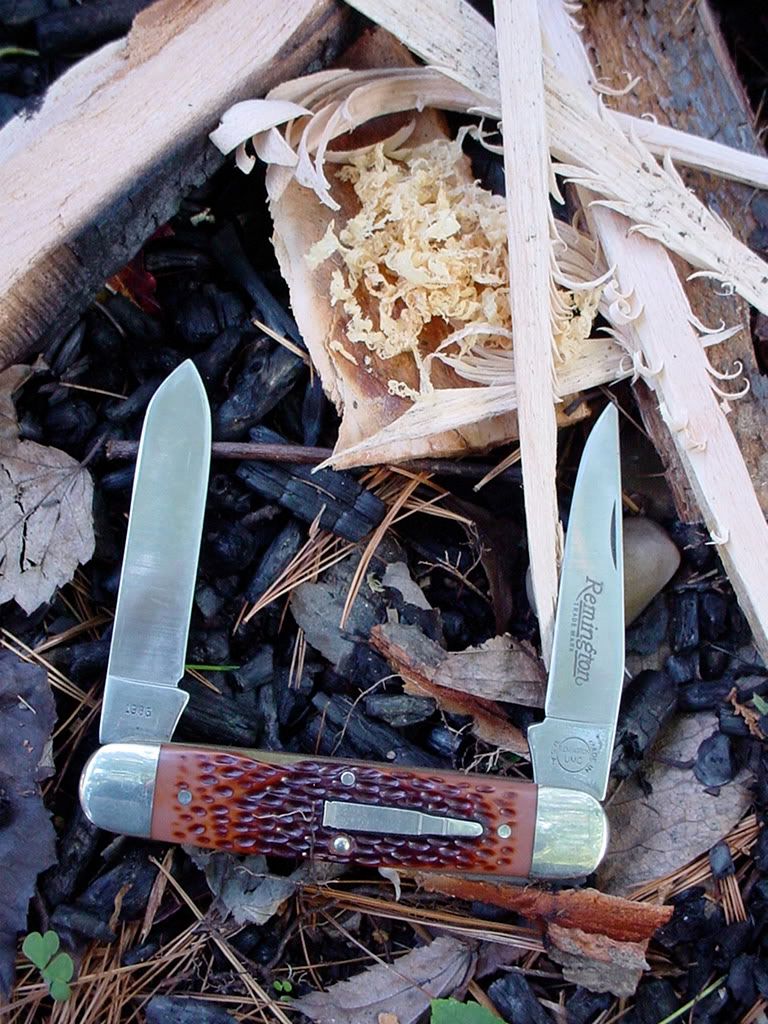
When I bought it, the Remington's 440 stainless blades were butterknife dull. I suspect that not much attention was paid to putting a good edge on at the factory, since Remington figured that most of them would be safe queens for collectors. With a lot of elbow grease I put sharp edges on both blades. I touched them up a bit today before going out back.
The knife is 4.25" long closed, with one clip and one spey blade. The scales are made from Delrin. This is a good sized knife, pretty large for a folder but not too big to keep in a pocket. The spey blade is designed for castrating bulls (!) but is also very useful for skinning game. The clip is a good general purpose blade. This pattern with a clip and a spey hinged on opposite ends is sometimes called a "Moose" pattern.
One advantage of a two-bladed design like this is that you can keep one edge razor sharp in case you need a super sharp blade, and rely on the other edge for normal use. Case currently makes a similar knife with chrome vanadium steel, for those who prefer to not use a collector's item and/or who don't like stainless steel knives. I think I see one of them in my future. ;)
Combine a Woodsman or a Case Moose with a 4" or 5" fixed blade knife and a double-bitted hatchet, and you've got a "Nessmuk" combination. I'm nowhere near the woodsman that George Washington Sears was, but I'd feel very well equipped heading into the woods with the Woodsman or a Case Moose, my Victorinox SwissTool RS, Becker BK7, and my Valiant Golok. (OK, I cheated and added one more knife than Nessmuk took, and my fixed blade is longer than his. Sue me.)
The Woodsman has a good heft and feels nice in the hand. It sliced up some hardwood to make fuzz sticks, and shaved some fatwood (the small yellow curls in the center of the first picture) for tinder easily. The thin blades would handle slicing food very well.
After I had a fire going I relaxed with a bowl of Old Ironsides Latakia.
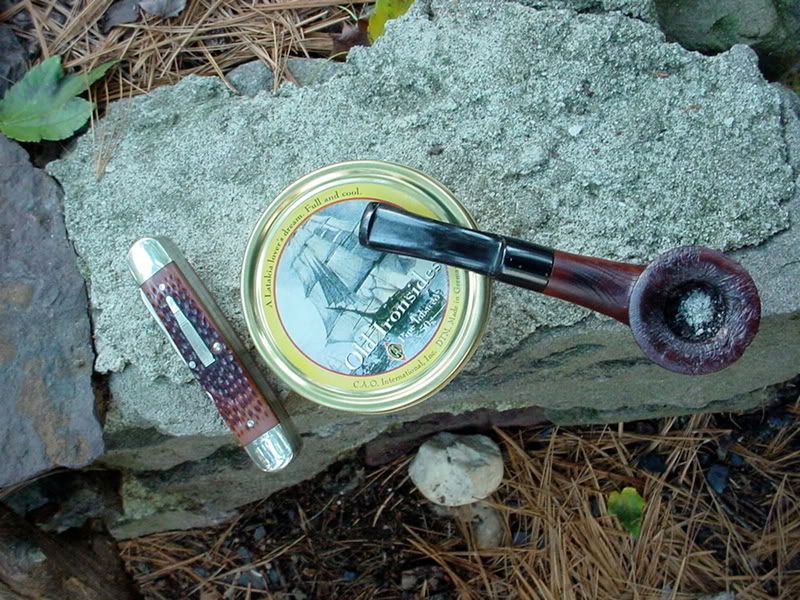
I bought the tobacco mainly because I thought the tin would make a good container for a personal survival kit. The Latakia was nice though, and I plan on going back to see if the shop has any more. The tin was vacumed sealed and to open it I had to pry open the side a little with the reamer on my Victorinox Farmer to let in some air. Neither I, my dad, nor my brother could unscrew it. I figure sealed like that, it should last damn near forever.
When I bought it, the Remington's 440 stainless blades were butterknife dull. I suspect that not much attention was paid to putting a good edge on at the factory, since Remington figured that most of them would be safe queens for collectors. With a lot of elbow grease I put sharp edges on both blades. I touched them up a bit today before going out back.
The knife is 4.25" long closed, with one clip and one spey blade. The scales are made from Delrin. This is a good sized knife, pretty large for a folder but not too big to keep in a pocket. The spey blade is designed for castrating bulls (!) but is also very useful for skinning game. The clip is a good general purpose blade. This pattern with a clip and a spey hinged on opposite ends is sometimes called a "Moose" pattern.
One advantage of a two-bladed design like this is that you can keep one edge razor sharp in case you need a super sharp blade, and rely on the other edge for normal use. Case currently makes a similar knife with chrome vanadium steel, for those who prefer to not use a collector's item and/or who don't like stainless steel knives. I think I see one of them in my future. ;)
Combine a Woodsman or a Case Moose with a 4" or 5" fixed blade knife and a double-bitted hatchet, and you've got a "Nessmuk" combination. I'm nowhere near the woodsman that George Washington Sears was, but I'd feel very well equipped heading into the woods with the Woodsman or a Case Moose, my Victorinox SwissTool RS, Becker BK7, and my Valiant Golok. (OK, I cheated and added one more knife than Nessmuk took, and my fixed blade is longer than his. Sue me.)
The Woodsman has a good heft and feels nice in the hand. It sliced up some hardwood to make fuzz sticks, and shaved some fatwood (the small yellow curls in the center of the first picture) for tinder easily. The thin blades would handle slicing food very well.
After I had a fire going I relaxed with a bowl of Old Ironsides Latakia.
I bought the tobacco mainly because I thought the tin would make a good container for a personal survival kit. The Latakia was nice though, and I plan on going back to see if the shop has any more. The tin was vacumed sealed and to open it I had to pry open the side a little with the reamer on my Victorinox Farmer to let in some air. Neither I, my dad, nor my brother could unscrew it. I figure sealed like that, it should last damn near forever.
Saturday, October 27, 2007
More Fire Starting in the Dark and Wet
Last month, I wrote about trying to start fires when it's dark and wet. I did a bit more experimentation along those lines last night, although with less success. Actually, no success. The last time I tried it, my wood was wet but it wasn't raining much. Last night, the rain was coming down harder.
My choice of tinder last night was some fatwood. I bought a box of this the other night at Lowe's, where it's stocked near the barbecue and fireplace stuff. I've read about fatwood in several postings on the BladeForums Wilderness & Survival Skills forum, and wanted to try it out.
Fatwood is pine with a higher than normal resin or pitch content. Pine pitch is very flammable. The reason fatwood has a higher pitch content is that it's from a tree that died violently, whether from a lightning strike or being cut down. Until the roots die, they'll continue to pump pitch up into the stump, saturating it with the flammable resin.
Fatwood is water resistant, cheap, and burns extremely well. When shaved into a fuzz with a knife, it ignites easily with sparks from a ferrocerium rod. At least long as it isn't soaking wet.
Before trying to get a fire going in the rain, I made a small pile of fatwood fuzz immediately outside my front door, where it was sheltered from the rain. After a few strokes on the ferro rod it ignited and burned for about 30 seconds. If I had dry secondary tinder and fuel to work with, I would easily have been able to start a fire.
A little while later I went out back with a couple pieces of fatwood, my golok, and my Victorinox Farmer to which is attached a Countycomm Peanut lighter and a Photon Microlight II. I also put in my pockets a ferro rod, a box of REI Stormproof matches, and a tealight.
I started by splitting slivers of wood from a piece of dry firewood taken out of my shed. I gathered these on a garbage bag to keep them off the wet ground and tried to shield them from the rain with my body. Next I made up a pile of fatwood fuzz.
As quickly as possible I made a fire lay with the fuzz sitting on top of a dry piece of bark, surrounded by the dry wood slivers.
Unfortunately, the whole fire lay quickly got wet. Also, the ferro rod would no longer throw sparks once wet. I tired the Peanut lighter but as soon as a raindrop hit the top it went out and was too wet to start until I later took it in and dried it out. The one reliable spark source I had were the REI matches. But by this time all my once dry tinder and kindling was sopping wet. Not to mention I was soaked.
Another problem I had was that as I tried to get sparks from the ferro rod after it got wet, a couple times I disturbed my fire lay, getting it wetter.
Since the fatwood worked when it wasn't too wet I do plan to add a couple pieces to my possibles bag to complement the 35mm film canister of Vaseline cotton balls and hexamine Esbit fuel.
So far, the one method I've tried which will get a fire started when it's raining is a magnesium road flare. When I was in a Civil Air Patrol ground search and rescue squadron from 1985 - 90, I carried one in my butt pack. Flares burn very hot and for 15 or 30 minutes, so they are able to dry out and ignite wet wood. Today, I carry a few in the back of my truck, for both their intended use and in case I get stuck somewhere and need to start a fire. Note that flares have a shelf life so they should be replaced every few years.
Upcoming tests will use hexamine, trioxane, and fire starters made from dyer lint and/or wood shavings in cardboard egg cartons, soaked in wax.
For now, I'm thinking that unless one has a flare when all potential fuel is wet and it's raining, concentrating one's efforts on constructing some shelter first to get out of the rain makes more sense than trying to get a fire going. After that, then think about starting a fire, because you'll be able to setup you fire lay where it won't get rained on and swamped before you really get it going.
My choice of tinder last night was some fatwood. I bought a box of this the other night at Lowe's, where it's stocked near the barbecue and fireplace stuff. I've read about fatwood in several postings on the BladeForums Wilderness & Survival Skills forum, and wanted to try it out.
Fatwood is pine with a higher than normal resin or pitch content. Pine pitch is very flammable. The reason fatwood has a higher pitch content is that it's from a tree that died violently, whether from a lightning strike or being cut down. Until the roots die, they'll continue to pump pitch up into the stump, saturating it with the flammable resin.
Fatwood is water resistant, cheap, and burns extremely well. When shaved into a fuzz with a knife, it ignites easily with sparks from a ferrocerium rod. At least long as it isn't soaking wet.
Before trying to get a fire going in the rain, I made a small pile of fatwood fuzz immediately outside my front door, where it was sheltered from the rain. After a few strokes on the ferro rod it ignited and burned for about 30 seconds. If I had dry secondary tinder and fuel to work with, I would easily have been able to start a fire.
A little while later I went out back with a couple pieces of fatwood, my golok, and my Victorinox Farmer to which is attached a Countycomm Peanut lighter and a Photon Microlight II. I also put in my pockets a ferro rod, a box of REI Stormproof matches, and a tealight.
I started by splitting slivers of wood from a piece of dry firewood taken out of my shed. I gathered these on a garbage bag to keep them off the wet ground and tried to shield them from the rain with my body. Next I made up a pile of fatwood fuzz.
As quickly as possible I made a fire lay with the fuzz sitting on top of a dry piece of bark, surrounded by the dry wood slivers.
Unfortunately, the whole fire lay quickly got wet. Also, the ferro rod would no longer throw sparks once wet. I tired the Peanut lighter but as soon as a raindrop hit the top it went out and was too wet to start until I later took it in and dried it out. The one reliable spark source I had were the REI matches. But by this time all my once dry tinder and kindling was sopping wet. Not to mention I was soaked.
Another problem I had was that as I tried to get sparks from the ferro rod after it got wet, a couple times I disturbed my fire lay, getting it wetter.
Since the fatwood worked when it wasn't too wet I do plan to add a couple pieces to my possibles bag to complement the 35mm film canister of Vaseline cotton balls and hexamine Esbit fuel.
So far, the one method I've tried which will get a fire started when it's raining is a magnesium road flare. When I was in a Civil Air Patrol ground search and rescue squadron from 1985 - 90, I carried one in my butt pack. Flares burn very hot and for 15 or 30 minutes, so they are able to dry out and ignite wet wood. Today, I carry a few in the back of my truck, for both their intended use and in case I get stuck somewhere and need to start a fire. Note that flares have a shelf life so they should be replaced every few years.
Upcoming tests will use hexamine, trioxane, and fire starters made from dyer lint and/or wood shavings in cardboard egg cartons, soaked in wax.
For now, I'm thinking that unless one has a flare when all potential fuel is wet and it's raining, concentrating one's efforts on constructing some shelter first to get out of the rain makes more sense than trying to get a fire going. After that, then think about starting a fire, because you'll be able to setup you fire lay where it won't get rained on and swamped before you really get it going.
Friday, October 26, 2007
Looters in CA
As I mentioned the other day, looters are a concern any time there's any kind of civil disturbance. I've seen a few news reports mentioning that looters have indeed crawled out from under their rocks in the wake of the southern California fires. (Example.)
Looters are scavengers, creatures of opportunities. While an AR-15, AK-47, or Mossberg 590 is a fine choice for dissuading them, you don't need a "tactical" gun. An old .30-30 or a cheap Remington 870 Express will provide plenty of firepower. The key is the knowledge of how and when to use it, and the will to do so.
Looters are scavengers, creatures of opportunities. While an AR-15, AK-47, or Mossberg 590 is a fine choice for dissuading them, you don't need a "tactical" gun. An old .30-30 or a cheap Remington 870 Express will provide plenty of firepower. The key is the knowledge of how and when to use it, and the will to do so.
Wednesday, October 24, 2007
Thoughts on the Southern California Fires
As of the latest news report this morning about 650 square miles of Southern California have burned. Along with this over 880,000 people have been forced to evacuate, the largest evac in California history. One person suspected of arson is in police custody.
Hopefully we can learn a few things from this tragedy:
Hopefully we can learn a few things from this tragedy:
- Building homes in an area prone to wildfires fanned by 100 MPH winds probably isn't a good idea.
- If you're going to ignore point 1, keep foliage well back from your home so there's something of a firebreak.
- Again, if you're going to ignore point 1, construct your home so it's fire-resistant, e.g, metal or terra cotta roof, concrete exterior, fire resistant eaves, and having a swimming pool or pond for the fire department to tap into, or at least a pump and hose so you can wet down the area.
- Have supplies handy so that you can bug out on short notice: water, food, extra clothes, N95 masks, etc. An encrypted USB flash drive with copies of important documents and contact lists would be very good to have. Keep your evacuation kit in boxes you can quickly put in your vehicle. The government recommends enough for 72 hours but at least a week is more realistic.
- You might need to camp somewhere. Have a tent big enough for your family, blankets or sleeping bags, and some means of cooking meals, like a Coleman stove.
- Don't let your vehicle's fuel tank get less than half full, and keep some extra gas or diesel on hand. It would suck and possibly be fatal to run out of gas.
- Have some form of alternate communications. The cellular phone system is taking hits from high usage and some towers burning. Have a CB radio in your vehicle, it's the most common two-way radio commo system for use on the road. Consider getting your ham radio license, too. In some areas of SoCal I'm informed that ham is the only reliable form of long distance commo right now.
- I haven't heard about any looting yet, but I won't be surprised to hear if they crawl out from under their rocks. The only realistic defense against these scum is an armed citizenry. Have a gun and the knowledge of when and how to use it.
Sunday, October 21, 2007
Doan Magnesium Fire Starter Review
Today I practiced making fire, this time using a Doan magnesium fire starter. This is a piece of USGI gear consisting of rectangular bar of magnesium, to which a ferrocerrium rod is glued on one of the long sides. It also has a hole towards one end through which a beaded chain is threaded, and which can be used to secure it to your kit or to keep a striker handy.
The magnesium fire starters are waterproof and don't burn when solid. To use, you scrape the exposed long side of the bar to make a pile of magnesium shavings, which do burn. Once you've got a good pile, which takes some work, you flip the bar over and use a striker to scrape sparks off the ferrocerium rod into the pile. This will then flare up and light your secondary tinder and kindling.
A hacksaw blade snapped in half works fairly well for making the magnesium shavings and for making sparks. However, I used the reamer on my Victorinox Farmer Swiss Army Knife. It's easier to hold and works well.
While the magnesium shavings burn very hot, they don't burn for very long. Thus, it's critical that you make a big enough pile and have enough dry tinder, twigs, and kindling to keep the fire burning once the magnesium shavings burn out in short order.
My secondary tinder was wood shavings sliced off one of the firewood logs I picked up last weekend at Lowe's. The logs were my fuel, as well. They were supposed to be seasoned but still had a fair moisture content, as I discovered once I got the fire going.
I first created a pile of wood shavings then made a small pile of magnesium shavings next to and surrounded by the wood. The magnesium shavings lit after a few strikes from the ferrocerium but I was unable to get a sustained fire going.
Since my daughters were outside with my and wanted to get one with roasting some hot dogs, I switched over to a Bic lighter. However, I wasn't able to get a sustained fire going until I broke out a Coughlin's tinder wad (a wax impregnated cotton ball) and placed it among the coals left over from the burning wood shavings. That and blowing on the fire finally got it going.
Once the fire was going I saw and heard moisture bubbling out the end of the firewood, so it wasn't seasoned enough. It burned with a lot of smoke, too.
I'm not real impressed with the magnesium fire starter. It takes too long and requires too much effort to create a pile of shavings for your stage one tinder. Also, the shavings are so lightweight that the slightest bit of wind blows them around. Finally, the striker rod on the one side of the bar is thin compared to a Swedish Fire Steel, so it throws fewer sparks.
If I was stuck in the wilderness, would I take a Doan magnesium fire starter over a primitive fire starting method, such as a fire drill? You bet. It's easily pocketable, light, and does contain both a spark source and tinder in one waterproof package. However, I think there are better alternatives. For example, a ferrocerium rod (e.g., Swedish Fire Steel) and a 35mm film canister filled with cotton balls soaked in petroleum jelly take up little additional room but work much better. The PJ cotton balls burn hot AND long enough to get your secondary tinder going. Of course, one could carry the Doan fire starter and the PJ cotton balls, using the Doan's ferrocerium rod to ignite them.
I was also reminded of the utility of a large knife, machete, or axe when making woods shavings or splitting kindling from large pieces of wood. Today I relied on my Mora Swedish Army Knife, (#760MG) which is a great small fixed blade. They are inexpensive, take and retain a sharp edge, and have comfortable handles. However, they are short and light which means it takes significantly more effort to make a pile of wood shavings or split logs. If I'd been able to split more kindling the fire would have gotten going a lot more easily. This could be critical in a survival situation where you need a fire RFN, such as if you need to dry off in cold weather.
Once again, I'm glad I tried this out in my back yard, instead of out in the woods in a serious situation.
The magnesium fire starters are waterproof and don't burn when solid. To use, you scrape the exposed long side of the bar to make a pile of magnesium shavings, which do burn. Once you've got a good pile, which takes some work, you flip the bar over and use a striker to scrape sparks off the ferrocerium rod into the pile. This will then flare up and light your secondary tinder and kindling.
A hacksaw blade snapped in half works fairly well for making the magnesium shavings and for making sparks. However, I used the reamer on my Victorinox Farmer Swiss Army Knife. It's easier to hold and works well.
While the magnesium shavings burn very hot, they don't burn for very long. Thus, it's critical that you make a big enough pile and have enough dry tinder, twigs, and kindling to keep the fire burning once the magnesium shavings burn out in short order.
My secondary tinder was wood shavings sliced off one of the firewood logs I picked up last weekend at Lowe's. The logs were my fuel, as well. They were supposed to be seasoned but still had a fair moisture content, as I discovered once I got the fire going.
I first created a pile of wood shavings then made a small pile of magnesium shavings next to and surrounded by the wood. The magnesium shavings lit after a few strikes from the ferrocerium but I was unable to get a sustained fire going.
Since my daughters were outside with my and wanted to get one with roasting some hot dogs, I switched over to a Bic lighter. However, I wasn't able to get a sustained fire going until I broke out a Coughlin's tinder wad (a wax impregnated cotton ball) and placed it among the coals left over from the burning wood shavings. That and blowing on the fire finally got it going.
Once the fire was going I saw and heard moisture bubbling out the end of the firewood, so it wasn't seasoned enough. It burned with a lot of smoke, too.
I'm not real impressed with the magnesium fire starter. It takes too long and requires too much effort to create a pile of shavings for your stage one tinder. Also, the shavings are so lightweight that the slightest bit of wind blows them around. Finally, the striker rod on the one side of the bar is thin compared to a Swedish Fire Steel, so it throws fewer sparks.
If I was stuck in the wilderness, would I take a Doan magnesium fire starter over a primitive fire starting method, such as a fire drill? You bet. It's easily pocketable, light, and does contain both a spark source and tinder in one waterproof package. However, I think there are better alternatives. For example, a ferrocerium rod (e.g., Swedish Fire Steel) and a 35mm film canister filled with cotton balls soaked in petroleum jelly take up little additional room but work much better. The PJ cotton balls burn hot AND long enough to get your secondary tinder going. Of course, one could carry the Doan fire starter and the PJ cotton balls, using the Doan's ferrocerium rod to ignite them.
I was also reminded of the utility of a large knife, machete, or axe when making woods shavings or splitting kindling from large pieces of wood. Today I relied on my Mora Swedish Army Knife, (#760MG) which is a great small fixed blade. They are inexpensive, take and retain a sharp edge, and have comfortable handles. However, they are short and light which means it takes significantly more effort to make a pile of wood shavings or split logs. If I'd been able to split more kindling the fire would have gotten going a lot more easily. This could be critical in a survival situation where you need a fire RFN, such as if you need to dry off in cold weather.
Once again, I'm glad I tried this out in my back yard, instead of out in the woods in a serious situation.
Saturday, October 20, 2007
Some Vehicle Preps
Last weekend I picked up a Contico SUV Utility Box at Lowe's to organize the stuff I keep in the back of my Expedition. It' sturdy and just the right size for my truck.
Today I added a few items which may come in handy during an emergency:
The coffee can itself serves a couple different uses. First, it protects the contents. Second, it can be used as a pot.
All of the above augments the stuff in the get home bag kept in the truck.
As we get closer to winter, it's a good idea to reevalute the emergency supplies we keep in our vehicles, and restock or augment them as needed.
Today I added a few items which may come in handy during an emergency:
- My Ontario 12" Camper Machete. It's a nice chopper yet not too large.
- One of the Swiss surplus ponchos I picked up a couple months ago from Cheaper Than Dirt. I already had a poncho but this is heavier and can do double duty as a tarp or groundcloth.
- Two 3600 calorie packs of Mainstay ration bars.
- A coffee can containing a box of REI stormproof matches, a Swedish Fire Steel, 35mm film canister with petrolatum soaked cotton balls for tinder, a space blanket, some paracord, some flat packed duct tape, and a whistle with a compass and thermometer. I sealed the can with duct tape and wrote the contents on the outside with a Sharpie.
The coffee can itself serves a couple different uses. First, it protects the contents. Second, it can be used as a pot.
All of the above augments the stuff in the get home bag kept in the truck.
As we get closer to winter, it's a good idea to reevalute the emergency supplies we keep in our vehicles, and restock or augment them as needed.
Saturday, October 13, 2007
Mainstay Ration Bars
I've been carrying some Mainstay Ration Bars ("lifeboat rations") in the get home bag I keep in my truck. I chose them instead of MREs because they are designed for long term storage in harsh environments. I've had them for a couple years and although still good, I wanted to replace them with fresher ones. So, earlier this month I got some more. Today I decided to try one.
Not bad at all. It has the consistency of a cookie and a lemony taste. I had some water along with the bar and didn't notice that it made me thirsty or if it had an aftertaste.
Assuming your not allergic to any of the ingredients, or don't have any special dietary restrictions, these are worth looking at for emergency rations.
Not bad at all. It has the consistency of a cookie and a lemony taste. I had some water along with the bar and didn't notice that it made me thirsty or if it had an aftertaste.
Assuming your not allergic to any of the ingredients, or don't have any special dietary restrictions, these are worth looking at for emergency rations.
Valiant Large Survival Golok
After reading several online reviews (e.g., on http://www.oldjimbo.com) I got a Valiant Trading Co. Large Survival Golok earlier this week:
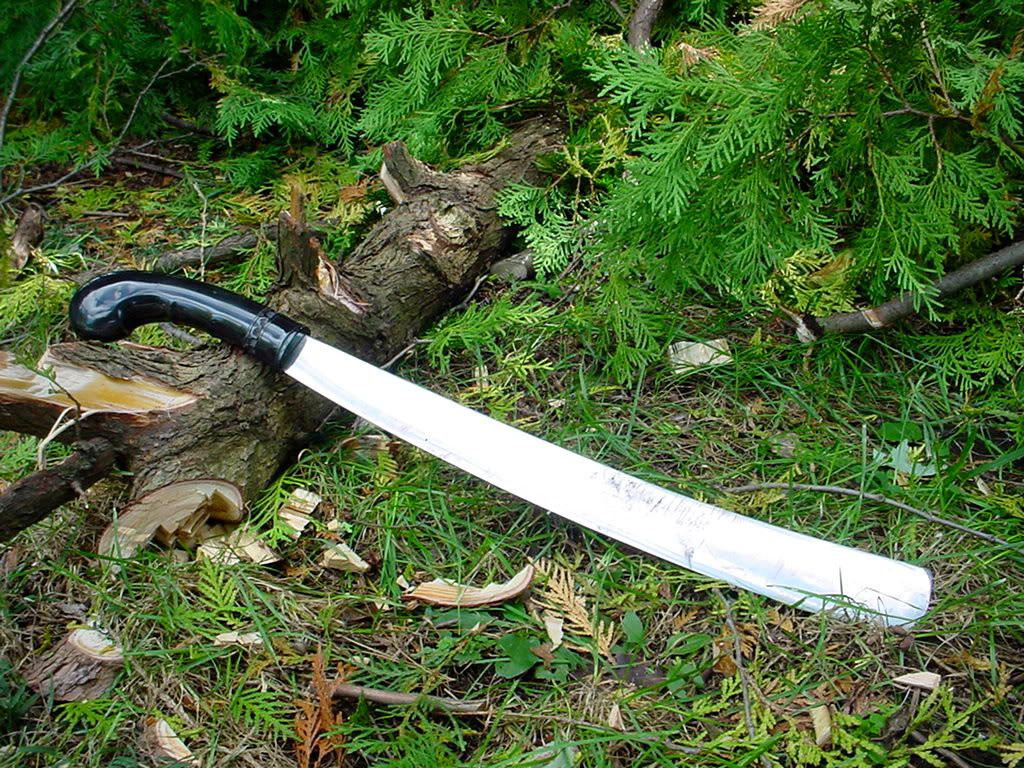
This golok is the closest thing I've held to a +10 vorpal sword.
Workmanship is very nice. It's nicely balanced and the buffalo horn handle is comfortable. The blade is ~15.5", hand forged, with a full convex grind and distal taper (thins towards the point). Weight is about 1.2 lbs. It came sharp enough to cut limply hanging newspaper. I almost sliced off my finger tip when wiping off the preservative oil it came in!
They're made in Java, then imported into Australia, then shipped to the US. I bought it from their US dealer, but just read on THR that he's closing up shop. Cost was $89 after shipping.
I took it out back today and used it for pruning some arborvitae. It works really well on woody plants, much better than a machete. The blade cross section prevents it from getting stuck the way a machete can. The handle was comfortable in use. The edge stayed sharp and didn't show any damage even after using the golok in lieu of a hatchet to chop down a couple trunks. I can see this golok being very useful in the woods.
A view in its wood and horn sheath:
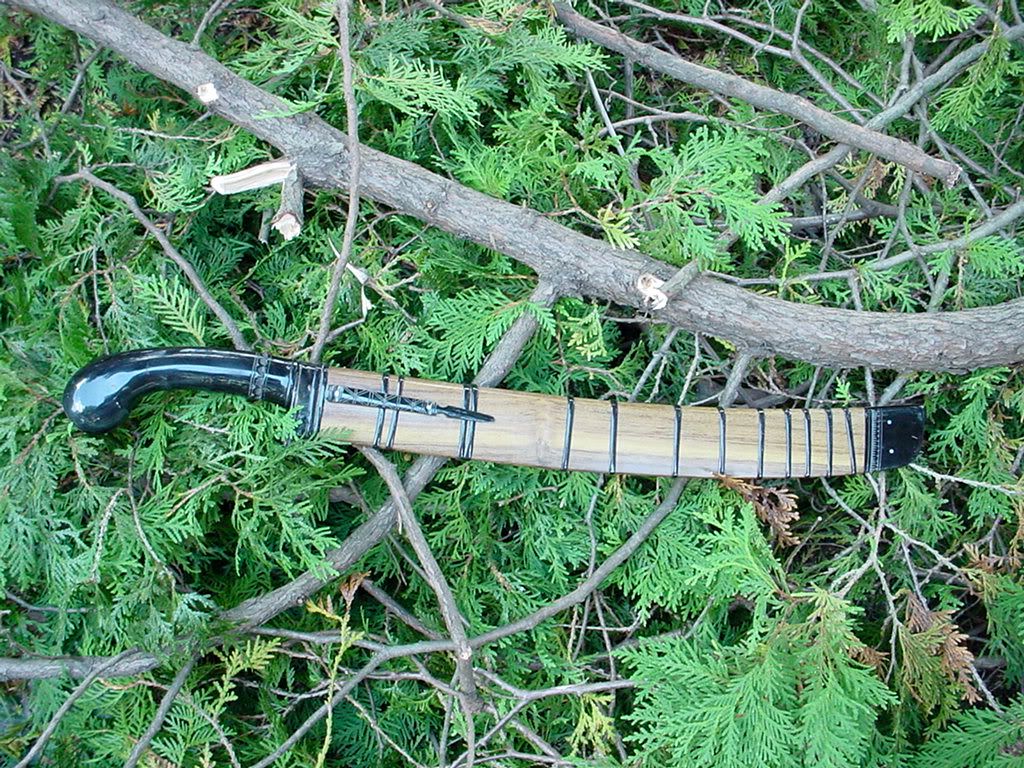
Handle and sheath closeup:
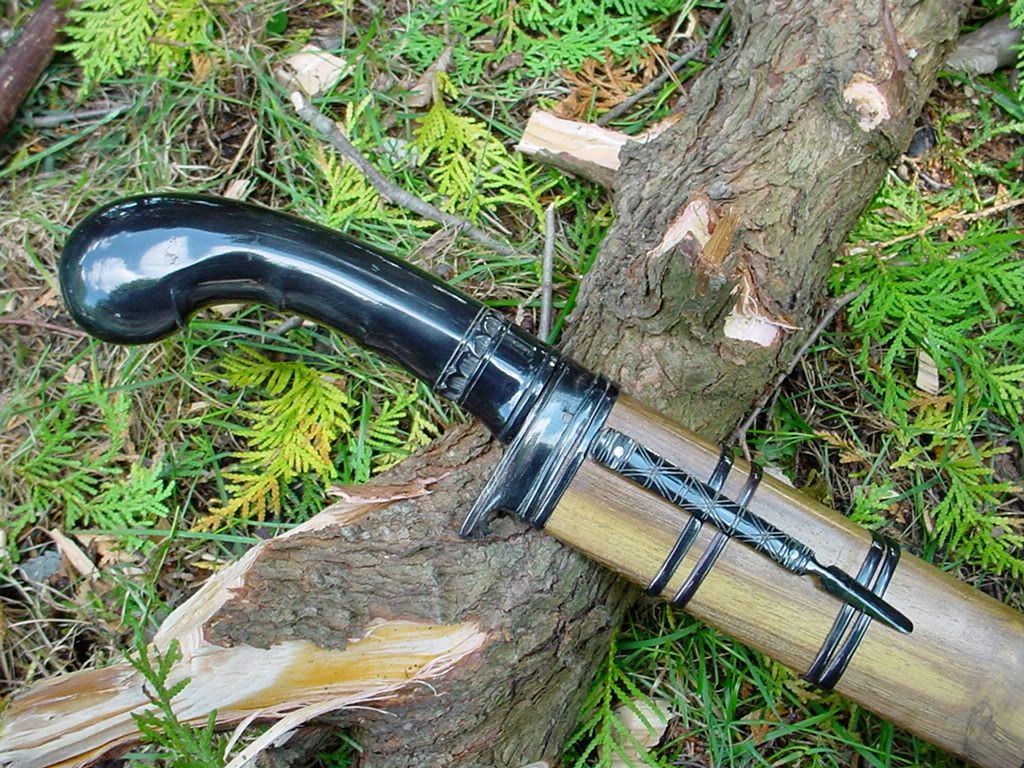
Chopping into a branch. You can see how deeply the golok bites:
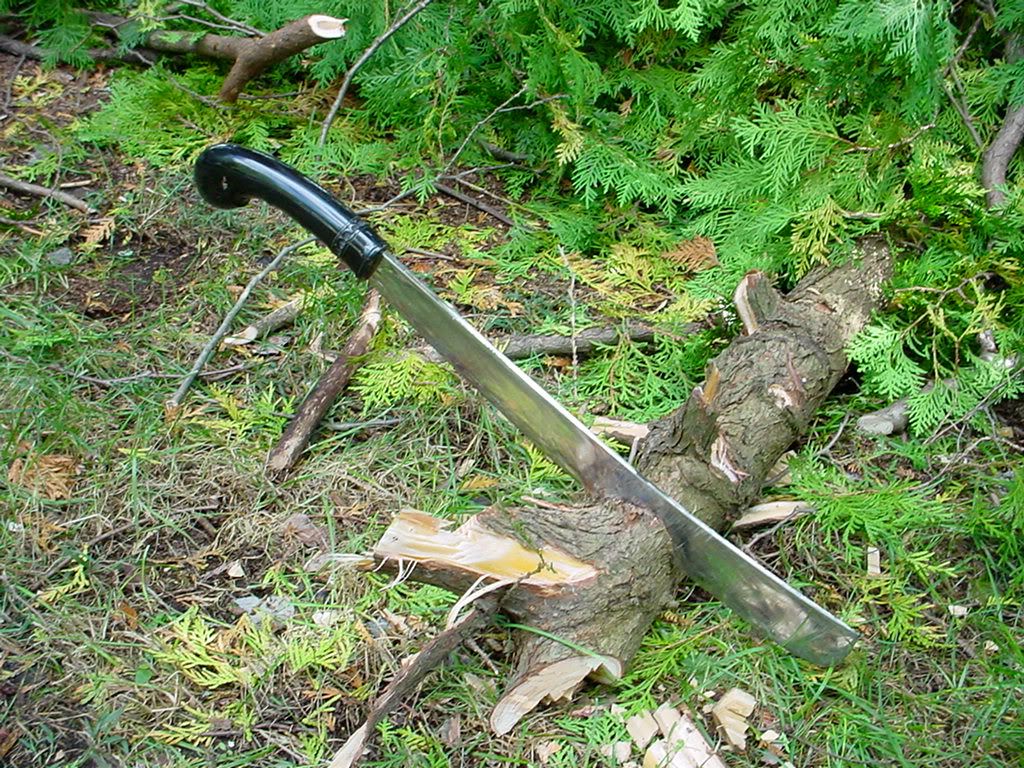
My reward after a morning of yardwork:
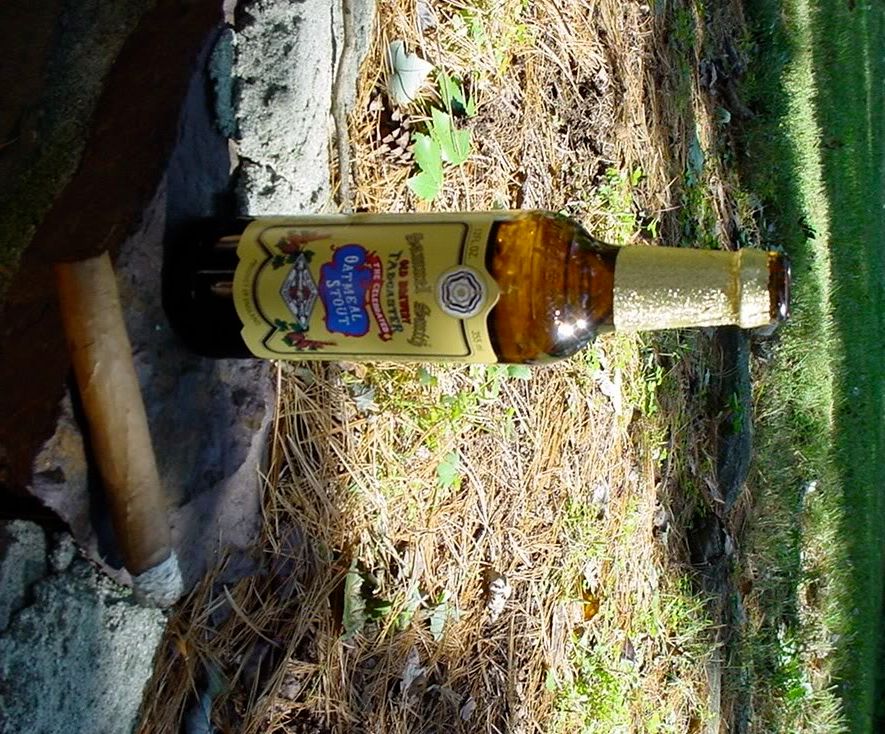
This golok is the closest thing I've held to a +10 vorpal sword.
Workmanship is very nice. It's nicely balanced and the buffalo horn handle is comfortable. The blade is ~15.5", hand forged, with a full convex grind and distal taper (thins towards the point). Weight is about 1.2 lbs. It came sharp enough to cut limply hanging newspaper. I almost sliced off my finger tip when wiping off the preservative oil it came in!
They're made in Java, then imported into Australia, then shipped to the US. I bought it from their US dealer, but just read on THR that he's closing up shop.
Cost was $89 after shipping.I took it out back today and used it for pruning some arborvitae. It works really well on woody plants, much better than a machete. The blade cross section prevents it from getting stuck the way a machete can. The handle was comfortable in use. The edge stayed sharp and didn't show any damage even after using the golok in lieu of a hatchet to chop down a couple trunks. I can see this golok being very useful in the woods.
A view in its wood and horn sheath:
Handle and sheath closeup:
Chopping into a branch. You can see how deeply the golok bites:
My reward after a morning of yardwork:
Saturday, October 06, 2007
Chopper Comparison
This morning I was able to do a little comparison between three chopping tools I have in my arsenal: a Cold Steel Trail Hawk, an Ontario 12" machete, and a Harbor Freight 18 machete. The victims of my cutting tests were a few arbovitae trees in my yard which were in dire need of pruning. First, some background on each of the tools.
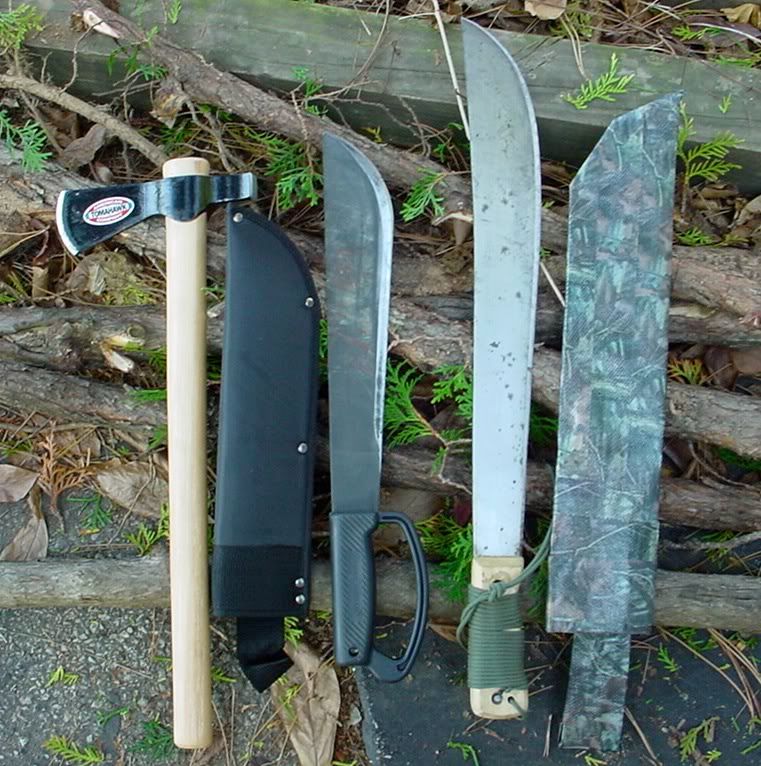
I've had the HF machete for a couple of years. Like most machetes it's on the soft side and came as dull as a butter knife. I put a semi-usable edge on it with a belt sander last year but was never really happy with it. A few weeks ago I bought some new files, reshaped the edge, then convexed it using sandpaper on top of a mousepad, taped to my workbench. I also drilled the handle for the lanyard and added a paracord wrap to the grip, which greatly improves the feel. The HF machete came with a cheap flimsy canvas sheath. I improved this by covering it with duct tape, first a couple layers of regular duct tape then a final layer of camo tape as shown below. This actually came out pretty good and I will look at giving it a polyurethane clear coat to make it more weather resistant.
I picked up the CS Trail Hawk a couple weeks ago mainly on a lark. I wanted a hawk that was smaller than my Dixon's hawk, which is about the same size as a CS Rifleman's Hawk. The Trail Hawk's head is rather small with a 2" edge, and a hammer poll. It came reasonably sharp, though I touchd it up with some sandpaper and began to convex the edge. The Trail Hawk did not come with a sheath.
The Ontario 12" machete was ordered around the same time as the Trail Hawk. It's made of 1095 carbon steel about 1/8" thick, which is thicker than the HF machete. The plastic handle is molded in place with a D-shaped hand guard. I find it pretty comfortable and like the hand guard. Like the HF machete, it came as dull as a spatula with a very uneven edge. Unlike the unfinished HF machete, it is parkerized. The Ontario has a secondary bevel next to the edge, while the HF does not. As you can see in the picture, I removed most of the parkerizing from the secondary bevel, to reduce drag when cutting. I sharpened the Ontario using files and sandpaper. It's sharp, but not as sharp as the HF machete. The sheath shown with it had to be ordered separately; all it came with was a cardboard blade cover.
With that out of the way, onto the results.
I started out with the Trail Hawk. It penetrated well into an arborvitae but because of the short edge, took a fair amount of effort to cut through the ~5" diameter trunk.
I switched to the Ontario machete next. It penetrated well in the wood and cut a wider swath than the Trail Hawk. It didn't take long to chop down another arborvitae. The longer blade also made it better than the Trail Hawk for limbing the downed trunks. I was quite impressed with how well it chopped.
My use of the HF machete today was minimal. It's better at cutting thin vegetation than the Ontario because (a) it's sharper, (b) it's thinner, and (c) the longer blade achieves higher tip velocity. I used it last weekend on some weeds and forsythia, which it went through like a razor. It also handled some arborvitae well. It has a reach advantage over the Ontario 12" machete, of course.
Naturally, which one of these three choppers is "best" depends on the use. The CS Trail Hawk is handicapped by the short cutting edge. It would probably make a pretty decent thrower, though.
The Harbor Freight machete is great on light brush and even does well on softwoods. With the 18" blade it has a good reach.
The Ontario 12" machete impressed me today with it's chopping ability on softwoods. It's a bit harder than the HF machete so would probably handle batoning a bit better if you hit a bad knot. The length is handy and the handle is comfortable. IMO it would make a very handy tool out in the Pennsylvania woods.
I've had the HF machete for a couple of years. Like most machetes it's on the soft side and came as dull as a butter knife. I put a semi-usable edge on it with a belt sander last year but was never really happy with it. A few weeks ago I bought some new files, reshaped the edge, then convexed it using sandpaper on top of a mousepad, taped to my workbench. I also drilled the handle for the lanyard and added a paracord wrap to the grip, which greatly improves the feel. The HF machete came with a cheap flimsy canvas sheath. I improved this by covering it with duct tape, first a couple layers of regular duct tape then a final layer of camo tape as shown below. This actually came out pretty good and I will look at giving it a polyurethane clear coat to make it more weather resistant.
I picked up the CS Trail Hawk a couple weeks ago mainly on a lark. I wanted a hawk that was smaller than my Dixon's hawk, which is about the same size as a CS Rifleman's Hawk. The Trail Hawk's head is rather small with a 2" edge, and a hammer poll. It came reasonably sharp, though I touchd it up with some sandpaper and began to convex the edge. The Trail Hawk did not come with a sheath.
The Ontario 12" machete was ordered around the same time as the Trail Hawk. It's made of 1095 carbon steel about 1/8" thick, which is thicker than the HF machete. The plastic handle is molded in place with a D-shaped hand guard. I find it pretty comfortable and like the hand guard. Like the HF machete, it came as dull as a spatula with a very uneven edge. Unlike the unfinished HF machete, it is parkerized. The Ontario has a secondary bevel next to the edge, while the HF does not. As you can see in the picture, I removed most of the parkerizing from the secondary bevel, to reduce drag when cutting. I sharpened the Ontario using files and sandpaper. It's sharp, but not as sharp as the HF machete. The sheath shown with it had to be ordered separately; all it came with was a cardboard blade cover.
With that out of the way, onto the results.
I started out with the Trail Hawk. It penetrated well into an arborvitae but because of the short edge, took a fair amount of effort to cut through the ~5" diameter trunk.
I switched to the Ontario machete next. It penetrated well in the wood and cut a wider swath than the Trail Hawk. It didn't take long to chop down another arborvitae. The longer blade also made it better than the Trail Hawk for limbing the downed trunks. I was quite impressed with how well it chopped.
My use of the HF machete today was minimal. It's better at cutting thin vegetation than the Ontario because (a) it's sharper, (b) it's thinner, and (c) the longer blade achieves higher tip velocity. I used it last weekend on some weeds and forsythia, which it went through like a razor. It also handled some arborvitae well. It has a reach advantage over the Ontario 12" machete, of course.
Naturally, which one of these three choppers is "best" depends on the use. The CS Trail Hawk is handicapped by the short cutting edge. It would probably make a pretty decent thrower, though.
The Harbor Freight machete is great on light brush and even does well on softwoods. With the 18" blade it has a good reach.
The Ontario 12" machete impressed me today with it's chopping ability on softwoods. It's a bit harder than the HF machete so would probably handle batoning a bit better if you hit a bad knot. The length is handy and the handle is comfortable. IMO it would make a very handy tool out in the Pennsylvania woods.
Tuesday, October 02, 2007
A Pair of Victorinox Pioneers
My Victorinox Pioneer that I bought in the early 80s has been my favorite EDC pocketknife of late. It's a good size for pocket carry, has a very useful assortment of tools, is nearly indestructible with its alox scales, and is sheeple friendly. I've been on a bit of a knife kick lately, so when I found out that Amazon was carrying the Vic Pioneer Farmer model in red, I had to get one. (Most of the Victorinox SAKs with alox scales are now silver colored. IMHO, SAKs should be red.) The Farmer adds one implement to the Pioneer, a wood saw. I think this could come in very useful.
Here's a side view of the Farmer next to my old Pioneer, showing the saw:
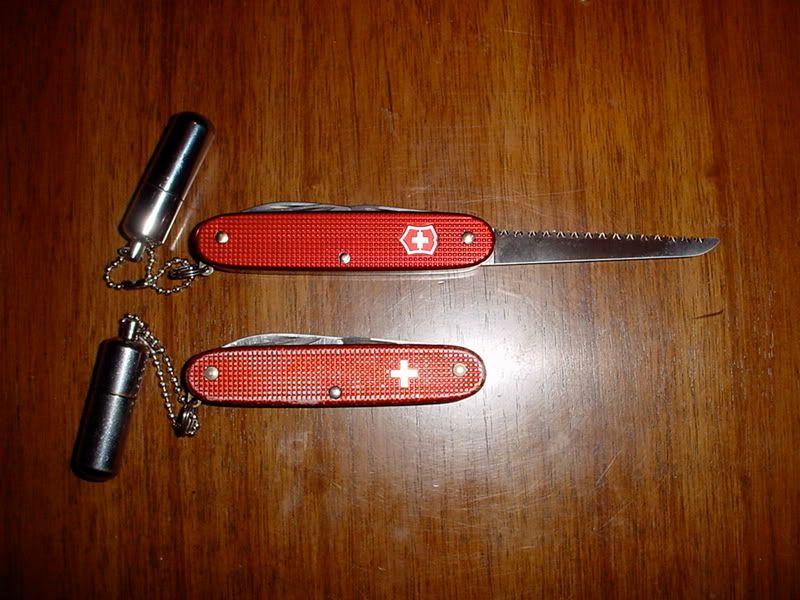
Note the Swiss shield on the Farmer, compared with the plain cross on the older knife. On the other side of the Farmer there's a rectangular area suitable for engraving. The older knife doesn't have this.
Below is a top view, showing how the Farmer is just a little thicker than the Pioneer. It's still very pocketable, the difference isn't noticeable.
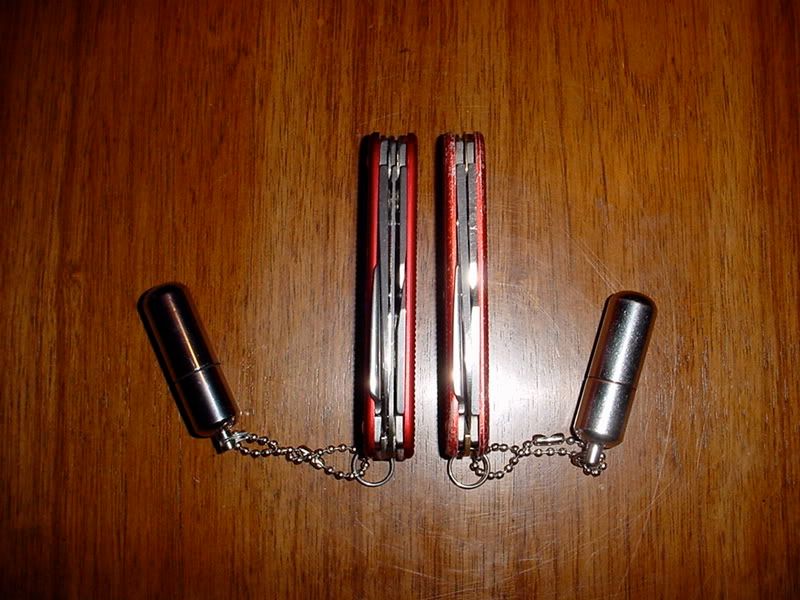
The Farmer's knife blade came with a good sharp edge. The polish on the blades is up to Victorinox's usual high standard, and better than on the older knife, even taking into account the wear and tear it has.
You're probably wondering what the silver cylinders attached to each of the knives are. They're "Peanut Lighters" I bought from Countycomm.com. They are refillable, using standard fluid and flints. With the O-rings, they don't leak or let the fluid evaporate. They aren't windproof like Zippos but aside from that work great. For $5 a pop you can't go wrong with them.
I think I'm going to give my old Pioneer a break as my EDC, and start putting the Farmer in my pocket when I get dressed.
Here's a side view of the Farmer next to my old Pioneer, showing the saw:
Note the Swiss shield on the Farmer, compared with the plain cross on the older knife. On the other side of the Farmer there's a rectangular area suitable for engraving. The older knife doesn't have this.
Below is a top view, showing how the Farmer is just a little thicker than the Pioneer. It's still very pocketable, the difference isn't noticeable.
The Farmer's knife blade came with a good sharp edge. The polish on the blades is up to Victorinox's usual high standard, and better than on the older knife, even taking into account the wear and tear it has.
You're probably wondering what the silver cylinders attached to each of the knives are. They're "Peanut Lighters" I bought from Countycomm.com. They are refillable, using standard fluid and flints. With the O-rings, they don't leak or let the fluid evaporate. They aren't windproof like Zippos but aside from that work great. For $5 a pop you can't go wrong with them.
I think I'm going to give my old Pioneer a break as my EDC, and start putting the Farmer in my pocket when I get dressed.
Monday, October 01, 2007
A Couple New Choppers
Last week I received the two new choppers I'd ordered: a Cold Steel Trail Hawk and an Ontario 12" machete.
The Trail Hawk is much smaller than my Dixon's tomahawk. The blade edge is only 2" long. The handle is a full 19". The blade came reasonably sharp but I did touch it up some.
Yesterday I took the Trail Hawk out back and hacked at a couple of things. Due to the light weight it doesn't chop nearly as well as the Dixon's Hawk. I think it would make a decent defensive weapon but it's not as useful a tool as the larger 'hawk.
In contrast to the Trail Hawk, the Ontario machete came as dull as a butter knife. In a few places the edge grind didn't even meet -- the edge was actually flat. The parkerized finish on the blade was even and looks good, however.
Sharpening the machete took a good bit of effort and I'm still not satisfied with it. I started with a couple of files then progressed to 150 grit sandpaper. The sandpaper I had wasn't intended for use on metal so I didn't make much progress before it was shot. Yesterday I ran out and bought some emery cloth and 150, 400, and 600 grit wet/dry sandpaper suitable for use on metal.
I also bought a lawn implement sharpening attachment for my Dremel. I need to improve my technique because I wound up with a really ugly edge after using it on the machete. (I think I'll practice on a shovel before using it on a knife again.) So, I went back to the file and abrasives. After awhile I got a usable edge but it's still not as sharp as I want it to be.
Anyway, once the machete was moderately sharp I took it out back to try. The handle seems comfortable and I like that it has a handguard on it. The balance is different from my Harbor Freight machete (which is thinner but longer) and so it feels quite a bit different when swung. I tried it on a few branches and weeds and it worked OK, but not as well as the HF, which is sharper. The longer HF machete also has the advantage when it comes to reach. For the kind of use I've been putting it to in my yard, this is significant.
I did use the Ontario to split a couple of logs using a baton. It worked pretty well. The machete is robust enough that you can feel comfortable wailing on it with a baton without fear of damaging it.
I got the Ontario from Knifecenter.com. They were out of sheathes so I've ordered one from Smokey Mountain Knife Works along with a couple of other items.
The Trail Hawk is much smaller than my Dixon's tomahawk. The blade edge is only 2" long. The handle is a full 19". The blade came reasonably sharp but I did touch it up some.
Yesterday I took the Trail Hawk out back and hacked at a couple of things. Due to the light weight it doesn't chop nearly as well as the Dixon's Hawk. I think it would make a decent defensive weapon but it's not as useful a tool as the larger 'hawk.
In contrast to the Trail Hawk, the Ontario machete came as dull as a butter knife. In a few places the edge grind didn't even meet -- the edge was actually flat. The parkerized finish on the blade was even and looks good, however.
Sharpening the machete took a good bit of effort and I'm still not satisfied with it. I started with a couple of files then progressed to 150 grit sandpaper. The sandpaper I had wasn't intended for use on metal so I didn't make much progress before it was shot. Yesterday I ran out and bought some emery cloth and 150, 400, and 600 grit wet/dry sandpaper suitable for use on metal.
I also bought a lawn implement sharpening attachment for my Dremel. I need to improve my technique because I wound up with a really ugly edge after using it on the machete. (I think I'll practice on a shovel before using it on a knife again.) So, I went back to the file and abrasives. After awhile I got a usable edge but it's still not as sharp as I want it to be.
Anyway, once the machete was moderately sharp I took it out back to try. The handle seems comfortable and I like that it has a handguard on it. The balance is different from my Harbor Freight machete (which is thinner but longer) and so it feels quite a bit different when swung. I tried it on a few branches and weeds and it worked OK, but not as well as the HF, which is sharper. The longer HF machete also has the advantage when it comes to reach. For the kind of use I've been putting it to in my yard, this is significant.
I did use the Ontario to split a couple of logs using a baton. It worked pretty well. The machete is robust enough that you can feel comfortable wailing on it with a baton without fear of damaging it.
I got the Ontario from Knifecenter.com. They were out of sheathes so I've ordered one from Smokey Mountain Knife Works along with a couple of other items.
Saturday, September 22, 2007
Dixon's Tomahawk
I bought a tomahawk at Dixon's Muzzleloading Shop in Kempton, PA about 10 years ago. For the past few years I've used it as a garden tool. The relatively thin blade chops through the wood on my property well.
The edge had gotten dinged up pretty badly from hitting pebbles. Today I went out and bought a couple of new files to resharpen it. The blade is fairly soft, so with the sharp new files it didn't take me long to get the edge repaired. I then taped a sheet of 150 grit sandpaper on top of a mousepad to my workbench, and polished it up. I wound up with a nice convex edge. The 'hawk will now slice newspaper.
While I was working on the 'hawk I decided to wrap the handle with paracord. I left a gap of exposed wood as a grasping surface, because I thought it might be too thick if I wrapped the whole thing. At the bottom I drilled a hole through the handle and made a wrist loop.
I took her out back and whacked a few things. Big improvement. Here are a couple of pictures.


I have an Ontario 12" machete and a Cold Steel Trail Hawk on order. It'll be interesting to see how they compare as choppers.
Edited to add:
It weighs 1 lb. 7 oz. Total length is 18-3/8", and the edge is 4".
The edge had gotten dinged up pretty badly from hitting pebbles. Today I went out and bought a couple of new files to resharpen it. The blade is fairly soft, so with the sharp new files it didn't take me long to get the edge repaired. I then taped a sheet of 150 grit sandpaper on top of a mousepad to my workbench, and polished it up. I wound up with a nice convex edge. The 'hawk will now slice newspaper.
While I was working on the 'hawk I decided to wrap the handle with paracord. I left a gap of exposed wood as a grasping surface, because I thought it might be too thick if I wrapped the whole thing. At the bottom I drilled a hole through the handle and made a wrist loop.
I took her out back and whacked a few things. Big improvement. Here are a couple of pictures.
I have an Ontario 12" machete and a Cold Steel Trail Hawk on order. It'll be interesting to see how they compare as choppers.
Edited to add:
It weighs 1 lb. 7 oz. Total length is 18-3/8", and the edge is 4".
Thursday, September 20, 2007
Thoughts About Survival Knives
I have been reevaluating my choices for survival knives lately.
Previously, I've favored smaller blades. When I was in a Civil Air Patrol ground search and rescue unit I happily got by with first a 5" USAF Survival Knife, then later a Schrade Uncle Henry LB7 Bearpaw folding hunter.
However, during the course of some recent firestarting practice I came to appreciate the chopping power of my Becker BK7. It's size made splitting branches easy when used with a baton, plus with its size I was able to chop at branches to chip off wood shavings for fire starting.
If I was absolutely restricted to one knife and one knife only in a survival situation in most of North America, I'd choose the BK7 without second thought. With a 7" blade, it's a good compromise between a small knife and a big chopper. But since this is a preparedness site and we believe in thinking ahead, IMO it's better to include a minimum of two knives in an emergency kit in my environment (Pennsylvania). Specifically, a small to medium sized blade teamed with a larger knife or hatchet. These will complement my everyday carry Victorinox Pioneer Swiss Army Knife.
The problem with relying exclusively on a small blade is that you may need chopping power in an emergency. Something that can cut the limbs off trees to make shelter or obtain firewood, can split kindling for a fire, or cut the legs off a downed deer. You might be able to perform these tasks with a 4" knife but not as easily as with a larger blade. As an alternative to a large knife, one might carry a hatchet or tomahawk for these chopping duties.
Conversely, a large knife is awkward to work with when performing fine cutting tasks, e.g., whittling camp implements from sticks. And like it or not, large knives tend to alarm urbanites and suburbanites who you may need to deal with.
The smallest blade, the SAK in my case, handles fine cutting tasks, doing so much more conveniently than a larger knife. It's small enough to carry in pocket virtually everywhere yet large enough to handle most cutting tasks I run into on a daily basis in an urban environment. The Pioneer has a spear point knife blade, an awl/reamer, a can opener with small screwdriver on the tip, a bottle opener with a larger screwdriver tip and a wire stripping notch. Victorinox makes another variant of the Pioneer, the Farmer, which adds a saw blade that could be useful. One reason I'm partial to the Victorinox Pioneers is that the handle scales are made from aluminum, so the knives are very rugged.
An alternative to a SAK is a multitool of the Leatherman, Gerber Multiplier, or Victorinox Swisstool type. These add a variety of tools to the basic knife blade, including pliers. I prefer the Victorinox multitools as IMHO they are higher in quality than the Leathermans or Gerbers. Multitools are heavier than pocketknives, so they may or may not work for you.
The medium blade handles larger tasks like skinning game or making fuzz sticks for fire starting. This can be a short fixed blade such as a Mora or a robust folder, such as my aforementioned Bearpaw or a Buck 110. For safety's sake, a locking blade is best if you choose a folder, although I've never managed to hurt myself due to the lack of a blade lock in about 30 years of carrying folding knives.
A side note about folders: The ability to open a folding knife with one hand is important, in case you only have one usable hand due to the other hand being either occupied or injured. Folding hunters such as the LB7 have sufficient weight in the handle to allow the blades to be flicked open. You grasp the blade then flick the handle downwards. The downside to this is that it's not as safe as a knife designed to be opened with one hand, such as a Spyderco Endura.
If you prefer a fixed blade over a folder for your medium sized knife, then a Mora makes a great choice. Although inexpensive, they are good quality knives and take a keen edge without being too hard to sharpen.
For a large chopper I have on order an Ontario 12" machete with a knuckle guard. The foot-long blade should work better than the BK7's 7" blade to clear a campsite, split kindling when used with a baton, and would make a formidable defensive weapon should the need arise. If I lived further south I'd go for a full size 18" machete.
Given my druthers I prefer knives made from carbon steel, especially for large knives. Carbon steel knives tend to be (a) easier to sharpen than stainless, and (b) tend to be a bit more rugged. The Ontario is made from 1095 carbon steel, though my Bearpaw's blade is made from stainless. An exception is the stainless used by Victorinox for their Swiss Army Knives. It's on the soft side and doesn't take me long to put on a razor edge using an Arkansas stone. I touched up the edge the other day and it's freaking sharp!
An additional consideration is blade thickness. This isn't as much of a consideration in folders, but some fixed knives come with blades that are thick enough in relation to their width, that the grind angle is such that they're hard to sharpen. The USAF Survival Knife is a good example of a knife with a blade too thick for its width, unless it was hollow ground.
Knives are among the most important items in your survival kit. They should be selected with care to maximize their utility in your environment. Between the SAK, LB7, and machete, I should be able to handle anything that needs cutting in an emergency.
Previously, I've favored smaller blades. When I was in a Civil Air Patrol ground search and rescue unit I happily got by with first a 5" USAF Survival Knife, then later a Schrade Uncle Henry LB7 Bearpaw folding hunter.
However, during the course of some recent firestarting practice I came to appreciate the chopping power of my Becker BK7. It's size made splitting branches easy when used with a baton, plus with its size I was able to chop at branches to chip off wood shavings for fire starting.
If I was absolutely restricted to one knife and one knife only in a survival situation in most of North America, I'd choose the BK7 without second thought. With a 7" blade, it's a good compromise between a small knife and a big chopper. But since this is a preparedness site and we believe in thinking ahead, IMO it's better to include a minimum of two knives in an emergency kit in my environment (Pennsylvania). Specifically, a small to medium sized blade teamed with a larger knife or hatchet. These will complement my everyday carry Victorinox Pioneer Swiss Army Knife.
The problem with relying exclusively on a small blade is that you may need chopping power in an emergency. Something that can cut the limbs off trees to make shelter or obtain firewood, can split kindling for a fire, or cut the legs off a downed deer. You might be able to perform these tasks with a 4" knife but not as easily as with a larger blade. As an alternative to a large knife, one might carry a hatchet or tomahawk for these chopping duties.
Conversely, a large knife is awkward to work with when performing fine cutting tasks, e.g., whittling camp implements from sticks. And like it or not, large knives tend to alarm urbanites and suburbanites who you may need to deal with.
The smallest blade, the SAK in my case, handles fine cutting tasks, doing so much more conveniently than a larger knife. It's small enough to carry in pocket virtually everywhere yet large enough to handle most cutting tasks I run into on a daily basis in an urban environment. The Pioneer has a spear point knife blade, an awl/reamer, a can opener with small screwdriver on the tip, a bottle opener with a larger screwdriver tip and a wire stripping notch. Victorinox makes another variant of the Pioneer, the Farmer, which adds a saw blade that could be useful. One reason I'm partial to the Victorinox Pioneers is that the handle scales are made from aluminum, so the knives are very rugged.
An alternative to a SAK is a multitool of the Leatherman, Gerber Multiplier, or Victorinox Swisstool type. These add a variety of tools to the basic knife blade, including pliers. I prefer the Victorinox multitools as IMHO they are higher in quality than the Leathermans or Gerbers. Multitools are heavier than pocketknives, so they may or may not work for you.
The medium blade handles larger tasks like skinning game or making fuzz sticks for fire starting. This can be a short fixed blade such as a Mora or a robust folder, such as my aforementioned Bearpaw or a Buck 110. For safety's sake, a locking blade is best if you choose a folder, although I've never managed to hurt myself due to the lack of a blade lock in about 30 years of carrying folding knives.
A side note about folders: The ability to open a folding knife with one hand is important, in case you only have one usable hand due to the other hand being either occupied or injured. Folding hunters such as the LB7 have sufficient weight in the handle to allow the blades to be flicked open. You grasp the blade then flick the handle downwards. The downside to this is that it's not as safe as a knife designed to be opened with one hand, such as a Spyderco Endura.
If you prefer a fixed blade over a folder for your medium sized knife, then a Mora makes a great choice. Although inexpensive, they are good quality knives and take a keen edge without being too hard to sharpen.
For a large chopper I have on order an Ontario 12" machete with a knuckle guard. The foot-long blade should work better than the BK7's 7" blade to clear a campsite, split kindling when used with a baton, and would make a formidable defensive weapon should the need arise. If I lived further south I'd go for a full size 18" machete.
Given my druthers I prefer knives made from carbon steel, especially for large knives. Carbon steel knives tend to be (a) easier to sharpen than stainless, and (b) tend to be a bit more rugged. The Ontario is made from 1095 carbon steel, though my Bearpaw's blade is made from stainless. An exception is the stainless used by Victorinox for their Swiss Army Knives. It's on the soft side and doesn't take me long to put on a razor edge using an Arkansas stone. I touched up the edge the other day and it's freaking sharp!
An additional consideration is blade thickness. This isn't as much of a consideration in folders, but some fixed knives come with blades that are thick enough in relation to their width, that the grind angle is such that they're hard to sharpen. The USAF Survival Knife is a good example of a knife with a blade too thick for its width, unless it was hollow ground.
Knives are among the most important items in your survival kit. They should be selected with care to maximize their utility in your environment. Between the SAK, LB7, and machete, I should be able to handle anything that needs cutting in an emergency.
Monday, September 17, 2007
Personal Financial Management
Part of being prepared is keeping your financial house in order. I came across this article, which I feel is worth reading.
Thursday, September 13, 2007
Gerber Firecracker Flashlight
Last weekend while up at REI, I picked up a Gerber Firecracker flashlight. Made of machined aluminum, it has 1 white LED, uses 1 AA battery, and puts out 18 Lumens. If you twist the tailcap it'll operate in continuous mode, and can also be used as a momentary switch if you push it in.
According to Gerber the beam will reach 160 feet. It'll reach the back of my yard from inside my house, through a sliding glass door that needs to be cleaned. It's not as bright as my Surefire G2 but it's more useful as a utility light, as opposed to a tactical light like the Surefire.
The one thing which could be improved would be to make the lanyard hole larger. It's only a couple millimeters in diameter, so in order to attach a paracord lanyard I first put a small loop of mason's twine through the it, then ran the paracord through that. (I want to find a small split ring to replace the mason's twine.)
Overall I'm quite pleased with the light. It's taken up residence in my laptop bag, replacing an older, larger light.
According to Gerber the beam will reach 160 feet. It'll reach the back of my yard from inside my house, through a sliding glass door that needs to be cleaned. It's not as bright as my Surefire G2 but it's more useful as a utility light, as opposed to a tactical light like the Surefire.
The one thing which could be improved would be to make the lanyard hole larger. It's only a couple millimeters in diameter, so in order to attach a paracord lanyard I first put a small loop of mason's twine through the it, then ran the paracord through that. (I want to find a small split ring to replace the mason's twine.)
Overall I'm quite pleased with the light. It's taken up residence in my laptop bag, replacing an older, larger light.
Tuesday, September 11, 2007
Fire Starting in the Dark and Wet
In my Sunday post I described how I did some backyard experimenting with fire starting. Since my goal was to see if a Ballistol-soaked cleaning patch would catch the sparks from a fire steel and act as tinder, the nice weather on Sunday was a bonus.
However, when you're out in the woods, whether by design or bad fortune, odds are that weather conditions won't always cooperate. Your fuel sources may be wet and it may be actually raining. Just as bad, it may be dark. (For some perverse reason, it seemed that every time my CAP squadron went on an FTX, we didn't pitch camp until it was dark and raining.)
So, tonight I went out back again for more practice. It rained last night and earlier today, so everything was wet. Before heading outside I gathered several items:
1. A Swiss surplus rain poncho, mainly for use as a mat to sit on. I also used it to collect wood shavings.
2. My Becker Combat/Utility 7 knife, along with matches and tinder in a small Altoids tin in the sheath pouch.
3. A Rayovac LED headlamp.
4. My Victorinox Pioneer Swiss Army Knife, to which is attached a County Comm Peanut Lighter. If I step out of the house, this combo is in my pocket.
5. 1L Nalgene bottle of water to douse the fire when I was finished.
I wanted to see if I could get a fire going using just a match and tinder gathered from my yard. I gathered some small dead branches from a tree in my yard. These felt pretty dry. I broken them up and set them aside.
I took a small branch which didn't seem soaked from my wood pile, peeled off the bark, and made a pile of shavings from the dry wood within.
Rather than placing my pile of shavings directly on damp ground, I first made a platform of dry sticks. Doing so keeps your tinder from getting damp.
The first hitch I ran into was that I could not get my strike anywhere matches to light, even using a dry rock as the striker. I don't have a striker from a match box in the fire starting kit in the Becker Sheath, something I must remedy.
I decided to light the match with the Peanut Lighter then try to light the pile of shavings. What I discovered was that whatever wood this was would ignite, flame, then cool down to a coal and then go out before getting any real flame going. Discouraging to say the least.
In exasperation, I took half of a petroleum jelly cotton ball out of the fire starting kit and placed it in the middle of the pile of shavings, then lit it with the Peanut Lighter. The cotton ball with PJ burned hot and long enough to ignite the wood shavings and sticks that I added. Shortly thereafter I had a small blaze going.
After dousing the fire and coming inside I took another match and tried to light it using the grout in my slate floor in my office. This has worked in the past, but tonight, no dice. I got one spark but the tip of the match wore away before igniting. I put the match in the flame of a lighter and it did ignite, so it may be that it's too humid for the strike anywhere matches to light without a matchbox striker or external help. Not something I'd want to discover in an emergency.
Lessons learned:
1. Lighting a fire when stuff is wet takes a lot of work.
2. Carry good tinder with you. Don't depend on being able to find natural tinder when you need it. Cotton balls soaked in petroleum jelly can be made at home, are cheap, and work wonderfully.
3. As a corrollary to #2, if you do find good tinder while roaming the woods, gather some for later use.
4. Even if your matches are strike anywheres, carry the striker from a matchbox with you.
5. Have at least one backup means of making fire. E.g., a lighter. I wholeheartedly recommend the Peanut Lighters from Countycomm.com. They are inexpensive, small, carry easily in a pocket, and don't leak. Mine has not been refilled in at least two weeks. I also like ferrocerrium rods which can be struck to generate a shower of hot sparks. They last a long time and work when wet.
6. A large knife will make it easier for you to make fire. It's much easier to make wood shavings with a good sized belt knife than with a pocket knife. You can also use a large knife to split open wet branches to get at the dry wood within.
7. Aside from keeping you dry, a poncho can be used to collect wood shavings you make and keep them off damp ground.
8. LED headlamps rock. It would have been a lot harder to work in the dark if I had to hold a flashlight in one hand.
9. Setting things on fire is fun.
However, when you're out in the woods, whether by design or bad fortune, odds are that weather conditions won't always cooperate. Your fuel sources may be wet and it may be actually raining. Just as bad, it may be dark. (For some perverse reason, it seemed that every time my CAP squadron went on an FTX, we didn't pitch camp until it was dark and raining.)
So, tonight I went out back again for more practice. It rained last night and earlier today, so everything was wet. Before heading outside I gathered several items:
1. A Swiss surplus rain poncho, mainly for use as a mat to sit on. I also used it to collect wood shavings.
2. My Becker Combat/Utility 7 knife, along with matches and tinder in a small Altoids tin in the sheath pouch.
3. A Rayovac LED headlamp.
4. My Victorinox Pioneer Swiss Army Knife, to which is attached a County Comm Peanut Lighter. If I step out of the house, this combo is in my pocket.
5. 1L Nalgene bottle of water to douse the fire when I was finished.
I wanted to see if I could get a fire going using just a match and tinder gathered from my yard. I gathered some small dead branches from a tree in my yard. These felt pretty dry. I broken them up and set them aside.
I took a small branch which didn't seem soaked from my wood pile, peeled off the bark, and made a pile of shavings from the dry wood within.
Rather than placing my pile of shavings directly on damp ground, I first made a platform of dry sticks. Doing so keeps your tinder from getting damp.
The first hitch I ran into was that I could not get my strike anywhere matches to light, even using a dry rock as the striker. I don't have a striker from a match box in the fire starting kit in the Becker Sheath, something I must remedy.
I decided to light the match with the Peanut Lighter then try to light the pile of shavings. What I discovered was that whatever wood this was would ignite, flame, then cool down to a coal and then go out before getting any real flame going. Discouraging to say the least.
In exasperation, I took half of a petroleum jelly cotton ball out of the fire starting kit and placed it in the middle of the pile of shavings, then lit it with the Peanut Lighter. The cotton ball with PJ burned hot and long enough to ignite the wood shavings and sticks that I added. Shortly thereafter I had a small blaze going.
After dousing the fire and coming inside I took another match and tried to light it using the grout in my slate floor in my office. This has worked in the past, but tonight, no dice. I got one spark but the tip of the match wore away before igniting. I put the match in the flame of a lighter and it did ignite, so it may be that it's too humid for the strike anywhere matches to light without a matchbox striker or external help. Not something I'd want to discover in an emergency.
Lessons learned:
1. Lighting a fire when stuff is wet takes a lot of work.
2. Carry good tinder with you. Don't depend on being able to find natural tinder when you need it. Cotton balls soaked in petroleum jelly can be made at home, are cheap, and work wonderfully.
3. As a corrollary to #2, if you do find good tinder while roaming the woods, gather some for later use.
4. Even if your matches are strike anywheres, carry the striker from a matchbox with you.
5. Have at least one backup means of making fire. E.g., a lighter. I wholeheartedly recommend the Peanut Lighters from Countycomm.com. They are inexpensive, small, carry easily in a pocket, and don't leak. Mine has not been refilled in at least two weeks. I also like ferrocerrium rods which can be struck to generate a shower of hot sparks. They last a long time and work when wet.
6. A large knife will make it easier for you to make fire. It's much easier to make wood shavings with a good sized belt knife than with a pocket knife. You can also use a large knife to split open wet branches to get at the dry wood within.
7. Aside from keeping you dry, a poncho can be used to collect wood shavings you make and keep them off damp ground.
8. LED headlamps rock. It would have been a lot harder to work in the dark if I had to hold a flashlight in one hand.
9. Setting things on fire is fun.
Sunday, September 09, 2007
Practiced some fire starting today
Fire making is a skill that you need to learn and then practice. Although I've started plenty of camp fires, every so often I like to try something a little different to see if it's something I can use. For example, my Marlin 336 has an Eagle Industries Stock Pack on the butt, inside of which I carry a small cleaning kit, a 35mm film canister filled with cotton balls soaked in petroleum jelly for use as tinder, and a Swedish Fire Steel. The latter is a ferrocerium rod and steel striker, which can be used to throw a shower of sparks. Someone recently suggested that the Ballistol in my cleaning kit might work as a fire starter, something I wanted to try out.
Here's what I gathered in my backyard to do a little experimenting:
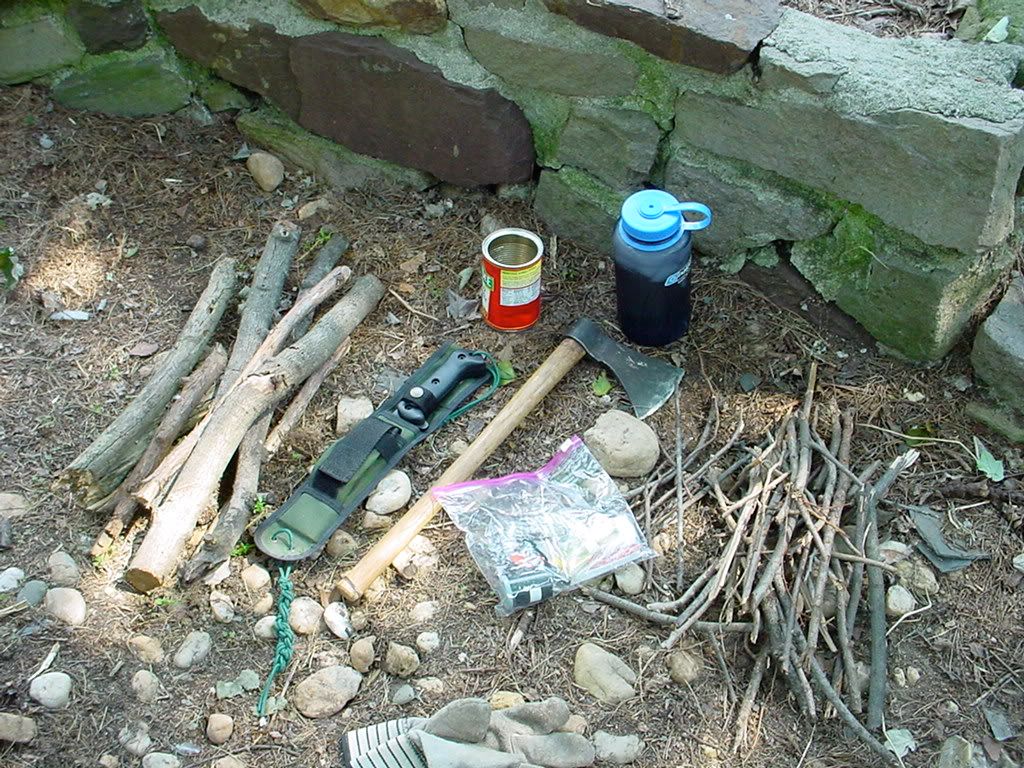
On the left are some large sticks to use as fuel. Then my Becker Combat/Utility 7 knife, tomahawk, Ziploc containing the cleaning kit, tinder and fire steel, then some small sticks for use as kindling. I wound up not needing the tomahawk. The Becker worked well to shave down a bunch of fuzz from the large sticks, and to split them so the inner dry wood was exposed.
Here's the pile of wood shavings ready to go. The white thing in the middle is a cleaning patch wet with Ballistol.
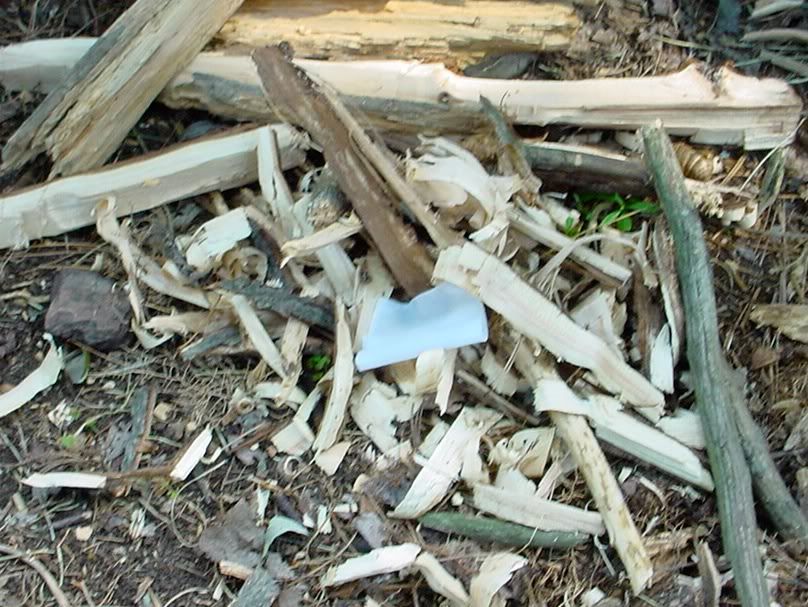
My hope was to use sparks from the fire steel to ignite the Ballistol-soaked patch, which in turn would ignite the shavings. No dice. It simply would not light. This demonstrates that while something might seem like a good idea in theory, it won't necessarily work in practice, and one should have a backup plan.
My backup plan is the fire starting kit kept in the pouch on the Becker's sheath. It's a small Altoids tin with some strike anywhere matches, and some PJ-soaked cotton balls. The wood shavings were thin and dry enough so that I didn't need to use a cotton ball. One match was all it took to get the shavings burning nicely. I then added sticks about as big around as a pencil, and once they were burning I added thicker wood. Here's my fire after it was burning for a little while:
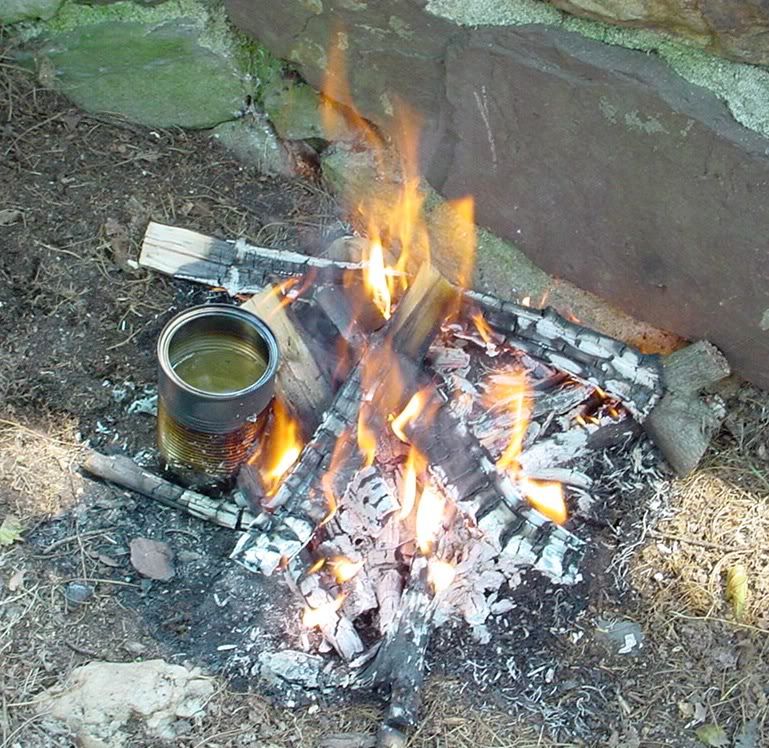
As you can see, I filled the Spaghettios can with water to see how long it would take to boil. Only a few minutes, as it turns out.
While I was experimenting out back, my four and a half year old daughter Alexandra came out, so I was able to teach her about camp fires. We even put the fire out with water, then rebuilt it using one of the PJ-soaked cotton balls as tinder.
It was a fun way to spend a couple of hours.
Here's what I gathered in my backyard to do a little experimenting:
On the left are some large sticks to use as fuel. Then my Becker Combat/Utility 7 knife, tomahawk, Ziploc containing the cleaning kit, tinder and fire steel, then some small sticks for use as kindling. I wound up not needing the tomahawk. The Becker worked well to shave down a bunch of fuzz from the large sticks, and to split them so the inner dry wood was exposed.
Here's the pile of wood shavings ready to go. The white thing in the middle is a cleaning patch wet with Ballistol.
My hope was to use sparks from the fire steel to ignite the Ballistol-soaked patch, which in turn would ignite the shavings. No dice. It simply would not light. This demonstrates that while something might seem like a good idea in theory, it won't necessarily work in practice, and one should have a backup plan.
My backup plan is the fire starting kit kept in the pouch on the Becker's sheath. It's a small Altoids tin with some strike anywhere matches, and some PJ-soaked cotton balls. The wood shavings were thin and dry enough so that I didn't need to use a cotton ball. One match was all it took to get the shavings burning nicely. I then added sticks about as big around as a pencil, and once they were burning I added thicker wood. Here's my fire after it was burning for a little while:
As you can see, I filled the Spaghettios can with water to see how long it would take to boil. Only a few minutes, as it turns out.
While I was experimenting out back, my four and a half year old daughter Alexandra came out, so I was able to teach her about camp fires. We even put the fire out with water, then rebuilt it using one of the PJ-soaked cotton balls as tinder.
It was a fun way to spend a couple of hours.
Monday, September 03, 2007
Deal on Wenger Swiss Gear Water Bottles
I came across a great deal today at BJ's Wholesale Club. They had a four-pack of Wenger Swiss Gear 32 oz (1L) Lexan bottles for $7.90 before tax. These are very similar to the Nalgene 32 oz. wide mouth bottles that normally go for about $10 each.
The Wenger bottles are about the same diameter as the Nalgenes. The Olicamp Space Saver cups which I got from Campmor fit over the end of a Nalgene will accept a Wenger bottle. However, the mouth on the Wenger is a little larger than the Nalgenes, so replacement caps or water filters designed to fit the latter won't work on the Wengers. For less than 25% the cost of a Nalgene, I can live with this.
The Wenger bottles are about the same diameter as the Nalgenes. The Olicamp Space Saver cups which I got from Campmor fit over the end of a Nalgene will accept a Wenger bottle. However, the mouth on the Wenger is a little larger than the Nalgenes, so replacement caps or water filters designed to fit the latter won't work on the Wengers. For less than 25% the cost of a Nalgene, I can live with this.
Subscribe to:
Posts (Atom)

 Posts
Posts