Saturday, August 06, 2016

Day Trip to Conrad Weiser

I took today off for a dentist appointment this morning, then a day trip to the Port Clinton Tract of the Conrad Weiser State Forest in the afternoon. I had a few goals on today's trip, the first of which was to locate the campsite where I did an aborted overnighter back in January, and locate a spot close to it on a trail. I succeeded in both, and marked the trail spot on both my phone in Spyglass and in my Garmin GPS.

The second goal was to practice putting up a shelter, which I did in the form of a poncho hooch.


I used my trekking poles in combination with a USGI-style poncho, a couple bungie cords, and some orange utility cord to build the lean-to. If I'd used a more subdued cord, it would have been very stealthy in these woods.

My next goal was to try out the Esbit cookset seen sitting in front of the hooch in the first picture. I bought it a few months ago but this was the first time I got a chance to try it. I like it. It's well made and lightweight. I used it with the included Trangia-style alcohol burner, using denatured alcohol from Lowe's. It can also be used with Esbit hexamine fuel tablets. Today I used it to boil water for coffee.

The final goal was to shoot some video with the Panasonic HC-W580K video camera I got in May. It, too can be seen sitting in the top picture, aimed at the Esbit set. I took over an hour of video which I need to edit down, but it looks good on my Mac.

Between the Esbit cookset and the video camera, I needed a bit more space than my Hill People Gear Tarahumara daypack had available. So, I attached a USGI surplus MOLLE sustainment pouch to the Tara's compression straps. This worked out fine.


Once I get the video edited and uploaded to YouTube, I'll post a link.

Edit 8/7/16: The video is up here.

Monday, July 11, 2016

Bike Inner Tube Fire Starter

A couple weeks ago I came home from REI with a shopping bag full of old bicycle inner tubes. The bike department's manager gave them to me for free when I told him I'd like some to make ranger bands (heavy duty rubber bands). And recently, I read on the Hill People Gear website that their preferred fire starter in the field is a 1.5" square of inner tube ignited with a lighter.

Tonight, my 12 year old daughter and I were hanging out when the idea to give the Hill brothers' method a try. So we rounded up a Bic lighter and a piece of inner tube about 1.5 to 2" square, and went out to our back patio where we have a fire pit.

I had the kiddo try it out. After a few seconds of exposure to the Bic's flame the piece of rubber ignited and burned with a hot flame for several minutes. We had no problems starting a fire with this and some small twigs.

I'm going to add a few ranger bands to my fire kit now. When cut as bands the pieces of rubber are multipurpose. They weigh next to nothing and being made from rubber are waterproof.

Scraps from an old bike inner tube may not be a bushcrafty fire starter, but they are a good addition to your emergency fire kit.

I'll have to do a video on this. Stay tuned....

Sunday, July 10, 2016

New Version of the Harbor Freight 3-In-1 Power Pack

A couple years ago I posted about the Cen-Tech (Harbor Freight) 3-in-1 power pack for portable power. The one I have has served me well on camping trips to power radios and charge cell phones.

The old model looks like it's been discontinued and replaced with an improved version. Improvements include replacing the incandescent work light with an LED, two 12V ports instead of one, and adds a 2.1A USB port for charging cell phones, etc. I'm not going to rush out and replace my old model, but if you're looking for an additional or new portable power source, this looks like a good one.


Friday, July 08, 2016

The $9 Expedient Tritium Night Sight

Over on Arfcom we find this example of out-of-the-box thinking:

http://www.ar15.com/forums/t_10_17/686350_Make_EXPEDIENT_TRITIUM_Night_Sights_for_the_Survivalist_for_abt__9.html

The OP, "EXPY37," took the tritium vial from a bivy marker sold on eBay and installed it in a hole drilled in the front sight of his pistol. This gives him the equivalent of Trijicon night sight for about $9 plus his time. In contrast, a Trijicon front night sight will run you over $60 from Brownells.

Unfortunately, the tritium bivy markers are not legal to sell in the US, but can be procured from overseas vendors on eBay.

Thursday, July 07, 2016

More on Cycling as a Fitness Prep

In my last post I mentioned how I've gotten back into cycling to improve my fitness. I noticed improved stamina after only one week. It's continued to get better as time goes on.

One improvement I made to my 1999 Trek 820 mountain bike yesterday was to replace the old, knobby off road tires with a set of Bontrager H2 semi-slicks, which are better suited to the kind of riding that I'm doing now. I.e., pavement and packed gravel.


Bicycle tires with an aggressive tread pattern are better for off road use on dirt, grass, loose gravel, or similar surfaces. In contrast, smooth tires offer better traction with less rolling resistance on pavement or hard packed gravel, even when it's wet.

This morning I took the bike for a short ride with the new tires. I did 6.13 miles* along Forbidden Drive in the Valley Green section of Philadelphia's Fairmount Park. These have noticeably less rolling resistance than the knobbies, so much so that I found myself riding one or two gears higher and improved my average speed by a couple MPH, compared with previous rides on the same trail. The improved rolling speed in my case is due not only to the smooth tread but also that these are 1.5" wide, vs. the 1.95" width of my old tires.

I'm also able to run these at higher pressure, between 60 to 90 PSI, vs. 65 PSI max for the old rubber. Since a lot of my riding is on gravel I have them inflated at about 65 to 70 PSI, to provide a little cushioning. Were I to take a long ride on pavement I'd pump them up to 90 PSI.

If you have an old mountain bike laying around or pick one up cheap from a yard sale or Craigslist, you can greatly improve its rideability on hard surfaces merely by swapping out the old tubes and tires for something like the Bontragers. If you envision mixed use, there are a variety of hybrid tires available with a smooth center flanked by more aggressive knobbies that will bite when you take it off road. If you're setting up a bike as a bugout vehicle, then such hybrid tires make a lot of sense.

Another option (and one I'm still considering) is getting a second set of wheels. Most mountain bikes from good manufacturers made in the past 25 years have quick-detach wheels. So, you could have a bike setup for dirt use, and another setup for road and packed gravel riding.


* I wanted to do at least 8 miles today but it was humid and hot as balls. That just sucks the energy right out of you.

Tuesday, June 28, 2016

Cycling as a Prep

In my last post on this blog I mentioned my recent purchase of a hitch-mount bike rack, and over on Blog O'Stuff, I have several posts about my renewed interest in cycling. My current bike is a late-90s vintage Trek 820 mountain bike on which I've recently added a few accessories.


Aside from replacing the original hand grips, which were deteriorating, I added the rack, trunk, kickstand, front and rear LED lights, and a RAM mount to hold my Garmin 62 GPS.  For a prepper there are several things attractive about an older steel mountain bike like my Trek:


  • They can frequently be obtained at low cost. I paid over $300 for it in the late 90s, but nowadays you may be able to find a similar bike in good condition for $75 to $100.
  • The lack of a front suspension means the bike is mechanically simpler and easier to maintain.
  • The steel frame absorbs vibrations and shock from the road better than an aluminum frame.
  • Many of these older bikes have threaded eyelets for mounting racks.
Mountain bikes in general tend to be more rugged than road bikes, especially the wheels. They are a lot more versatile, allowing you to ride on pavement, dirt, or gravel. Everything else being equal, mountain bike tires are more resistant to flats than high pressure road bike tires.

For preppers, bicycles offer low cost transportation that doesn't require fuel and can help you get and stay fit. Cycling on a bike that fits you is great, low impact cardio exercise. The "rails to trails" movement is converting many old rail beds to multi-purpose trails, all across the US. These trail networks not only provide a place to ride without having to deal with distracted drivers, they may also create less-used paths for cyclists and pedestrians to bugout in an emergency. Getting a bike now and exploring them is a useful way to combine recon with recreation.

Sunday, June 12, 2016

Trailer Hitch and Accessories

Last summer I bought a Curt Class III receiver hitch for my 2007 Nissan Xterra. With the help of a friend with a garage and air tools, installation was easy. The primary reason for the hitch wasn't for towing anything. Rather, I wanted to be able to expand the carrying capacity of the truck by using a hitch mount cargo carrier.

The cargo carrier I got was this one from Harbor Freight. If you catch it during one of their sales and use a 20% coupon, you can probably snag it for about $70 - $80. I found it to be pretty well designed but at some point I might replace the screws holding it together with stainless steel screws. Assembly was pretty straightforward with a screwdriver and nutdriver.

As a compact/mid-sized SUV, the Xterra has enough room for a long weekend camping for two people. When I bring both kids, though, I need to leave the back seats up and lose about half my cargo capacity. Before I got the external cargo carrier I used a bag strapped to my roof rack. This is OK for duffle bags but is a major pain to access and kills gas mileage. In contrast, the hitch mount carrier is easy to mount and has enough space to hold a cooler, Rubbermaid Action Packer box full of stuff, a Coleman stove, and a roll up aluminum table from REI.

The major downside of the hitch mount carriers is that if you leave them unattended whatever is on them is vulnerable to theft. Also, you don't want to overload them because doing so will change the balance of your vehicle, affecting its handling.

The secondary reason for the hitch was for a bike rack. I finally ordered one this week. My girls have been after me to get one so I can take them to local trails for cycling. Now that they are beyond the little kid stage they'll be able to bike for long enough to make such trips worthwhile. I used to be into cycling but it's been years since I did more than a couple laps around my subdivision. It's a good, low impact way to get some exercise.

Sunday, May 22, 2016

Camping Trip AAR

This weekend a couple friends and I went on a camping trip to Tioga County, PA. The main activity this time was ham radio. We went up on Friday and came home today.

I had to work on Friday but was able to cut out a little early. By the time I got on the road it was rush hour, so it took me a full four hours to get to my friend's land. By the time I arrived it was 9:30 PM. Before I got there, he'd put up an 80M dipole antenna made from aluminum welding wire, electric fence insulators, and some electric fence posts from Tractor Supply. The feed line was the welding wire, formed into an open ladder line held apart with pink duct tape.


This dipole worked well and pulling in signals on 20M, 40M, and 80M. A number of the calls we logged were from within Pennsylvania, demonstrating the viability of NVIS communications.

We're fans of the digital modes. He has an Icom 718 with which he uses a Donner Digital Interface at home. Since he's not going to schlepp a desktop PC with him, he used PSKdroid running on an LG Android tablet, using audio coupling. I also setup my Apple iPad Mini 2 running PSKer to try and pull some signals from the aether.


We were able to copy quite a few transmissions even without a digital interface between the tablets and the rig. We probably would've copied some more, but for the bourbon. ;)

On Saturday I setup my portable vertical antenna, Yaesu FT-817ND, and iPad.


As you can see, we setup inside his 16' x 24' pavilion, which was a godsend this weekend due to the weather. It rained on and off all weekend. There was little to no wind, so the open ends weren't a problem. We even setup my tent underneath the roof so it stayed mostly dry.


As you can see, I have my antenna feedline connected via the FT-817ND's front, BNC connector. As I understand it, using this instead of the SO-239 on the back reduces power consumption.  Also note that the feedline is connected straight to the rig, with no tuner. The vertical is resonant on 20M. Using a resonant antenna instead of one connected through a tuner increases your effective radiated power, and when operating QRP, every little bit helps.

The iPad is connected to the rig with one of KF5INZ's Easy Digi interfaces.

Pic of my vertical antenna:


The objects to the right of the antenna are steel gong targets set out at about 25 yards.

I mostly operated PSK31 and using the antenna above was able to reach the west coast.


I grabbed the above from pskreporter.info using my iPhone. Later, my signal was also reported in Washington state, but I forgot to get a screen shot.

After doing PSK31 for awhile I changed over to WSPR, using iWSPR. This was my first time trying this digital mode and it's amazing. The signal reports below are after transmitting for awhile on 5 watts.


Numerous hits in Great Britain, Western Europe, and Germany. WSPR basically acts like a beacon, transmitting your callsign so that other hams with Internet-connected rigs can upload signal reports. With some creativity I think it could have other applications.

We took time off from the radio to have a nice lunch of venison sausage and onions, sauteed in a red wine reduction. Yeah, we eat good when we go camping.


Saturday night's dinner was venison chili washed down with Yuengling Lager or Guiness Stout.

I also took a break from radio in the afternoon to do a little shooting. I first shot my Cowboy Pimp Gun, AKA a Ruger Single Six in .32 H&R Magnum which has a color case hardened frame and faux ivory grips. It's a fun little blaster but needs a trigger job. I put a bunch of Prvi Partizan .32 S&W Longs through it, which made a nice little tink when they hit our steel gongs.

I also put 70 rounds of .44-40 through my Cimarron 1873 Sporting Rifle.


Fifty of those were black powder loads with 35 grains of Goex 3Fg under a bullet cast in my Accurate Molds 43-215C bullet mold, and they really smacked the gongs around. If you click on the picture to view the full sized version, you can see some smoke coming out of the rifle's ejection port. I was doing an 1870s-style mag dump. Off to the left, you can also see the gong that I just shot swinging from the impact.

After I finished shooting my other friend put up about 500 feet of aluminum welding wire in a loop, all around our campsite. We got back to radio after nightfall and the loop turned out to work well for receiving 80M and 160M, and they both wound up getting 160M phone QSOs. Because the antenna height ranged from only a couple feet to a max of 5 feet, they were NVIS to other hams in northern PA and southern NY.

Finally, I took this picture of my iPad which looked like it was detecting Space Invaders on the waterfall.


Even though the weather this weekend was crappy we had a great trip. We got some good field radio practice in, plus a bit of fun shooting.

Monday, April 18, 2016

Old School Shooting and Reloading

Over on Blog O'Stuff, I've been writing about a Cimarron Firearms Uberti 1873 Sporting Rifle that I bought in March, along with handloading .44-40 ammunition for it. The gun is a replica of the Winchester 1873, "The gun that won the West."


Although it's a 19th Century design and by modern standards it's considered an obsolete weapon, one advantage these old guns and replicas thereof is that they can be kept going with low tech reloading methods. Ammunition can be loaded for these cartridges on modern equipment or with simple hand tools.

A modern reloading press like my Lee Classic Turret press is a lot more efficient than the hand tools. The hand tools are slow and don't allow you to resize fired brass, so it can be used only in the same gun in which it was first fired. That said, with a hand tool you can put together a portable, complete reloading kit that will fit in a toolbox. Perhaps the best of both worlds would be a Lee hand press, which uses standard reloading dies.

If chambered in one of the original centerfire rounds -- .44-40, .38-40, or .32-20 -- they are ideally suited for use with black powder or black powder substitutes like Pyrodex or Triple 7 and cast bullets. (Modern replicas are also available in .45 Colt, .357 Magnum, and .44 Magnum, all of which work great with cast bullets but don't seal the chamber as well when used with black powder, because of their thicker brass.)

Other lever action models have been chambered for the WCF cartridges, including replicas of the Henry, Winchester 1866, and original and replicas of the Winchester 1892.

This is an original Winchester Model 1882 reloading tool that I got off eBay, along with the original matching bullet mold. (The mold isn't pictured.)


This tool can perform the following functions without any adjustments:

  1. Deprime fired cases, if you have the original decapping pin, or can substitute a Lee Precision case length gauge in the right caliber.
  2. Seat a fresh primer.
  3. Seat and crimp a bullet cast from the original mold, or a bullet design with the same overall length (since it's not adjustable).

Under the tool, from left to right are a 200 grain bullet cast from the original mold, a charged case with bullet pressed in ready to be seated and crimped, and a complete cartridge. Above the tool are some cases charged with 35 grains of Swiss 3Fg black powder. The bullet was cast from reclaimed plumber's lead and lubed with a mix of beeswax, mutton tallow, and canning paraffin. There are other black powder compatible lubes you can make at home, e.g., a 50/50 mix of beeswax and Crisco.

The Ideal Tool Company (bought by Lyman in the early 1900s) offered similar tools, some with built-in bullet molds, and some with adjustable seating chambers to allow different bullets to be used. The Lyman 310 tool remains in production and can neck size spent brass, and has an adjustable seating chamber.

During the panics of the past eight years, black powder and BP substitutes remained largely available. In extremis, black powder can be made. There is plenty of info available online on how to do so, just be careful.

Primers are one component that tends to disappear quickly when panics hit, and cannot be easily made or reloaded, so it would be wise to stock up ahead of time.

Likewise, if you are setup to cast your own bullets, if you can obtain a suitable lead alloy and make some kind of bullet lube, all you need to worry about stocking up on are cases and primers. As of the time this was written (April 2016) cases for these "obsolete" rounds are easily available in quantity online. The primer supply is good now, too, either online, in stores, and at gun shows.

As a side note, the capacity of these leverguns is 14 + 1 for the 24" barreled rifles, or 12 + 1 for the 20" carbines. Either one has more firepower than a pump shotgun, with a lot less recoil, and a longer effective range.

The .32-20 is suitable for small game and varmints up to coyotes, but the .38-40 (really a .40 caliber) and the .44-40 are good on deer out to about 100 yards. The latter two also work well for defense, but when shot from a rifle, even the .32-20 is comparable to a 9mm handgun, so it's no slouch. The black powder WCF rounds may be "obsolete," but they are just as effective today as they were in the 19th Century.

In my opinion, the ability to load cartridges using components that you can get in times of scarcity or make yourself has value for preppers. It's something to consider if the rest of your preps are squared away.


Saturday, April 09, 2016

SignalLink USB

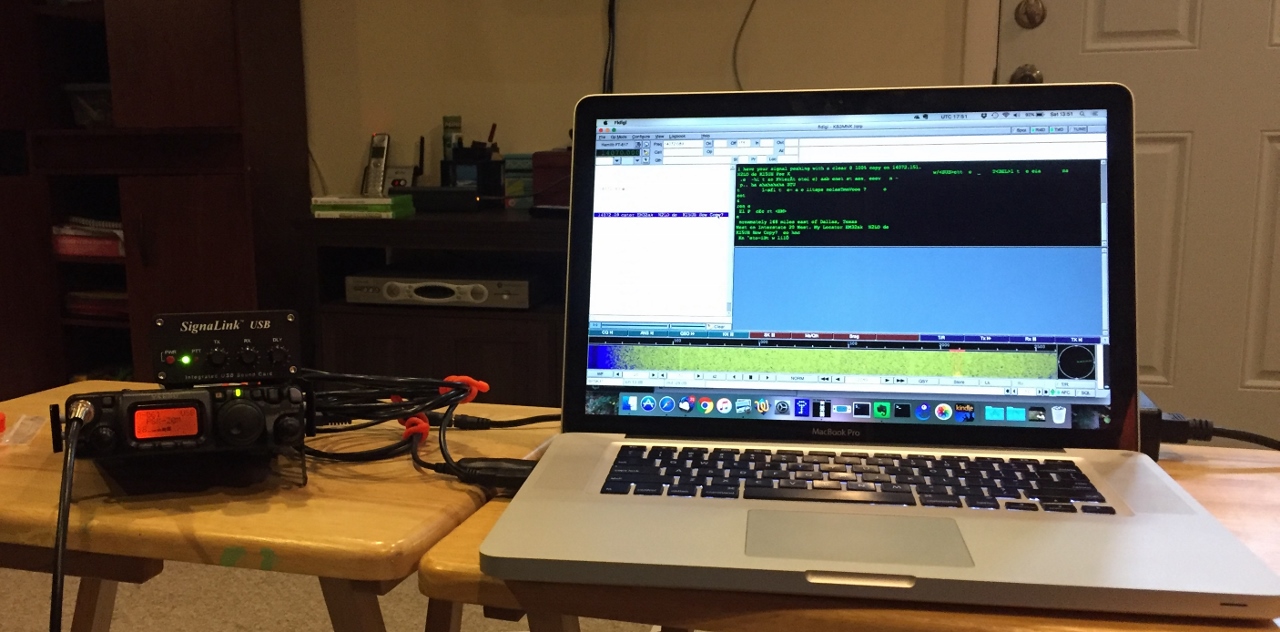
This morning a friend and I drove down to the Newcastle, DE Ham Radio Outlet, where I bought a Signalink USB, the jumper module to configure it for my Yaesu FT-817ND, a Diamond RH-707 folding HT antenna, a BNC-to-SO-239 jumper cable, and an MFJ-4103 A/C adapter for the FT-817ND. After getting home I set everything up in my den. Please ignore the clutter.


The antenna is a 7 to 30 Mhz AlexLoop. A lot of QRP operators favor one. I haven't used it enough to decide if I like it or not.

Setup of the SignaLink was pretty straightforward.


  1. Using the Allen wrench supplied, remove the front and back panels from the aluminum enclosure.
  2. Carefully align the jumper module and insert it.
  3. Reassemble the case.
  4. Connect a 6 pin mini-DIN to RJ45 cable from the SignaLink to the rig's DATA port.
  5. Connect an audio cable from the SignaLink to the rig's speaker jack.
  6. Connect the USB cable between the SignaLink and laptop.
  7. Since I want rig control, I connected my Valley Enterprises USB CT-62 cable between my MacBook Pro and the rig's ACC port.


Once everything was hooked up I changed the rig from VOX to PSK31-U data mode, and in Fldigi, selected the USB AUDIO CODEC for sound input and output.

Below, I'm monitoring a PSK31 QSO in Fldigi.


I played around with this setup for about an hour and was able to receive several signals. I called CQ but did not make any contacts. I gave up when 20M died.

I was impressed with the ease of setting up the SignaLink and wish that I'd bought one awhile ago. It's easier to adjust than the internal sound card.

The MFJ-4103 power supply looks like a good buy, also. It looks like a laptop power supply and would be a good choice for anyone traveling with an FT-817ND or using one as a base station where there is 120VAC power.

Friday, April 08, 2016

Valley Enterprises Yaesu Programming Cable

Last week I got a Valley Enterprises FTDI chipset-based programming cable for my Yaesu FT-817ND. This is a USB version of the Yaesu CT-62 serial cable used for rig control and programming.

I took today off to finish my income taxes and after I was done I decided to play with the cable. I already had an FTDI driver on my MacBook Pro, so I was able to just plug it in, connect it to the radio, and use it to program the rig using CHIRP. I also tried it with Fldigi and once I selected the correct driver in the config screen, it worked. If I put the rig into memory mode and manually selected the frequency it immediately showed up in Fldigi. Likewise, if I used Fldigi to change the frequency it worked on the radio.

Tomorrow I'm planning to head down to Ham Radio Outlet and pick up a Signalink USB, among a few other things. The Easy Digi interface I have now works but it's a rat's nest of cabling. The Signalink USB should reduce the clutter and simplify setup and teardown. Combined with the Valley Enterprises cable I tested today, it should make digital mode operation a lot easier.

Saturday, March 19, 2016

Kelty Cosmic Down 20 Sleeping Bag

After my last overnighter back in January I decided that I needed a better sleeping bag rated down to about 20 degrees F. I got some good feedback from posts on THR, the Hill People Gear forum, and BCUSA, but held off on buying anything until today.

I used my REI dividend and 20% off coupon today to get a Kelty Cosmic Down 20 19*F rated bag (REI link to bag. Amazon link to bag.) It weighs 2 lbs. 9 oz., and is filled with 600 fill moisture-resistant DriDown. It came with a stuff sack but no storage bag so I also bought an REI-brand cotton bag to store it in uncompressed. 

If I'm expecting colder weather I can use my HPG Mountain Serape as an overbag.  The combination should get me down into the teens and still be a lot lighter than my USGI Military Sleep System.


While at REI I also grabbed a couple packs of Nite Ize Gear Ties, which are very handy for organizing cables that go with electronics. Between my dividend and the coupon, I was only out about $50.

Once I get the chance to use the Kelty bag I'll post a report, but it may be awhile.


Sunday, February 14, 2016

Arc'Teryx LEAF Atom SV Hoody Review

A couple years ago I bought my first article of clothing by Arc'Teryx, an Atom LT Hoody. I've been incredibly happy with it. It weighs about one pound but keeps me warm down into the low 40s, and makes a great mid-layer when combined with an outer shell. It's also super packable, which is very handy when adding it to a bag for a trip, or when I wear it to work on a cool morning but want to shove it in my laptop bag for the trip home.

However, I wanted a warmer jacket that would still be packable. Last Fall I picked up an Eddie Bauer 700 fill power down jacket that is pretty nice, but the hood bugs me when I try to wear it over a ball cap. It simply isn't large enough. So, back in January I ordered an Arc'Teryx LEAF Atom SV Hoody in Wolf grey from SKD Tactical. It got to PA from MO in two days. SKD is probably going to get more of my business.


Arc'Teryx calls this jacket a hoody but don't compare it with a sweatshirt. This is an insulated technical jacket that is filled with 100gsm Coreloft with a wind and water resistant shell. The jacket weighs a little more than a pound.


"LEAF" is Arc's Law Enforcement and Armed Forces line. Arc LEAF items are built with a bit more durable material and have a fuller cut, which is good for me since I'm not exactly athletic. I ordered my normal t-shirt size, XL, and I find it pretty true to size.

As with my other pieces of Arc'Teryx gear, the workmanship is top-notch. The stitching is exceptionally well done, there were no loose threads, and it looks sharp.

The LEAF Atom LT has a generously-sized hood that can be cinched down with a shock cord accessible from the back, and one on either side of your face. The shock cords and cord locks are concealed by fleece panels that prevent them from rubbing your face. This keeps them neat but does make it more difficult to adjust with just one hand. When not in use the hood can be rolled up and secured with a loop and toggle.


Likewise, the bottom hem can be tightened against wind via shock cords. These are also captured in tunnels, unlike in every other jacket I've seen. This prevents them from snagging on items on your belt, like a holster, or on things you brush against. Simply brilliant.


The jacket has three pockets -- two large handwarmer pockets and one internal left chest pocket. All are zippered.

There are inside ports on both handwarmer pockets that allow you to route earbud or microphone cables from a device up through the inside of the jacket.

Since the LEAF line is marketed towards law enforcement and the military, the upper sleeves have Velcro patches. While I'm neither, I figured that I'd adorn the jacket with a couple -- an American flag that I bought with the jacket, and a Gadsen patch in Hebrew that I got from Zahal.org.

The cuffs are a light, stretchy material that seals out drafts but is light and dries quickly. They are the same as on the Atom LT.

I've had the Atom SV now for about a month am very pleased with it. I've been wearing it as my winter coat during my daily commute with temps down into the teens. When it dips down to 20*F or below I'll add a light fleece underneath. (I'd expect to get too warm with the fleece if I were active, but my commute consists of a two mile drive to a train station, then a half hour ride on a commuter train into town. I.e., pretty sedentary.)

The outer shell is more robust than the shell of the Atom LT. It's highly wind resistant and the DWR finish shrugs off light snow and rain. Despite the light weight of its outer layer, it's durable. I wore it on a January overnighter in a Pennsylvania State Forest, when I had to abort in the middle of the night due to unrelated gear issues. While walking out to my truck I had to do some bushwhacking, which included going through some thorns. I thought for sure that I'd just trashed a $270 jacket, but nope. Remarkably, the Atom SV showed no signs of wear when I was able to inspect it in daylight.

For cold, dry conditions, the Atom SV works well as an insulating layer under a German surplus flecktarn parka. I tried this combination while getting my snow blower ready for Winter Storm Jonas. The temp was 23* F. with a wind chill of about 11*. That's pretty cold for those of us living in SE Pennsylvania. The inexpensive German parka adds further protection against stains and tears, while extending a windproof layer down to your thighs, and has a good camo pattern if you need it. Underneath I wore jeans, a t-shirt, and a Duluth cotton flannel shirt. After being outside for about 20 minutes and mildly exterting myself I started needing to vent. It's a good combination.

As good as the Atom SV's shell is, it's is still a synthetic. Care is warranted if you'll be spending time around a campfire, and an outer layer like the German parka, a British smock, or similar cotton or wool shell would be a good idea to prevent the Arc hoody getting holes from sparks.

The only changes I'd make would be to add a left side Napolean pocket on the outside of the coat and move the inside pocket to the right. I like stashing my phone in a Napolean pocket since it's easier to access while seated in my truck or on the train.

Overall, I am extremely pleased with both SKD Tactical's fast service and the Arc'Teryx Atom SV Hoody. It's a light but warm jacket that will serve for the vast majority of my winter coat needs.

Monday, February 08, 2016

Hill People Gear Kit Bag Pictures

In my previous post (q.v.), I listed the contents of each pocket of my Hill People Gear Original Kit Bag. Since a picture is worth a thousand words, this post should be worth about 6,000 and change.

First, the zipped up Kit Bag and then the back compartment with my S&W M&P Shield 9 and a spare magazine. When worn, the pistol doesn't move at all, but I will probably buy a kydex holster that covers the trigger guard.

If you click on each pic you should get a full sized version.


Next we have the middle compartment with an assortment of survival gear.


Finally, the outer compartment with a few more items. This is where I stow my keys and iPhone. It provides easy access to the phone without having to worry about everything falling out when I'm consulting the phone's GPS.


Sunday, February 07, 2016

Hill People Gear Kit Bag Loadout

A couple years ago I bought a Hill People Gear Original Kit Bag. This is the gear that lives in it 24x7. I use the bag on day hikes and overnighters. I have found the Kit Bag to be the most comfortable way to carry a pistol while hiking when carrying a pack. It also provides a very convenient and comfortable means of carrying a basic survival kit, and an easily accessible but secure way to carry my car keys and phone when off-pavement.

I augment the contents as dictated by the particular trip. E.g., add a Cliff bar or two.

Rear compartment:


  • Smith & Wesson M&P Shield 9 with 8 round magazine
  • One spare 8 round magazine, held in place with a Maxpedition Universal Holster

(The gun and spare magazine are loaded with Federal XM9001 9mm 115 grain JHP. In PA, I'm not worried about wild animals larger than dogs. The gun is there for defense against people. I've also carried a Beretta M9 and a CZ P-09 but switched to the Shield to reduce weight.)

Middle compartment:


Outside compartment:


Items marked with an asterisk are dummy corded to light aluminum caribiners with bank line. I replaced the Slick Clips that came with the KB with the 'biners because they are easier for me to open and close.

Once I get to the trail, I'll stow my car keys and iPhone 6 in the outside compartment. Depending on the trip I may also bring a larger compass and a Garmin GPSMAP 62 GPS unit, but not necessarily in the KB.

Also, I removed the Grimlocks from the outside of the KB, since I don't use them.

Monday, January 25, 2016

Winter Storm Jonas Gear Report

Thankfully, the impact of Winter Storm Jonas on my area was limited to a crapload of snow. We got about 2 feet, plus or minus. (It's hard to get an accurate measure due to the drifting.) This was the 4th biggest snowstorm to hit the Philadelphia area since they began keeping records.

High winds were predicted for this storm but they didn't hit our area, and our power never went out. Because of the predictions I charged all the batteries for things like drills, radios, lanterns, and cell phone power banks. I also filled a Dietz hurricane lantern with lamp oil, but we didn't need either it or our kerosene heater.

A few things performed well during the cleanup:

1. Troy-Bilt Storm 2410 snow blower. I bought this in the Fall of 2014 as an upgrade from the smaller Troy-Bilt 5524 that I got in 2004. The extra size was very welcome with the amount of snow we got, especially when it came to clearing my driveway apron after the township's plow came through. The 179cc engine started easily even after sitting outside under a tarp in sub-freezing weather, and had plenty of power.

I am going to look into putting chains on the snow blower tires, however. The additional traction would be helpful.

2. ORC PCU Level 5 softshell pants. These remain one of the best items I've ever bought. They kept my legs warm and dry even when I had to wade through snow up to my thighs.

3. Arc'Teryx LEAF Atom SV Hoody + French Army MVP* CCE** surplus parka. The Atom SV provided plenty of insulation down into the teens and twenties when worn under the French parka, which blocked the wind and kept me dry, even when getting drenched with windblown snow from the blower. The French parka is available for $35 from keepshooting.com. If they have it in your size it's one of the best buys you can make. I'd rate it up there with any of the high end civilian GoreTex parks I've owned from Mountain Hardwear and Arc'Teryx, which cost A LOT more.

A few fails:

1. My father's vintage-2000 MTD snow blower (basically an older version of my Troy-Bilt) kept stalling due to a mix of old gas and new gas. Once it warmed up enough it was able to handle the mix.

2. However, to get to that point it had to be restarted. This was a problem when it stalled at the bottom of the driveway and the pull cord for the recoil starter broke when my brother tried to restart it. I had to drive over with a 100 foot extension cord so that it could be restarted. (My parents live around the block, so it was a short trip.) He'll be buying a suitably long extension cord, and replacing the starter rope.

3. I managed to get my Xterra stuck in front of their house when I pulled as far to the side of the street as I could. However, I remembered to toss a collapsible snow shovel in the back of the truck before I went over, so I was able to dig myself out in a couple minutes.


Notes:
* MVP = Moisture Vapor Permeable, like Gore-Tex.
* CCE = The French central European camo pattern, similar to US woodland but with more tan.

Monday, January 18, 2016

Aborted Overnighter

With Monday off for MLK Day and the weather being mild for January in Pennsylvania, I thought that Saturday night would be good for a solo overnight camping trip in the Conrad Weiser State Forest Port Clinton Tract. I did an overnighter there with my daughter last Fall and we had a great time.

So Saturday morning I packed my gear and headed up to the forest around lunchtime. It's a little more than hour away. I arrived around 2:00 PM, hoisted my pack, and headed in using the same trail we used in October and when I went back for a day hike a few weeks later.

I hiked in further that our previous campsite, because on my last visit I noticed some standing dead trees a little too close for comfort. It took me about an hour to find a suitable spot off the trail that was level, away from widowmakers, and had two trees the right distance apart to support my tarp, but with enough room to extend the shelter back.

I setup the tarp with the back to the northwest, to block the prevailing wind. Rather than the lean-to pitch I've used before, I rotated the tarp so that I could extend the sides down to more fully enclose it.


I like to pitch the tarp fairly low so it doesn't catch the wind and is stealthier.

For dinner I had some jerky and beef flavored ramen noodles in a cardboard bowl. Afterwards, the bowl went into the fire.


For boiling water I used my Stanley pot and Etekcity canister stove. The stove is light, cheap, and works well at least down to about 30 degrees. But if I'm planning to be out in lower temps, my Kovea Spider will be used instead. It can be run with the canister inverted and I also have an adapter to allow the use of 1 lb. propane cylinders.

The temperature was about 40 degrees F. during my walk in and until sunset.


My bedroll consisted of:

* USGI casualty evacuation blanket for a ground sheet.
* Ridge Rest foam pad.
* Klymit Static V insulated air matress.
* British surplus jungle sleeping bag.
* Hill People Gear Mountain Serape (medium sized).

My plan was to use the Mountain Serape as an overbag with the British jungle bag inside of it. I ran into problems with this, mainly related to the jungle bag. I've used the jungle bag before without issues, but that was in warmer weather. This time, I had on a fleece top that had a lot of friction with the inside of the bag. This made it very difficult to turn over, which is a problem since I'm a side sleeper.

Eventually, I decided to just unzip the jungle bag and the footbox of the Mountain Serape and use them as quilts. This was warm when they stayed on top of me, but the Serape kept slipping off the jungle bag whenever I turned over. I'm going to have to suck it up and get a light 20 degree bag. Suggestions welcome.

To compound matters, the Klymit Static V air mattress sucks for side sleepers. I'm going to return to using my Big Agnes air mattress. My daughter may like the Klymit better.

After tossing and turning for several hours I got up in the middle of the night and fixed myself a cup of hot chicken broth. By this time it was down to about 30 degrees and expected to drop a few more degrees.


The stove is sitting on a Jetboil Fuel Canister Stabilizer. I found mine at REI but there's an Amazon link. It makes the canister stoves a lot more steady, especially when using the small diameter canisters. It will fit large fuel canisters, too.

Following a few minutes of considering what to do, I said <bleep> it and aborted the trip.

Striking camp when it's pitch dark is a bit more difficult than when it's light, but my headlamp worked well during this and the approximately 850 yard walk out.

Although I ended the trip early due to gear failure, the rest of my gear worked fine. A few standouts:

* Arc'Teryx LEAF Atom SV Hoody. I got this last week from SKD Tactical and I think it's my favorite jacket, ever. It was warm and stood up well to thorns. It merits its own post, which will be forthcoming shortly.

* Princeton Tec Remix headlamp. I mostly used the low power setting around camp, but when set to high it throws a nice beam. I used that when I was working my way back to my truck.

Seriously, don't go into the woods without a headlamp. The ability to work with both hands cannot be understated. I also used an inexpensive Cree LED single-AA light but if I could have only one, I'd keep the headlamp.

* Hill People Gear Kit Bag. I've had this now for a couple years and for me it's the most comfortable way to carry a gun in the woods. My S&W Shield with a spare mag is hardly noticeable. The KB also provides a secure, and easily accessed method of carrying a small survival kit, my car keys, and iPhone, which I used as a GPS. I kept the iPhone in the front zippered pocked of the KB and would stop every 25 or 30 yards to check it to make sure I wasn't walking in circles.

* The iPhone app Spyglass. It's a compass and GPS. Since I'm carrying the phone anyway, it's great to be able to use it instead of my Garmin. On our first trip to the CWSF I had marked my parking spot as a waypoint, which facilitated navigating back to the truck in the dark. (Yes, I had a compass and map. Spyglass is a lot easier to use, especially in the dark.)

* Hill People Gear Mountain Serape (medium). Whatever wind leaked around my tarp was stopped by the MS. Although it didn't work out so well as an overbag in concert with the British jungle bag, I can tell it'll make a great bag for 40 and above, or to carry on day hikes when I'm not planning to spend the night, but want something just in case. It's windproof and highly water resistant, so it could serve as both insulation and shelter. Like the Arc jacket, this merits its own post, which I'm working on.

Even though the trip didn't work out as I'd planned it was a good learning experience.

Sunday, January 10, 2016

Campsite Intruder Alarm With Fireworks

This is a neat video from Survival Lilly showing how to create a tripwire-activated campsite alarm using a firecracker/noisemaker, matches, twine, and duct tape.


With a little work, this could be weatherproofed and a better mounting system could be devised. That said, this is a good starting point.

Tuesday, December 29, 2015

Archery for Preppers?

With my interest in archery having been rekindled of late, naturally I began to consider whether or not including archery in one's preps makes sense. Certainly, archery played a major role in humankind's rise over the animal kingdom, and bows were important military weapons for millennia, but do they have a place in the 21st century prepper's armory?

Searching the Internet for "survival bow," "survival archery," or "bows for preppers" results in a ton of hits. Several prepper oriented sites recommend adding a bow to your equipment. E.g., this article, complete with a pic of Our Hero wearing a hoodie and gas mask and getting ready to loose an arrow.

But, I'm going to go out on a limb and state that for most preppers in the USA, archery equipment should be far down on the list of gear to get, after food, water, shelter, and firearms. If you're in a jurisdiction that does not allow or heavily restricts civilian ownership of guns but does allow archery equipment, a bow or crossbow moves up the list.

A smart prepper will prepare for the most likely events. Trying to live off the land by hunting and fishing is far less likely than surviving a period of unemployment, short duration social disruptions, or natural disasters. Only the latter two situations really require that you be armed.

Even if the end of the world as we know it happens, wild game is likely to be depleted in a short time. Go compare the amount of wild game available in the 1940s after the Great Depression, when the only source of protein for many was wild game, with what's available now, after decades of conservation. Planning to survive TEOTWAWKI by heading for the hills and adopting a hunter/gatherer lifestyle is planning to fail.

IMNSHO, the single most versatile weapon for a prepper is a concealable handgun such as a Glock 19 or S&W M&P Shield. This allows you to be discretely armed in public and can double as a home defense gun. If your finances permit, add a suitable long gun as a dedicated home defense gun.

Further, even firearms which are now considered obsolete replaced bows and arrows as primary weapons, largely due to them being much easier to learn how to shoot well. As much as I love archery, I would take a flintlock musket over a bow for either hunting or defense.

That said, archery gear does have some advantages:

1. Regulations for purchase are typically minimal or non-existent. Even in many areas that heavily restrict firearms ownership, archery equipment is unregulated. If I lived in a a country where civilian gun ownership is banned, I'd definitely have a recurve bow with a good supply of arrows, and practice with them. I'd also learn how to make arrows from hardware store materials. See, e.g., The Dowel Arrow Handbook.

2. Bows and arrows are quiet compared to unsuppressed guns. That means you're less likely to be discovered if you need to shoot. Crossbows are surprisingly loud, however.

3. Traditional bows can be made at home for low cost, from either hardware store lumber or even PVC pipe. Similarly, arrows for traditional bows can be made from carefully selected dowels or bamboo tomato stakes. Lethal arrowheads can be fashioned from sheet steel or old saw blades (YouTube link). Note that this does NOT apply to arrows to be shot from modern compound bows.

35# PVC bow by Backyardboywer

Home Depot tomato stake arrows by "tenbrook" on Primitive Archer.

4. Bows can be used to take game ranging from squirrels and birds up to moose. With the right kind of arrows, you can even take fish.

5. Bows can be used for defense, although they are far from ideal for this. Even short, Asian-style bows are long and cumbersome indoors. If you're outside, they do give you a standoff option if you don't or cannot have a gun.

6. Within limits, arrows are reusable. When shot into game, it's not unusual for wooden arrows to break or aluminum arrows to get bent. Modern carbon shafts will usually be fine afterwards, although they may need refletching and the edges on the broadhead should be resharpened.

7. With a lot of practice, an archery shooting a traditional bow can fire several arrows quickly.

8. Crossbows are almost as easy to shoot as a rifle out to about 50 yards, and can be carried ready to fire.

And of course, archery has some disadvantages:

1. Compound bows that are relatively easy to shoot well are not easy to maintain, once they need repair or periodic maintenance. You need a bow press to work on a compound bow, and you'll need suitable strings and cables to keep it going.

2. Compound bows require modern arrows made from aluminum or carbon fiber.

3. The rate of fire for a modern compound bow is low. Between nocking the arrow and clipping the release to the bow's string or D-loop, rapid fire isn't very feasible. Older compounds that can be shot by drawing with your fingers can be shot faster, of course. Crossbows are even slower.

4. Traditional bows, whether purchased or made at home, require a lot of practice to use effectively. One of the main reasons that early firearms superseded bows on the battlefield is because it takes a lot less training to use a gun effectively.

5. Even expert archers have a shorter effective range than a moderately trained person armed with a rifle or shotgun and slugs. Most traditional archers limit themselves to 20 - 30 yards when hunting deer-sized game. You can stretch this a bit if shooting in defense. An arrow through a non-vital area like a shoulder or leg is likely to at least slow down an assailant even if he isn't put out of commission permanently.

So, having looked at the pros and cons of archery, if you're still looking to add a bow to your preps, what are some good choices?

IMO, the maintenance requirements of modern compounds outweigh their advantages for long term survival use, so strike them from your list, unless you're already an archer and learn to maintain them and stock the required tools and materials.

If you don't have the time to dedicate to learning how to shoot a traditional longbow or recurve, then a recurve crossbow makes sense. There are some inexpensive Chinese made crossbows on Amazon that get good reviews, although I don't have any first hand experience with them. E.g., the SA Sports Fever and the Arrow Precision Fury. Back in April, I bought a Barnett 78615 Recruit recurve crossbow for deer hunting and have been pleased with it. (Still haven't shot any deer with it, though.) On the high end, look at Excalibur crossbows.

My Barnett Recruit recurve crossbow.

Another option is to haunt Craiglist for deals on used crossbows. This is especially true after deer hunting season closes, since a lot of guys like to dump archery gear (not to mention deer rifles) in January. A good choice would be an old, wood-stocked Barnett Wildcat, as long as it's been reasonably well maintained. Dave Canterbury did a good video on that here, showing off one that he sangged at a gun show for a paltry $25.  If you go this route you may need to replace the string, and picking up a couple spares wouldn't be a bad idea, either.

If you're willing to put in the time for practice a used longbow or recurve is a good choice, since they are so simple. A takedown bow can be handy if storage space is limited, and helps when traveling or if it's going into your bugout kit.

My Samick Sage takedown recurve bow.

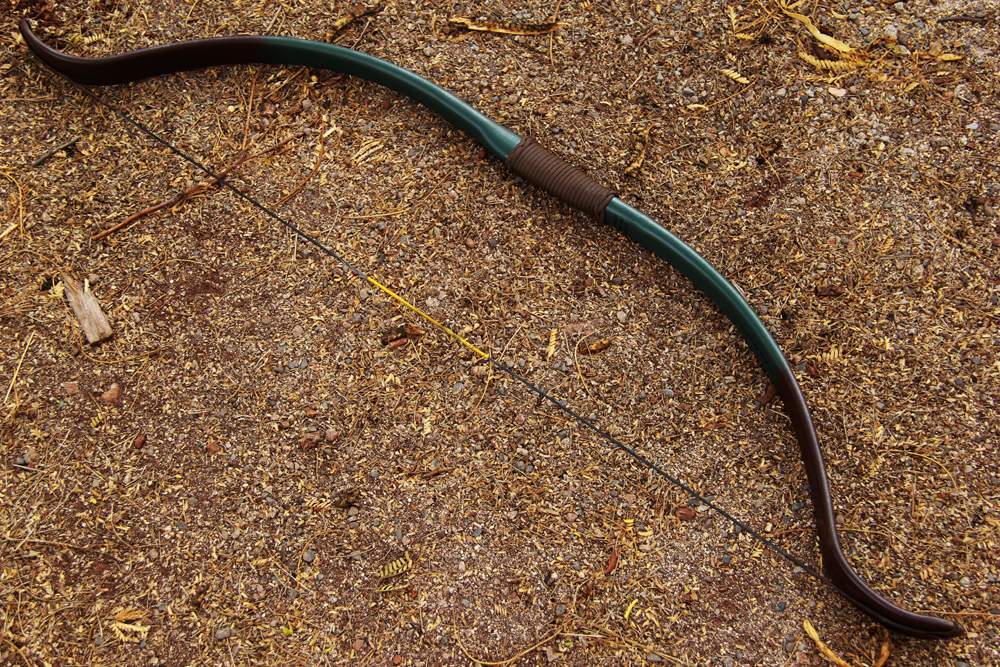
I recently posted on Blog O'Stuff about the Samick Sage takedown recurve. It is a good choice for a survival bow. The going rate on them is about $139, and for the money it's an excellent buy. Since it's a takedown and Samick sells limbs separately, you can buy limb sets in different weights. E.g., 35# for extended practice sessions and 50# for hunting. As a takedown it can be stored in a compact case complete with arrows, glove or tab, and bow stringer.

In summary, archery gear may have a place in your preps. But when deciding whether or not to include it make sure that you take into account all the legal, technical, and tactical reasons for adding it.

Monday, December 07, 2015

Lever Action Carbines for Defense

Recently I was able to get some shooting in over a friend's house (he lives in the country). One of the guns I shot was my Rossi 92 lever action in .357 Magnum. It's a replica of the Winchester 1892, designed by John Moses Browning. Shooting the R92 got me to thinking about the practical application of this 19th Century design in late 2015, especially in light of current events.


Those of us who live in free states have unfettered access to modern defensive rifles like AR-15s, with full capacity magazines. However, if you live in a ban state such as New York, unless you're willing to break the law, no more standard capacity magazines will be available. If you're just now looking to get a defensive rifle, modern semiautos and acessories may be limited in availability.

In my opinion, a lever action is a viable alternative, even though the basic design is a century and a half old. If we're looking at a rifle for defense against bad guys (as opposed to dangerous animals) the ones to look at are those which fire handgun cartridges. Although there are several other options, if buying a levergun for social purposes I suggest that you choose one in .357 Magnum, .44 Magnum, or .45 Colt. These are currently the most common such cartridges and are easy to reload for.

Of these three, my first pick is the .357 Magnum. Ammunition is widely available at less cost than .44 Magnum or .45 Colt, it provides effective terminal ballistics, and recoil is mild.

From rifle length barrels, magnum revolver cartridges get a big performance boost. For example, a .357 Magnum 158 grain bullet that leaves a 4" revolver barrel at about 1250 FPS will probably be doing at least 1700 - 1800 FPS from a 20" carbine. .357 loads with 125 grain bullets can exceed 2,000 FPS from a rifle! The muzzle energy of a .357 Magnum round fired from a rifle can be double that of the same load fired from a handgun.

Compared with a shotgun, lever action carbines have less recoil, smaller and lighter ammo, and greater magazine capacity (generally speaking).

Currently, the Rossi 92 is probably the most commonly available pistol caliber levergun. The Marlin 1894 is still around, but 1894s in .357 seem to scarce as hen's teeth. There are also Winchester 1894s in .357, .44, and .45 available on the used gun market, if you can find one.

Some features that I like about the Rossi 92 include:


  • The 20" barreled models hold 10 cartridges in the under barrel magazine. The 16" models hold 8, while the 24" rifles hold 12 rounds.
  • In the 20" barreled version, it weighs in at about 5 pounds. Even my 11 year old daughter is able to shoulder it.
  • The .357 Magnum carbines have very mild recoil, even with full power loads. I've single loaded .38 wadcutters, which recoil like and sound like a .22 when fired from the 20" barreled carbine. This is great for familiarization firing for new shooters, and can also be used for small game.
  • The design includes a built-in gunlock incorporated into the hammer. It is unobtrusive and is locked/unlocked with a key included with the rifle. If you want to secure a loaded rifle outside of a safe, it's one of the better solutions I've seen. IMO, it's safer than gun locks that go in the trigger guard.
  • Rossi 92s are reasonably priced and readily available, although you might need to order one through a local FFL or from an online retailer. 
  • While my rifle is blued steel, Rossi also makes the 92 in stainless steel. If you need a rifle for a boat or other humid environment this is definitely a big plus.


Some things I don't care for:


  • There are some rough edges inside the loading gate that I need to debur. They can chew on your fingers when loading the magazine.
  • Several years ago Rossi added a manual safety on top of the bolt to John Browning's original design. It feels cheap and cheezy. I removed mine and replaced it with a plug from Steve's Gunz. The gun still has the original half cock on the hammer.
  • The magazine follower is a cheap piece of plastic. I replaced mine with a steel follower from Steve's Gunz.
  • The finish on the wood was not only bland, but it didn't seal the wood well, either. I gave it a couple coats of Watco Danish Oil to better protect the stocks. Boiled linseed oil, tung oil, or a sprayed on polyurethane would also work well.
  • Browning's design does not lend itself to easy takedown. The good thing is that takedown is rarely required. Marlins are much better in this regard.

Steve's Gunz has a good DVD on slicking up the Rossi 92s.

As an aside, Rossi's quality control can sometimes be a little spotty. Years ago I had an 1892 Short Rifle in .357 made by Rossi for EMF. It had a 20" octagonal barrel, crescent buttplate, and no barrel band around the forearm. It was a beautiful rifle but when I first got it, it gave me extraction problems. Rossi had me send it in and they fixed it, but this was a hassle. At some point I traded it off but I do regret that.

The pistol caliber lever actions give you a light, fast handling rifle that fires an effective cartridge, can be operated quickly, and especially in .357 and .45 Colt, has mild recoil. It's worth a look for home or property defense if you can't have a modern rifle.

Monday, November 02, 2015

Day Trip to the Conrad Weiser State Forest

Yesterday I went up to the Port Clinton tract of the Conrad Weiser State Forest and had the chance to try a few pieces of gear.

1. Sony DSC-W810 digital camera. I chose this as my 15 year gift from my employer. I used it to take the pictures in this post. It takes good quality still photos but for video it sucks -- grainy, focusing problems, etc. Disappointing.

2. Etowah Outfitters 10 x 10 tarp. It's polyurethane coated ripstop nylon, and is nice and light. Instead of grommets it has nylon webbing loops sewn on. If one tears out you can sew it back on in the field.


I bought the Etowah tarp so that I could have a larger shelter than my USMC field tarp, for when I go camping with my daughter. The 10 x 10 tarp will allow me to set it up with enclosed sides but still give us adequate room. I brought it yesterday to try setting it up. If I was planning to spend the night I'd rig it so that the sides touched the ground, to block as much wind as possible. This pitch would work to protect you from rain pretty well, however. There was plenty of room underneath it for me and my gear.

3. Etekcity canister stove. Ten bucks on Amazon Prime and it works great for boiling water. I used it with my Stanley cookset to boil water for my Mountain House chili mac & beef lunch, and a cup of coffee. I've lit it a few times and each time, the built in piezo igniter started it on the first click. I don't know how well it'll hold up in the long run but for an occasional use unit, it looks like it'll do the trick.

4. Stanley 24 oz. Adventure Camp Cook Set. Well made except for the plastic tab handle on the lid. I previously replaced that with a stainless steel key ring. I didn't use the plastic cups that came with it. I'd left them home so I could store the stove, a bandana, and a fuel canister inside the pot. An Olicamp or GSI cup will nest over the outside. It is too tall and narrow for eating from, but it's good for boiling water on a canister stove. It has graduations stamped into the side for measuring water.


The foam pad was from Dick's Sporting Goods. It was good for kneeling on, but next time I'll schlep my REI camp chair, which is a lot easier to sit down on or get up from.


I made myself a cup o' joe after lunch using a Folger's coffee single. It's basically a tea bag, but with coffee. I'd rate it as better than instant coffee but not as good as coffee made using a drip, French press, or percolator. However, it's very convenient.

Finally, I practiced a little bit of fire starting. Pic of the ashes before I doused them:


FT-817 Legs

The Yaesu FT-817 is a great all band, all mode QRP rig, but one feature it lacks is a set of legs to prop it up so the face is at a good viewing angle. My previous solution was a stand made from a CD jewel case. A nicer fix is to add folding legs.

Back on October 17th, I ordered a set of "Black Edition Carbon Fiber Sport Legs" from eBay seller radioshackus (not to be confused with Radio Shack). Anyway, they arrived today from Hong Kong and I installed them tonight.

They came sans instructions but after looking at the pic on the eBay listing I figured it out. I'll note that if you get these legs or something similar, you will need a good, properly fitting Phillips head screwdriver to remove the OEM Yaesu screws holding on the carry strap brackets. They are in tight.

A couple of pics of the legs as now installed on my radio:


If you prefer to order FT-817 legs from a US vendor, see here. Note that while the seller is American, these are made in Germany.

Compared with an external stand, the folding legs are a lot more convenient and add no noticeable weight to the radio.