Showing posts with label gunsmithing. Show all posts

Tuesday, July 21, 2026

Pipe Cleaners and .22s

I wanted to swab the chambers on this High Standard and my bag of pipe cleaners was handier than my .22 cleaning rod, so I figured I'd give it a try. Doubled over the pipe cleaner is a snug fit that still pushes through easily. You could even use it to clean a rifle bore by cutting a short section, folding it in half, and then pulling it through with a thin line. You're not going to be doing any serious scrubbing but it'll work for applying solvent or oil.


You can get pipe cleaners with embedded plastic bristles which would be slightly more aggressive but they are probably not needed unless the bore or chamber are really crusty, although I do find them handy for cleaning hard to access spots in guns.

Monday, July 20, 2026

Fixing a High Standard R-108 Sentinel Snub Revolver

One of my favorite guns is a High Standard Sentinel R-101 .22 with a nickeled finish and 3" barrel, that I bought in near-new condition about 5 years ago. It's given excellent service.

A couple years ago I found a later Sentinel R-108 snub with a 2" barrel, and the original box and papers included.I jumped on that because the shorter barrel makes it a lot more pocketable, and 9 rounds of CCI Stingers or Federal Punch .22s is nothing to sneeze at.


Unfortunately, the snub gave me problems at the outset with the cylinder binding. I tried swapping cylinder assemblies with one I grabbed off eBay but that was for nought. It needed to have the cylinder disassembled to find the problem. I figured it would be a burr or some grit had managed to work its way inside.

The problem is that the Sentinels are notoriously difficult to put back together once taken apart. They are held together with pins and you need to align all the holes just right, often under spring tension. So, the gun sat until today when I finally got tired of it occupying space.

After removing the cylinder from the frame, which isn't difficult, to get the cylinder stripped I had to remove the cylinder lock plunger pin (part # 7112). This pin is about as thick as a pencil lead and 3 or 4mm long. It's under pressure from a couple springs (#7513 and #7576).

I managed to drive it out and not shoot any parts across the room. Upon pulling everything apart I found that ejector rod spring (#7576) was splayed out on both ends, causing cylinder rotation to bind. I clipped both ends which still gives plenty of spring pressure for the ejector rod to rebound.

Now came reassembly. I had to hold three parts under spring pressure in alignment and drive that tiny pin back into place. Aside from a small diameter drift punch I found a small hook from a Harbor Freight set indispensable.

You also need to stick your tongue out at the right angle, squint correctly, cross your toes, and pray. In extreme cases you may need to sacrifice a chicken.

After reassembly and a few cylinder's worth of dry firing (safe to do with the Sentinel) it seems to be working smoothly.

Part of self reliance is being able to work on your guns. To that end, you should have a gunsmith's screwdriver kit with an assortment of bits that properly fit gun screws, a set of drift punches, a non-marring mallet, and a bench block. A vise with non-marring jaws will also be very handy. Also, magnetic parts trays help keep you from losing small parts when you've got a gun apart.

I feel like I earned a bowl of Half and Half in my Falcon pipe, along with a can of Yuengling Lager.


Hopefully I'll get to do a live fire test soon.

Friday, January 31, 2025

Soft Jaw Pliers For Gunsmithing

Last week I found an old Lee Loader for 20 gauge shotgun shells on eBay for a very good price so I snagged it. It's basically new-old stock and came complete in the cardboard box with instructions, loading data, and all the parts.


The kit that I bought dates from the 1960s, before Lee changed their shot dippers over to plastic. It's made from aluminum. There was some corrosion on it preventing me from pulling out the inside part to increase the volume of shot.

After letting some Kroil soak into it for a few days, I used this set of soft jaw pliers to rotate the inner sleeve and break it free. I was then able to pull it all the way out and clean the corrosion off with 0000 steel wool.

I originally bought the pliers to help removal of the cap for the CO2 cylinder chamber on my QB-77 pellet rifle. Since then, they've come in handy for a variety of projects when I needed a good grip on something but didn't want to scratch it.

If you do any kind of home gunsmithing I highly recommend picking up a set.

Sunday, June 30, 2024

Revolver Chamber Brushes from Brownells

Cleaning the charge holes is an important part of maintaining a revolver. If you shoot .38 Specials in a .357 Magnum it's especially important to do so to knock back the crud ring that results. However, even using a bore brush this is a fair amount of work.

Brownells sells revolver chamber brushes for .38/.357 and .44/45. They are larger in diameter and longer than pistol bore brushes. This morning I used one when cleaning my S&W Model 64-2 snub .38.


(Yes, my workbench is cluttered.)

Note how much longer the chamber brush is than a bore brush. Also note that it's longer than the frame opening for the cylnder. Do not put the chamber brush down the bore because getting it back out is going to be extremely difficutl.

I ran the chamber brush dry through each charge hole once in each direction. It got rid of a lot of crud from the .38 Special 158 grain LSWC loads I fired yesterday.

Incidentally, after I finished cleaning the gun I replaced the wood grips and grip adapter with the set of Pachmayr Compacs it had when I got it. The Magnas with grip adapter were comfortable when dry firing but really whacked the inside of my left thumb when shooting the gun.

From last weekend:


The rubber grips are still pretty small so the piece should still conceal easily under a jacket or vest when Fall rolls around. This is a 6 shot K-Frame so it's not like I'm going to be stuffing this in my pants pocket, anyway.

Saturday, May 18, 2024

S&W Model 640 Range Report

I'm pleased to note that the gunsmithing I did on my S&W Model 640 I did this morning worked out. I took it to the range tonigh and put 50 rounds of my handloads through it. The loads were a 148 grain button nose, bevel base wadcutter from Matt's Bullets, 3.3 grains of Alliant Bullseye Powder, and CCI primers in Winchester wadcutter brass. The gun functioned perfectly.

Something to mention is that of the major American primer brands, CCIs have the hardest cups. So, if the gun runs well with them it should work fine with Federal (the softest), Remington, or Winchester primers.


Note that the reason I needed to work on it earlier today was because I'd installed an Apex Duty/Carry kit in it, which has a reduced power hammer spring and extended firing pin. (The kit also includes a reduced power rebound spring but I managed to launch that into the ether so my gun has the OEM rebound spring.) Even without the lighter rebound slide spring it's much easier to shoot well than as it came from the factory.

This is 50 shots at 7 yards. All of my shots were on the target.


This gun will definitely be carried.

Replacing the Hand Spring in a Smith & Wesson Revolver

If you need to replace a hand spring in a Smith & Wesson revolver this video shows how:


In the video he used a dental tool to push the spring forward so that it's in the correct position relative to the hand. I found that a spring bar tool as used for changing watch bands worked perfectly. I used one that was included in this inexpensive kit.


Monday, February 26, 2024

Check the Thumb Piece Nut on Your Revolvers

If you rely on a double action revolver something that's easily overlooked is whether the thumbpiece nut or screw is tight. If it loosens and falls off it could lead to losing the thumb piece, thus making the gun a lot harder to load and unload.

The thumb piece nut is part number 20 in this diagram of the Smith & Wesson Model 10, with the thumb piece itself being number 21.


(Schematic borrowed from Numrich.)

Taurus revolvers use a similar design. At least on the two sample I own an actual screw is used, that screws into the cylinder latch. On the S&Ws there's a threaded stud that protrudes through the frame onto which the nut threads.

I recommend removing the nut or screw, cleaning the threads with rubbing alcohol, and then reinstalling after putting some blue Loctite on the threads.

It wouldn't be a bad idea to pick up a couple extras along with other spare parts. Something else I recommend for older Smith & Wessons is a spare hammer nose and rivet (parts 48 and 51 in the diagram). Numrich is a great source for a vast amount of gun parts.

When working on guns always make sure that you use properly fitting, hollow ground screwdrivers. I mostly use the screwdriver bits found in this set from Weaver, which includes a good mallet, pin punches, and bench block, all of which are very useful.

Friday, January 12, 2024

Got a Spider for my Minilathe

A couple weeks ago I ordered a spider for my 7x14 minilathe, something I should have bought years ago. Little Machine Shop had it as their weekly special so I finally pulled the trigger on it.

Link to minilathe spider: https://littlemachineshop.com/products/product_view.php?ProductID=1136

The spider threads onto the end of the spindle and provides additional support to long workpieces, to prevent them from whipping around.


To install the spider you remove the gear cover on the end of the headstock and simply thread it onto the end of the spindle.


I used it today while drilling and tapping the flared end of the factory ramrod that came with my Investarm Gemmer Hawken. Even though I bought an unbreakable Delrin rod for it from Track of the Wolf, which is threaded on both ends, I want to keep the OEM wood rod as a spare.

This shows the ramrod mounted through the spindle bore.


And here I was using the lathe as a tapping guide to keep the 10-32 tap straight. I did not do this under power. Instead, I used the chuck key as a handle and rotated the chuck manually. Power to the lathe was off when I did this.


Aside from drilling and tapping the end of the OEM ramrod to accept 10-32 accessories like cleaning jags, worms, and bullet pullers, both ends of both rods got drilled and cross-pinned. To drill the holes I used my minimill.

Always cross-pin your ramrod tips! Failing to do so can result in the ends pulling off the rod if you get a jag stuck or need to pull a ball. It's simple to do so:

  1. Drill a hole through the rod crossways. I used a #40 drill because for my pin I used some brass rod 0.098" in diameter.
  2. Chamfer both ends of the hole.
  3. Drive the rod through the hole and cut it off. I used side cutters.
  4. Using a hammer, peen over both ends on a metal surface. I used the anvil on my bench vise.
  5. File the ends of the pin smooth.
One end of the Delrin rod from Track is tapped 10-32 and the other is 8-32. I will use 10-32 jags, etc. and have an aluminum T-handle with an 8-32 stud on the end. I have qualms about using it for cleaning or ball pulling.

Just another example of how my small, tabletop machines help me out with gunsmithing tasks.

Sunday, December 17, 2023

A Little Gunsmithing With My Table Top Mill

Back in October I picked up a Northwest Trade Gun put together from Caywood parts by Arizona gunsmith Mike Roby. The NWTG was one of the most important firearms in North American history, being made by the tens of thousands from the mid-18th to late 19th Centuries. It's basically a single barrel shotgun that was wildly popular with Indians and to a lesser extent, whites.

As a smoothbore, it's very versatile in that you can load it with shot for small game and birds, buckshot for larger animals or defense, or a single ball for large game.

The Caywood/Roby NTWG is a lefty, which made it impossible to resist.


It's a 20 gauge which translates to about .62 caliber.  My goal for it is to develop a round ball load that will allow me to hunt whitetail deer out to about 50 yards. That means I need to keep my shots on a paper dinner plate at that distance.

The first time I shot the gun I was getting pretty good groups at around 25 yards but they were about 10" low and a foot left. I decided the best way to correct this would be to add a rear sight, since as it came it only hand a front sight.

Last week I dismounted the barrel from the stock and used my Grizzly G8689 mill to cut a shallow dovetail.


The rear sight as it currently appears. After I settle on a load and get it zeroed, I'll narrow the blade to match the barrel.


I took it to the range yesterday and tried several different ball/patch combinations but failed to get what I consider an acceptable group, so more experimentation is necessary. One thing I'm going to try is 2Fg powder instead of 3Fg.

ASSuming I'm able to develop a good load it'll become a deer gun for me. It's under 8 lbs. and has a nice sling, making it nice to carry. Recoil is not bad at all with a hunting load. The large balls should drop deer nicely.

Many machinists turn their nose up at these small Chinese machines. Would I like to have a Bridgeport mill? Of course! But I don't have anywhere for it. This mill and my 7x14 lathe are quite capable of doing useful work as long as you confine yourself to their working environments. For making small parts or even modifying bigger ones, they've found a place in my toolkit.

Wednesday, September 14, 2022

A Canoe Gun by Jackie Brown, and Muzzleloaders for Survival

Over on Blog O'Stuff I've already posted about this, but this post will have a different slant.

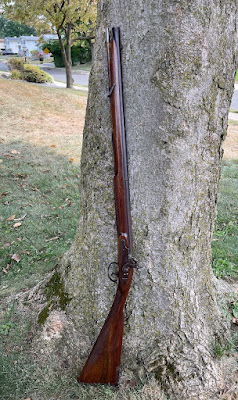
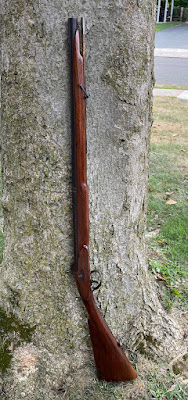
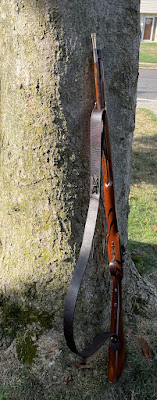
I bought this "Canoe Gun" (really just a short version of the Indian Trade Gun) at Dixon's Muzzleloading Shop last weekend. It's a 20 gauge percussion smoothbore. It was built by Jackie Brown. As a southpaw I could not pass it up.


I made a sling for it from a cowhide shoulder I had.


Some measurements I took:

  • Overall length 40"
  • Barrel: 24.5"
  • Length of pull 13.5"
  • Weight 6.5 lbs.
  • Width of buttplate 2"


The lock is a large Siler. The barrel has a slight flare at the muzzle end. It may be slightly coned on the inside. The front and only sight is a trade gun-style turtle. It has a large Siler lock and the nipple is sized for No.11 caps. A .580" ball will drop freely down a clean barrel all the way to the breech.

I got a chance to shoot itthe next day over at a friend's place. He has some land and we can shoot safely in his yard. Unfortunately it was raining and the only place I could load while under overhead cover was his patio. I'd then step out to shoot and some tin cans we placed on a hillside.

My load of 1 oz. of #5 shot on top of 65 grains of Scheutzen 3Fg black powder penetrated both side of a #10 can from about 20 yards, so it's got enough power for hunting.

I also tried a couple varieties of ball loads. I shot a half dozen .570 balls loaded in paper cartridges on top of 65 grains of powder. I also tried a few shots with .575 balls loaded on top of a tow wad, with another tow wad over the ball to hold it in place. The balls loads shot high with how I was holding the gun.

Recoil with both the shot and ball loads was very mild. I plan to try some heavier charges.

I absolutely need to put both shot and ball loads on paper.

Everything went mostly well until the gun fell over onto the brick patio, landing on the hammer which was set to half cock. That broke the half cock notch on the tumbler. (Insert vast amounts of profanity here.)

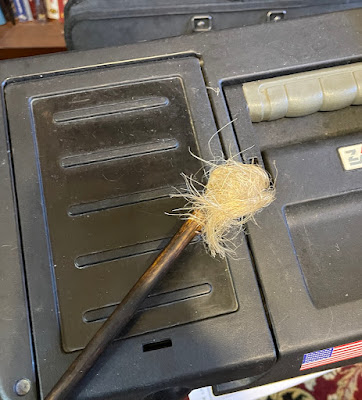
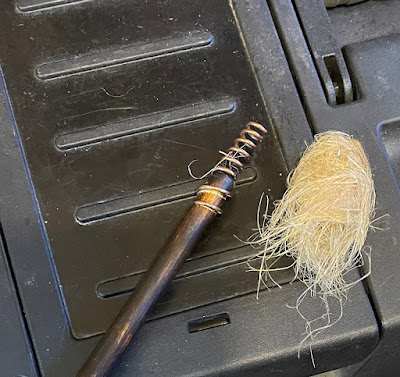
When I was done I used tow wrapped around a worm to scrub the bore. This was the first time I've tried using tow for cleaning and it works pretty well, much like a bore brush. I'll be using it at least for my smoothbores in the future. This is what tow looks like when wrapped around the worm. There's no reason you can't use it in a modern shotgun. It can even be washed and reused. Once it's worn out you can use it as tinder. You can make the equivalent by cutting a 4" to 6" length of hemp, sisal, or jute rope and unraveling it.


The primitive worm I use is just a coil of wire that winds onto the end of my ramrod. It works like a Chinese finger trap and doesn't easily come off.


After getting home I ordered a replacement tumbler from Track of the Wolf and I paid extra for 2 day delivery. My order arrived today and I repaired the lock after work. It took about a half hour with some needle files to fit the new tumbler to the hammer. I also cleaned up the side of the tumbler that rubs against the lock plate, using a stone. The hammer now clicks solidly into both the half and full cock notches.

I may be going upstate next weekend and if so I should be able to pattern shot loads and figure out how to hold it when shooting ball.

OK, Dave, I know you're saying. Why consider a muzzleloader for a survival gun? Sure, when these guns were originally made they were used for real as survival guns, but it's 2022 now.

For a long term/TEOTWAWKI survival gun a muzzleloader has some advantages, IMO:

  • No paperwork in most states.
  • You can make your own black powder and projectiles.
  • You can shoot birdshot, buckshot, ball, or buck and ball in it. In extremis you can shoot rocks or sticks.
  • It can use modern plastic shot cups for better shot patterns, or traditional materials for wads like felt, tow (flax or hemp fiber), or wasp's nest.
  • You can make percussion caps if you have the correct tool, thin sheet aluminum, copper, or brass, and the chemicals which are freely available now.
  • If it's a flintlock, each flint should be good for at least 30 shots and it's possible to make your own if you live in the right area and know how to do it. (For me, making caps is actually easier.)
  • If the gun is constructed like mine with a nipple and drum, the gun can easily be converted to a flintlock by replacing the drum with a vent liner and the lock with a large Siler flint lock.

I'll have to do a separate, more detailed post on the caplock vs. flintlock for a survival gun.

Of course it's nowhere near as good as even a single shot breech loader for defense but it still beats a sharp stick or harsh language. You are far from unarmed with one of these.


Saturday, January 22, 2022

Sometimes Even High Quality Guns Break

Don't let anyone tell you that revolvers are 100% foolproof. If you shoot them long enough you'll run into functional issues and sometimes, parts breakage.

This afternoon I was shooting with a friend and this happened to his revolver:


That's a 1980s-vintage Smith & Wesson Model 64 K-Frame chambered for .38 Special, with a broken hammer nose. The gun is down hard until my friend replaces it. The fix shouldn't be difficult but it will require tearing down the gun pretty far.

This is the first time I've personally experience a broken S&W revolver firing pin. However, my brother owned a Rossi .357 in the 1990s and it experienced a similar failure.

If you have a small battery of guns, it's a good idea to have a spare of the one you use the most, so that you can rearm yourself if it goes down. Likewise, for small, easily lost parts, or parts known for breakage, keep spares on hand.

Saturday, February 22, 2020

7.62x39 AR-15

Today I finished building my first AR-15 that isn't chambered for 5.56x45mm. It was time for something different.

While I find the 6.5 Grendel to be very interesting, I didn't want to get into a new caliber at this time, so this one is in 7.62x39. I've maintained a good stash of that caliber since before I got into ARs, starting when I bought a Chinese SKS in 1988.

I used the following parts:


The enhanced firing pin is to improve reliability with foreign ammo with hard primers, while the bolt from BRA is supposedly higher quality. One thing 7.62x39 ARs have the reputation for is breaking bolts. I'm hoping to avoid that but in case it happens, I'll have a spare ready to go.

First impressions of the AR-STONER kit were good, except for the poor staking of the carrier key to the bolt carrier, so I restaked the screws.

Here's the assembled carbine on my messy workbench:


And a close up of the receiver. It's my first AR with a graphic on it:


I would have finished it last weekend but managed to shoot a detent spring into the unknown. To complete the rifle I had to wait for an order containing spare detents and springs to arrive from Brownells.

It will be interesting to see what the recoil impulse of an AR-15 in 7.62x39 feels like compared with an SKS, AK, or VZ-2008.

I really hope that eventually Pennsylvania will legalize semiauto rifles for big game hunting. We got semiautos legalized for small game and varmints so hopefully after another year or two the PA Game Commission will realize that it hasn't caused the sky to fall and they'll let us use them for deer. This would make a fine rifle for the ranges encountered in most of PA.


I should be able to put a few rounds through it tomorrow, after which I'll post a follow up report.

Sunday, October 13, 2019

Monday, March 25, 2019

Tap and Die Sets

In my quest for self reliance, one category of things I've tried to acquire has been a variety of tools. On the top end are my mini-mill and mini-lathe. Tonight I used something a little further down the scale, a set of taps and dies. I have this inexpensive SAE and Metric set from Harbor Freight.

Yesterday when I shot my Pedersoli Brown Bess carbine for the first time, I wanted to use the ramrod for cleaning. One end has male M8-0.5 threads. However, I found that although I was able to thread on my worm, I could not thread on the adapter (part number SA-10-BESS) that allows me to use regular 10-32 rod tips, like a cleaning jag. So, I had to bring a separate range rod.

After work tonight I gathered up the ramrod, worm, and adapter and went out to my workshop. I first chased the threads in the coupler with an M5-0.8 tap and tried to thread it on the rod. No dice. Then I chased the threads on the rod itself with a die. That fixed the problem.

The total elapsed time was about ten minutes.

Think about how many threaded fasteners and parts you have in your life. A tap and die set may not get used frequently, but when threads on something get damaged, having such a set can allow you to fix it quickly.

Saturday, January 12, 2019

Sling and New Front Sight on Cabela's Hawken

One rifle I've been shooting lately is my Cabela's Hawken, made in Italy by Investarms. At some point I'd like to take it hunting, which IMNSHO requires a sling. Being a more modern design than, say, my long rifle, I didn't mind mounting modern quick detach swivels.

I found this set by GroveTec at MidwayUSA which fit. I paired it with this Hunter carry strap. Installing the rear swivel required drilling a hole in the stock. The front swivel clamps around the lower ramrod pipe. Before installing it, I Loc-Tited the screw securing the pipe since I noticed it was loose already. I also Loc-Tited the Chicago screw holding the strap to the rear swivel. In my experience, thread locker prevents a lot of problems. I even put some on the inside of the part of the front swivel where it clamps over the ramrod pipe.


The other addition I made was to replace the Williams fiber optic front sight with a Lyman 37ML white bead from October Country. The dovetail for the front sight is .360" instead of 3/8" (.375"), which is more common in the US. The Williams sight never fit the dovetail that well and wasn't as secure as I'd like.

The Lyman front sight wasn't as good a fit as I wanted, either. I wound up dimpling the bottom of the dovetail recess to raise some metal and shimming it with a small piece of 600 grit wet/dry sandpaper. After the sight was in I staked the dovetail as well.


The new sight is a little shorter than the Williams it replaced, so I'll have to rezero the rifle. No biggie.

Monday, December 31, 2018

New Rear Sight for my Hawken Rifle

Several years ago I bought a Cabela's Traditional Hawken rifle in .50 caliber. It isn't a faithful copy of the real Hawken rifles of the 19th Century, but nevertheless, it's a well made and nice shooting gun. It's more or less a variant of the Lyman Trade Rifle, but fitted with a cap box on the stock and double set trigger. Also, unlike the Lyman, it was available with a left handed stock and lock. Both the Lyman and Cabela's rifles were made by Investarms in Italy.

One thing I did not like about the rifle was the sights. The rear sight, in particular, was a poor design. The adjustable rear notch was a wide open "V". IIRC, the Lymans's have rear sights that are dovetailed in, which makes replacement with a fixed but better sight easy. Unfortunately, the Cabela's rear sight was held on with two screws and nobody made a good replacement.

So, I decided to install a Lyman Model 66SML aperture sight, made for the Lyman Great Plains Rifle, Trade Rifle, sidelock Thompson-Centers, and similar rifles.

The Model 66SML is mounted on the tang with two screws. It uses the rear wood screw which goes through the tang into the stock, plus an 8-32 screw into the metal of the tang. The tang on my rifle wasn't drilled and tapped so I did that today.

Using a #29 drill on the tang:


Before drilling the hole, I located it by mounting the sight on the tang and marking the spot with a transfer punch. I then dismounted the tang from the rifle and used a pilot drill to ensure the #29 drill wouldn't skip. Only then did I put the twist bit in the chuck.

I then tapped the hole with 8-32 threads. I used #3 Morse taper lathe center held in the mill's head to guide the tap so it started off straight:


I used a little Tap Magic on the tap, but I could probably have done it dry with no problems. OTH, there's no reason not to use a lube and save a little wear on the tap.

A closeup of the newly mounted sight:


And finally, the whole rifle:


This rifle has a 1:48 twist, so it can shoot either patched round balls or conicals like a Hornady Great Plains Bullet or T/C Maxi balls. So far, I've just shot it with PRB and it did well.

Simple work like this is a main reason I bought a small lathe and mill back in 2013. It took me about 45 minutes to do this, which included digging out the rifle and rear sight, schlepping them out to my shop, and doing the work. In contrast, to have a gunsmith mount the sight it would require locating a 'smith locally or shipping the rifle, getting onto his wait list, and probably paying about $75 to $100. Since shooting is my hobby, I will eventually do enough jobs like this to largely offset the cost of the tools.

Of course, that doesn't even account for the satisfaction of doing it myself.

Sunday, September 09, 2018

Polymer 80 Range Report

I shot the Polymer 80 "Glock 19" last night. My dad and I put about 150 rounds through it, mostly Herter's 115 grain ball (made by Sellier & Bellot), along with around 25 rounds of my handloads. They were 115 grain Berry's plated bullets on top of 4.5 grains of Universal Clays in mixed brass.

The gun had one malfunction, a failure to fully go into battery with one of the handloads. Previously, I had some issues with this batch in my CZ P-09. AFAIC it was an ammo issue, not a gun issue.

Accuracy was OK, nothing to crow about. Most of the rounds went into a palm-sized group at 7 yards. The limiting factor for me was the trigger. Even with my fluff and buff job it is still pretty bad -- heavy and creepy. I'll see what it feels like after 500 rounds but if there isn't a marked improvement I'll look into getting something like an Apex trigger.

The other mod I have tentatively planned is a set of Heinie Straight Eight night sights.

After I finished shooting I field stripped it and saw no signs of unusual wear.


So far I'm very pleased with the gun.

Saturday, September 08, 2018

Polymer 80 Build Complete

I finished up the Polymer 80 "Glock 19" today. Impressions:


  1. "Milling" the frame is easy. I used end nippers to remove most of the excess rail material, then filed and sanded them smooth.
  2. Assembly gave me some issues but mainly because this is my first "Glock." In particular, I had issues getting the slide stop in correctly so that it would either turn the gun into a single shot, or fail to raise at all. But I got it squared away.
  3. The "$0.25 Glock trigger job" is worth it. Before I polished several parts in the mechanism, the trigger pull was really heavy and gritty. Now it's a lot better and should smooth up with use.
  4. The Polymer 80 grip is an improvement for me over the stock Glock 19 grip.


I am left handed and found that the magazine catch rubbed on my middle finger uncomfortable, so I beveled the offending corner.


Not being a fan of the hole in the bottom of the grip behind the magazine well, I added a Strike Industries grip plug, which holds a combo flat head screw driver/punch, and a small oil vial. It had to be sanded a bit to allow magazines to drop free. Speaking of which, I bought four MagPul P-Mags from MidwayUSA to go with the gun.

I'm hoping to shoot it tonight on an indoor range. Range report to follow.

Sunday, August 07, 2016

How to Remove the Cylinder and Side Plate from a Smith & Wesson Double Action Revolver

In this video I demonstrate how to properly remove the cylinder and side plate from a S&W revolver, including a discussion of the tools required. Using the proper technique when removing the side plate will prevent damage to the gun and preserve its value.

The demonstration piece is a S&W Model 10-5 chambered for the .38 Special cartridge.


The Weaver Deluxe Gunsmith Tool Kit I used in the video can be seen and purchased here.